Archive:DVD installation for 11.0
| This article is being considered for deletion! Reason: openSUSE 11.0 is EOL --Zbuhman 01:13, 25 March 2011 (MDT). Please do not blank, merge, or move this article, or remove this notice. Refer to this article's discussion page and our deletion policy for more information. |
Installation
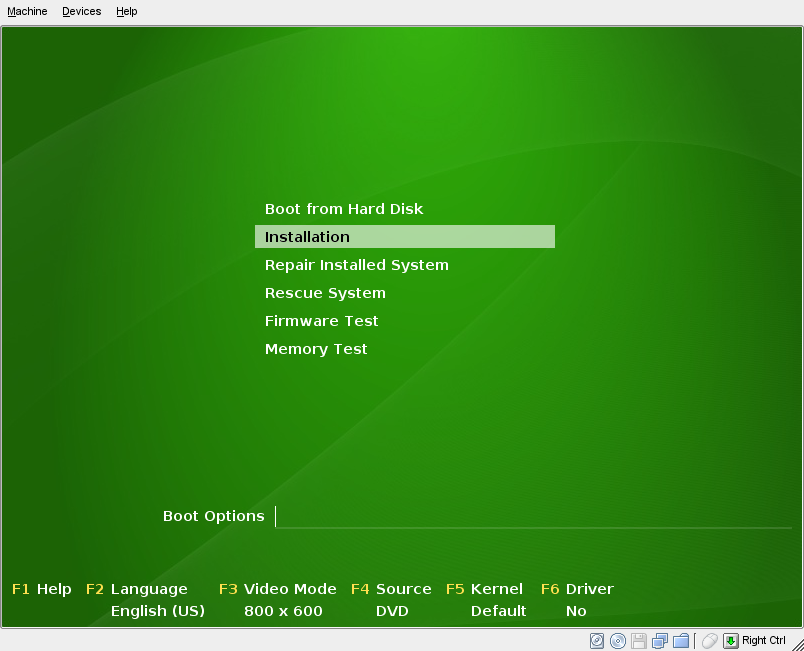
Place your openSUSE disc in the drive, and reboot your computer. Upon rebooting, you should encounter the boot screen.
Choose Installation and wait for YaST, the openSUSE installation and configuration program, to load.
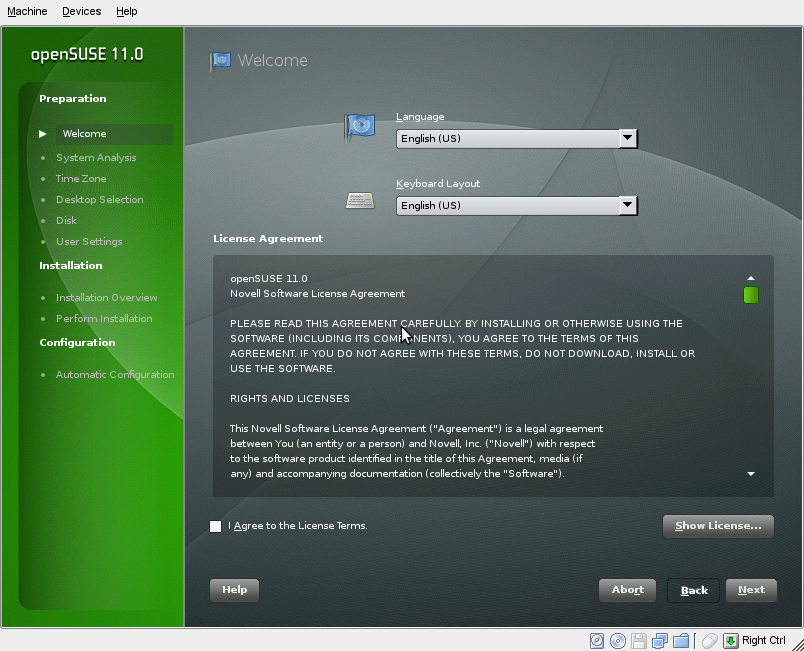
Step 1: Welcome screen
YaST will present you with the screen. All YaST pages follow the same interface: a list of where you are in the installation on the left, different functions in the main screen, and Help, Back, Abort, and Next buttons at the bottom.
Choose your language in this screen. The keyboard layout is set automatically depending upon the language. If your keyboard layout is different from the one chosen by YaST, go ahead and correct it.
Also, you'll need to accept the license agreement. To expand the license agreement, click Show License. Once you accept the license, click Next.
[ja:Installation/11.0_DVD_Install]
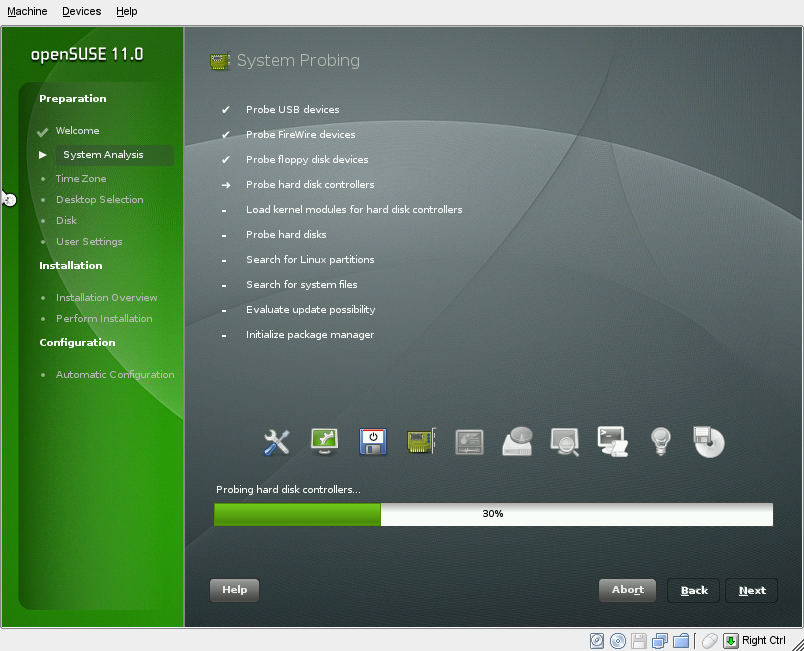
Step 2: System Analysis
YaST will now analyze your computer to determine the settings it should use for installation.
You can simply wait until it is finished.
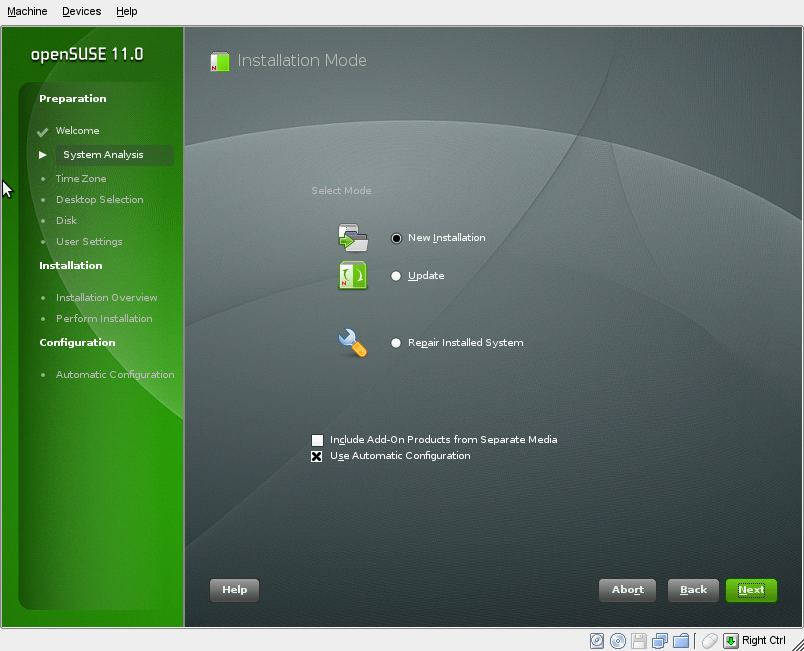
Step 3: Installation Mode
Now you can choose between installation modes of openSUSE 11.0.
Most users should leave the options set to what they are. If you have a previous version of openSUSE installed, you can choose Update to upgrade that version to openSUSE 11.0. If you ever need to repair your installation of openSUSE 11.0, the Repair Installed System option can be used to assess and repair your installed openSUSE system.
If you want to fine-tune how the entire installation is set up, including hardware configuration, you can uncheck Use Automatic Configuration. This is recommended only for those who know what they are doing, and it also extends the time it takes to install openSUSE 11.0.
Step 4: Set the time & time zone
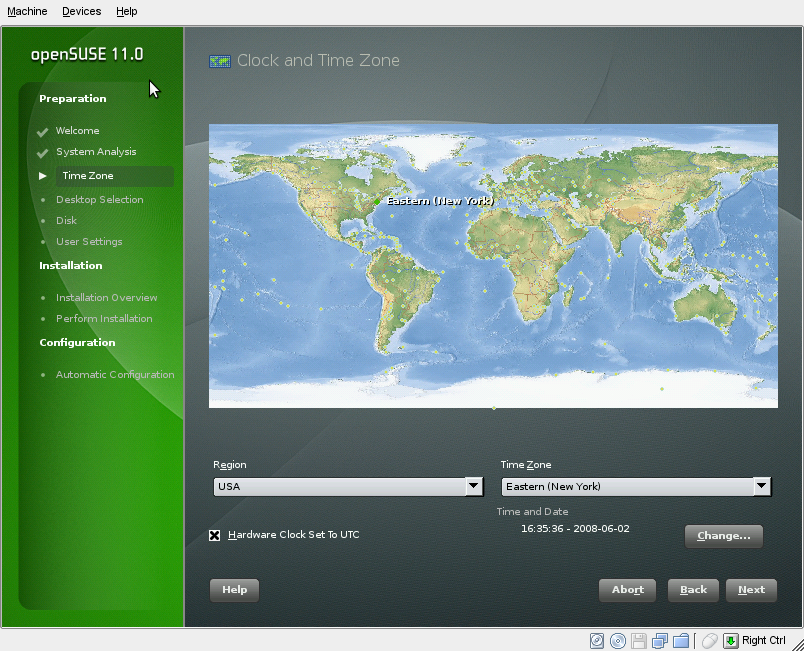
After that, you will be brought to a screen with a map on it. This is where you will give your time zone information for the clock.
Zoom in on your region of the world, then choose one of the cities with a dot on them, either the closest one to your location, or any one in your time zone. You can confirm these settings at the bottom. If the time in the Time and Date section is not correct, choose Change... to correct it.
Step 5: Desktop selection
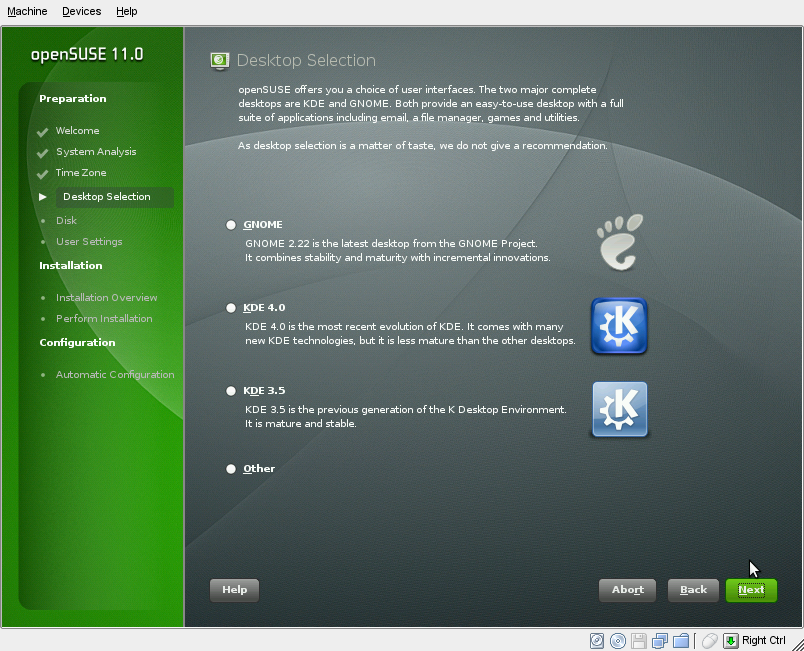
Here you can select which of the three desktop environments openSUSE includes you wish to install. Keep in mind this is just for the initial selection. Later in the installation process or even after you install, you can add GNOME, the other KDE, and even more X window managers like XFCE.
Since the choice is highly personal, we don't give a recommendation.
Step 6: Setting up your disk
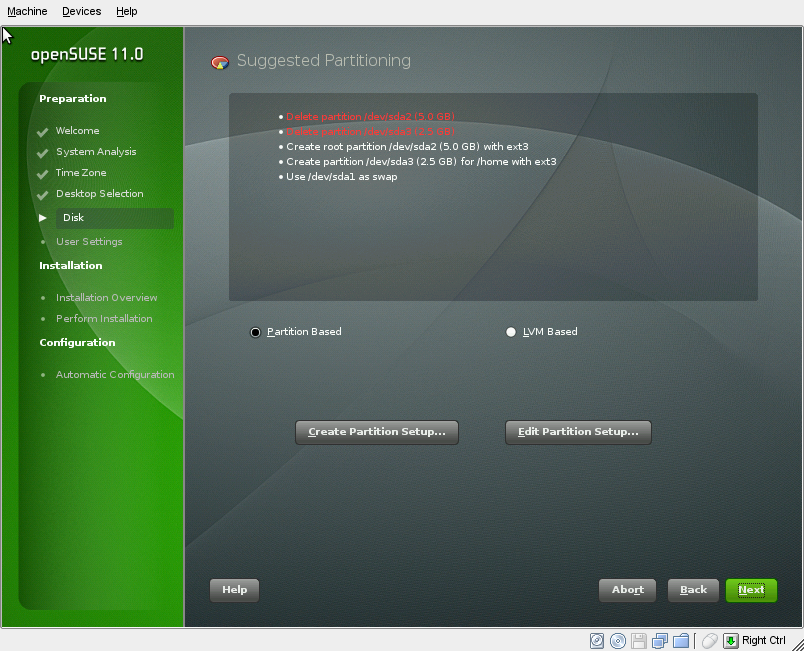
Now YaST will set up your hard drive settings. If you have another operating system installed on the computer (for example, Microsoft Windows or another Linux), YaST will resize that operating system so that it still on your computer, but has enough room to install openSUSE 11.0.
YaST should propose settings that will satisfy most users. If you want to edit the proposed settings, click Edit Partition Setup.... If you'd like to redo the entire setup for your own settings, click Create Partition Setup.... If you want to keep the proposed settings, click Next.
Step 7: Create your user
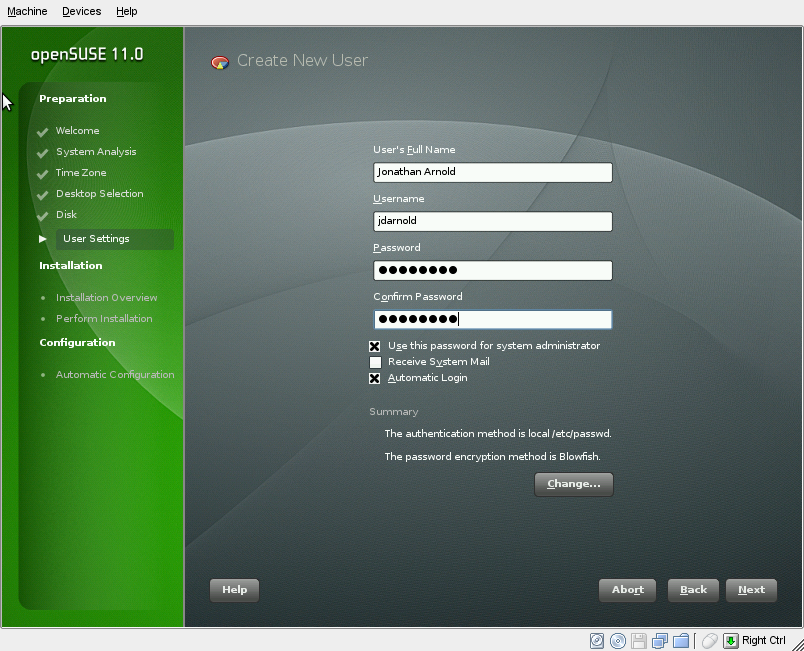
Now you'll need to set up a user account for the primary user of the computer.
Enter your full name, a username (which is automatically chosen: you can change the name if you wish), and a password.
By default, the system is set so your password is the password of the system administrator (also known as root). Also, automatic login is turned on as well, which logs you into your computer automatically upon turning it on. You can uncheck these options for more security if you wish.
Step 8: Installation overview
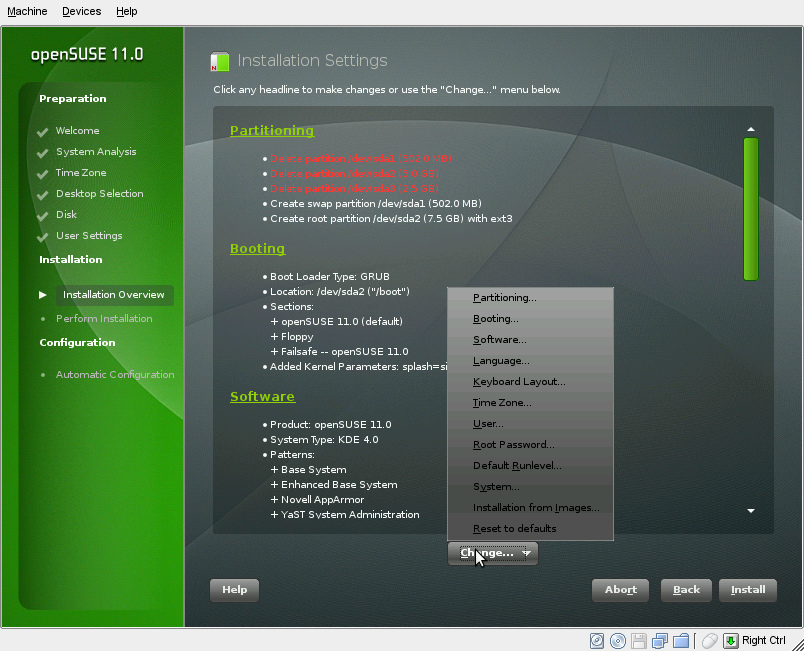
Now you are presented with the overview of the installation. These are the details to what YaST is going to do to your system upon installation.
To change these details, select the headline of the option or choose it in the Change... menu as shown.
Software changes
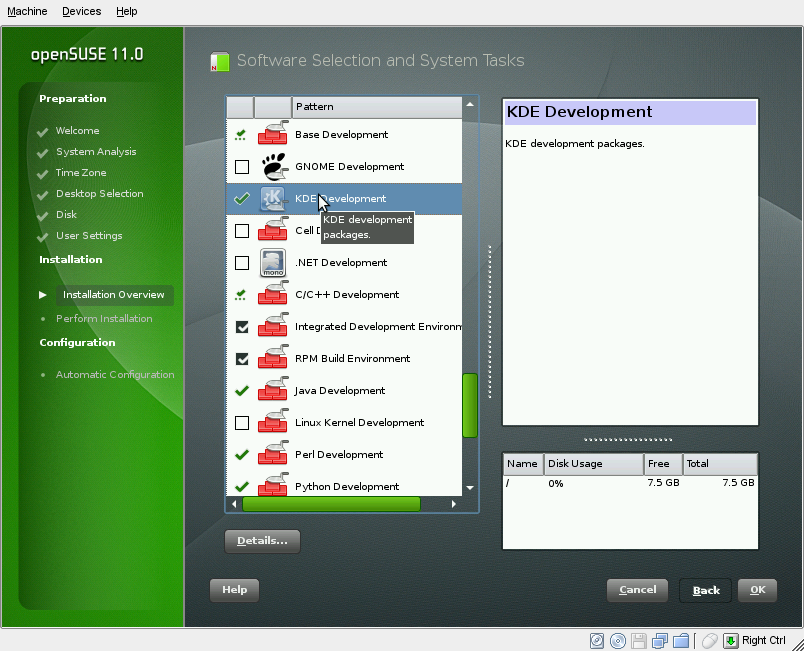
The most common setting users want to change is software. In YaST, software is installed in patterns, or groups of software that achieve a similar goal.
The appropriate software patterns for a basic openSUSE installation have already been chosen by default, but you may want to add additional ones (e.g., developer tools or extra office applications). If so, simply check the pattern on the left. Disk space permitting, all associated software will be installed along with the rest of the system.
Step 9: Install openSUSE!
If you're ready to install, click Install.
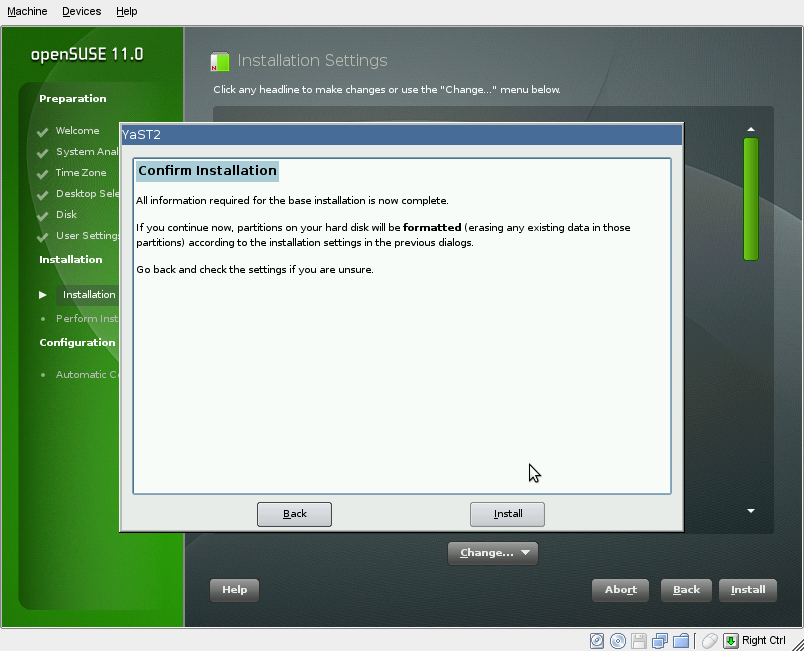
You'll be asked again if you want to install. This is the point of no return. After you accept this dialog, installation will begin.
Click Install to begin the installation.
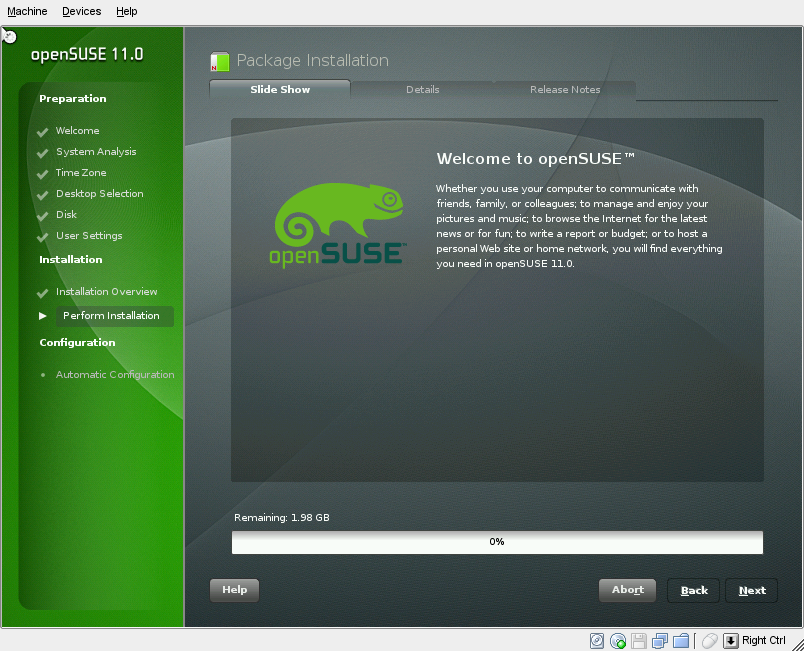
Now the installer will work to install openSUSE. Several progress bars will come and go, until you are at the openSUSE installation slideshow:
After the installation is complete, the computer will reboot.
Automatic Configuration
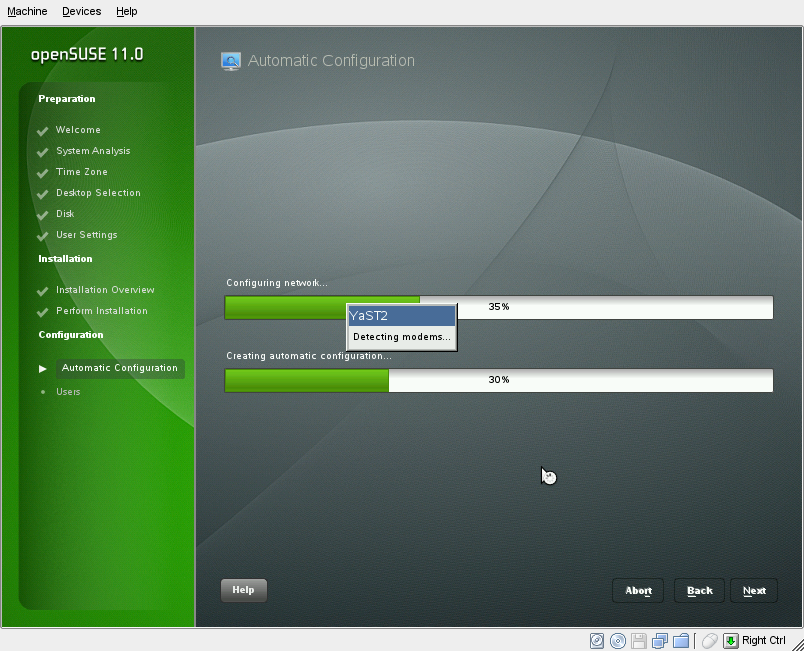
After the system has rebooted into your new openSUSE 11.0 system, the installation is over. However, before you can start your desktop, it must run a one-time automatic configuration of your hardware and network connection.
As it's name suggests, it's automatic. You don't have to do anything here.
Completion of Installation
openSUSE 11.0 is now installed! Once you login, you'll be greeted by the openSUSE Greeter with all sorts of information about openSUSE on it, and you'll be directed to setting up your online update system.
