SDB:DVD installation for 13.1
Tested on openSUSE
- in installing of 13.1
- with small differences also all versions
Recommended articles
Related articles

|
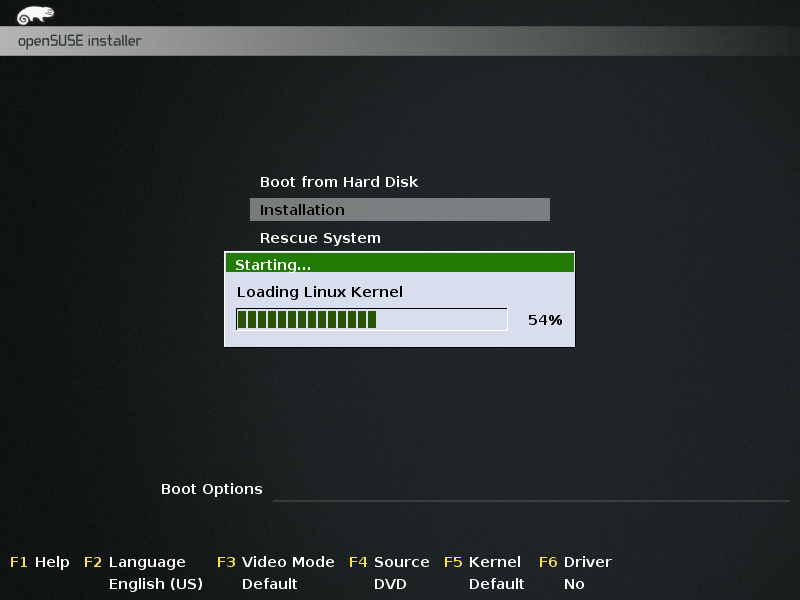
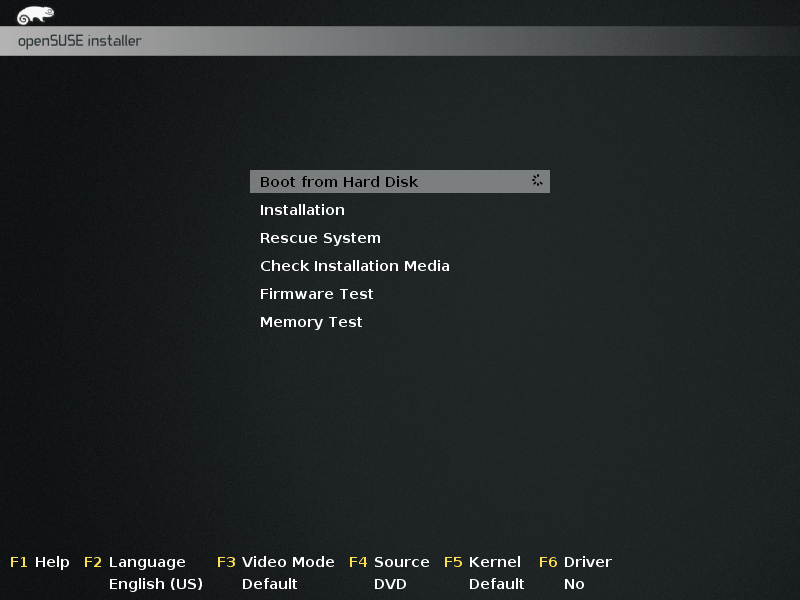
BootInsert the openSUSE DVD into the first DVD drive and restart the computer. After the power-on self test (POST), the boot screen should appear. Use the keyboard up and down buttons to select Installation and press enter to confirm. This guide does not cover the differences between UEFI and BIOS booting, or how to change the BIOS boot order.
|
|
The kernel will load and some debugging messages may appear. These can usually be ignored unless there is an issue starting the installation. In that event, these messages may make debugging easier.
Installation |
|
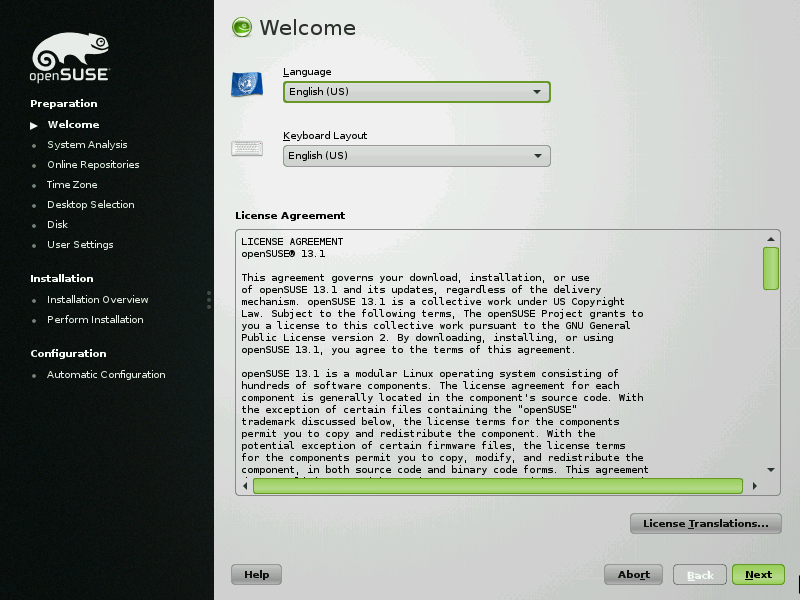
WelcomeThis page provides a choice of languages and keyboard layouts. The installer will choose a keyboard layout automatically after selecting a language. You can change this with the keyboard layout menu. The license agreement is below the language options. Language translations are available below. Click Next to accept the license and continue.
|
|
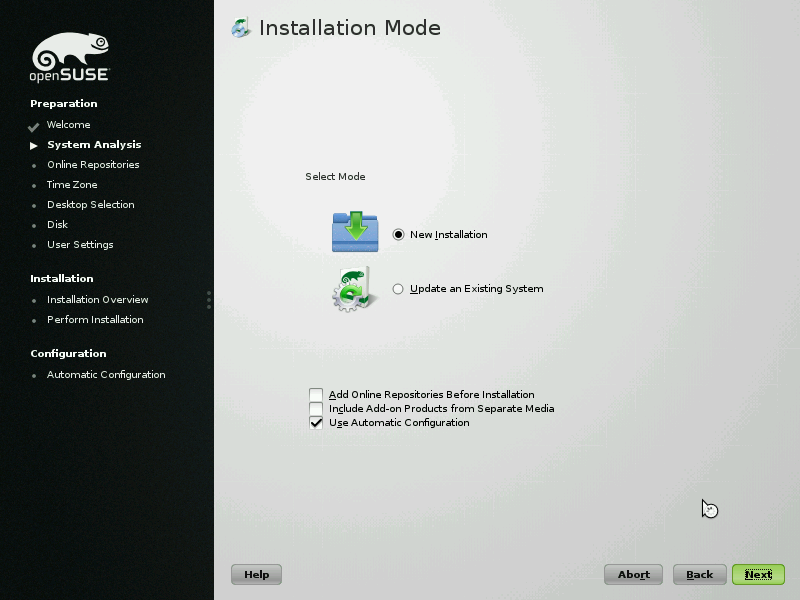
Installation ModeThis guide only covers new installations. Leave the default options and click Next to continue.
|
|
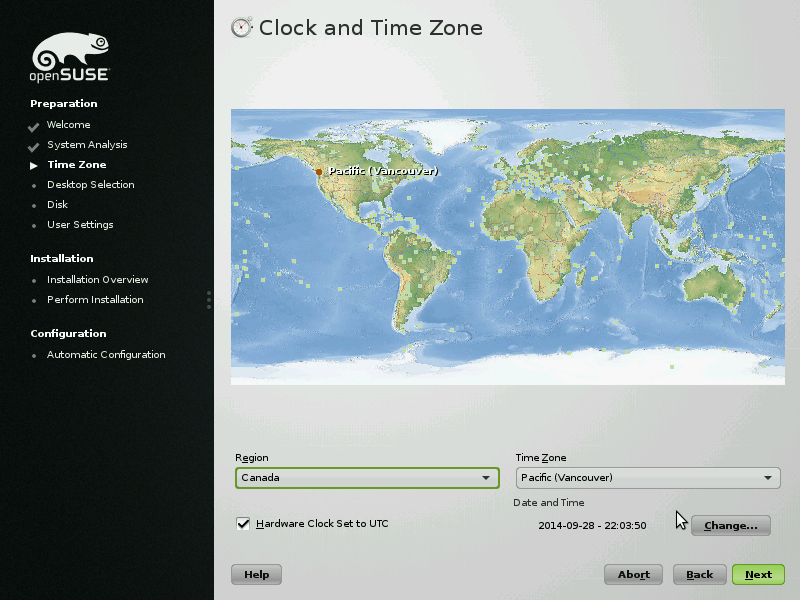
Clock and Time ZoneClick on the map closest to your current location. This will select the computer's time zone, which can also be selected from the drop down box below the map. Leave Hardware Clock Set to UTC enabled if this computer will only use Linux. Disable the box if the computer will also use Windows with a dual boot configuration.
|
|
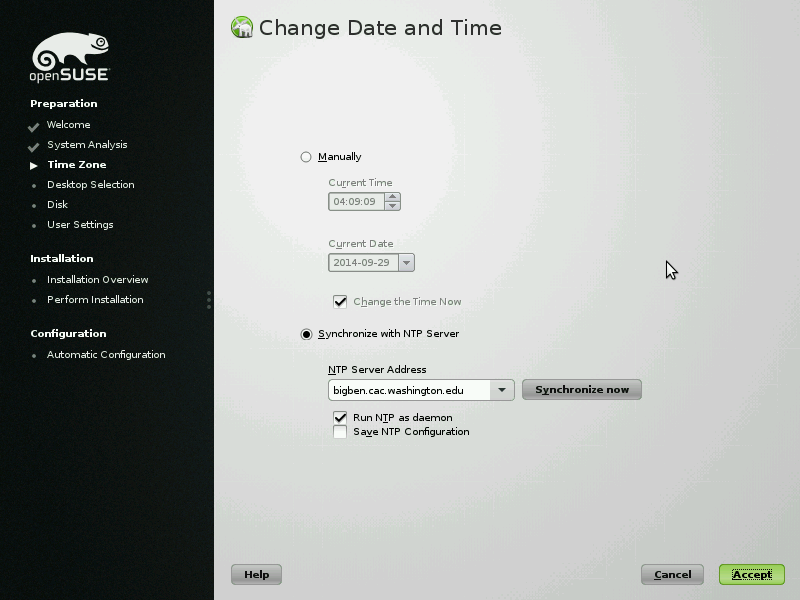
If the Date and Time shown below the menu is incorrect, click Change to enter the correct date and time manually. If the computer has an active internet connection, select Synchronize with NTP Server to obtain a date and time automatically from a time server. The default server is usually the best selection. Click Accept to continue.
|
|
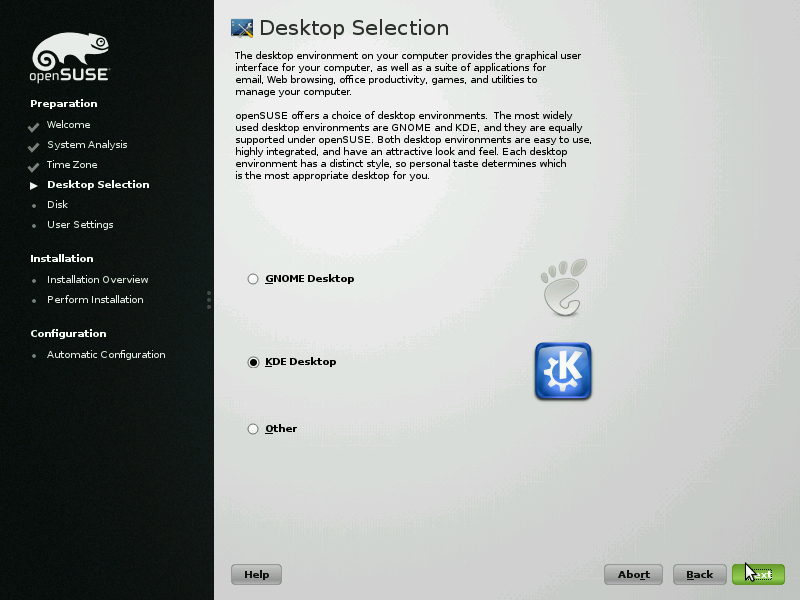
Desktop SelectionopenSUSE 13.1 supports both KDE and GNOME desktop environments. Selecting other will also allow the selection of XFCE Desktop, LXDE Desktop, Minimal X Window, or Text Mode installations. See the respective wiki pages for more information on each desktop selection, their behaviour, and configuration. This guide will use the default KDE Desktop, although all installation steps are identical.
|
|
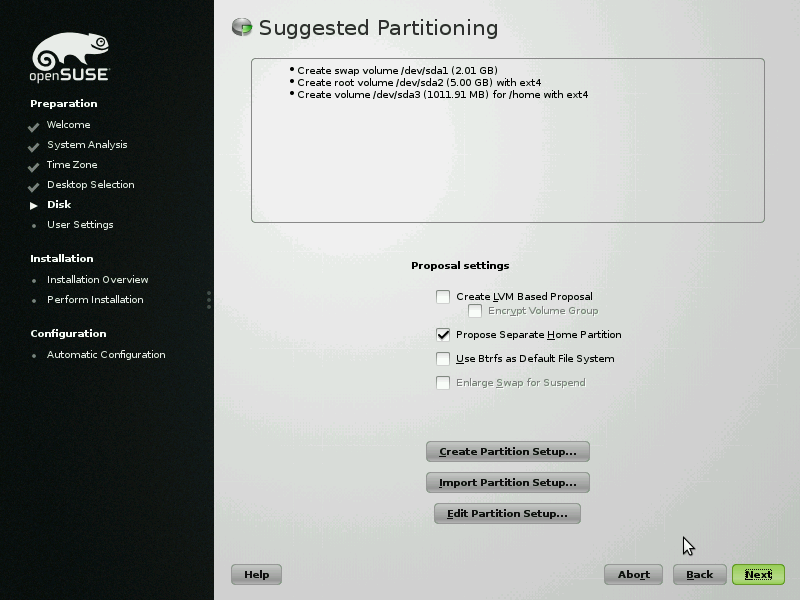
PartitioningBy default, the installer will provide a suggested partition setup. This guide will not cover disk partitioning in depth, however users should exercise extreme caution when partitioning and selecting disks for installation. Permanent data loss can occur. A partition used for another operating system should be resized automatically, but this should be confirmed before installing. Create LVM Based Proposal will create a Linux Volume Manager group for the openSUSE installation. This makes resizing, moving, and adding drives to a volume easier. If these features are not important to this installation, leave the option unchecked. Encrypt Volume Group requires an LVM volume and will encrypt all data on the volume with a password that must be entered upon boot. Without the password, all data is unreadable and inaccessible. Propose Separate Home Partition will keep personal (/home) files on a different drive partition than the openSUSE operating system. This will retain most user files and settings even if the root (/) volume is erased. Use Btrfs as Default File System uses the newer Btrfs file system, which has more features than the default ext4 file system. As Btrfs is still undergoing heavy development, users who do not need the new features it provides may wish to use ext4 instead. Enlarge Swap for Suspend resizes the swap partition of the drive to allow the contents of the computer's RAM to be stored to disk. This allows for the computer to save the current session and power down entirely, similar to the Hibernate feature on Windows. Selecting this option may reduce available disk space.
|
|
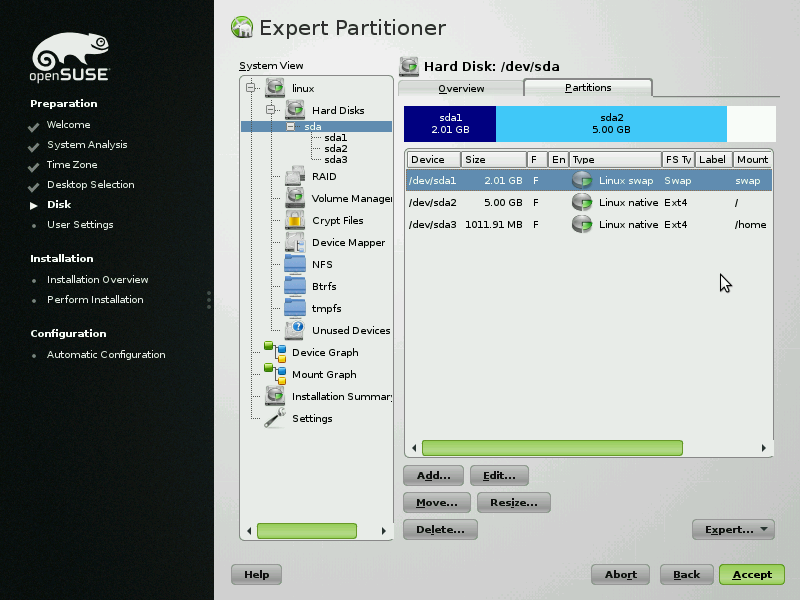
Partitioning (con't)Selecting Create Partition Setup will guide the user through prompts to configure a drive for openSUSE installation. Edit Partition Setup will open the Expert Partitioner where drive layouts and installation can be customized. Consult the wiki or other documentation for more details on how to customize partitioning.
|

|
Create New UserEnter the User's Full Name and the Username field will complete automatically. The username can also be customized. Enter a Password twice. This password will also be used for the root or administrator account. Disable Automatic Login to be prompted for a password when the computer starts. A warning prompt will display if the provided password is weak and easily broken.
|
|
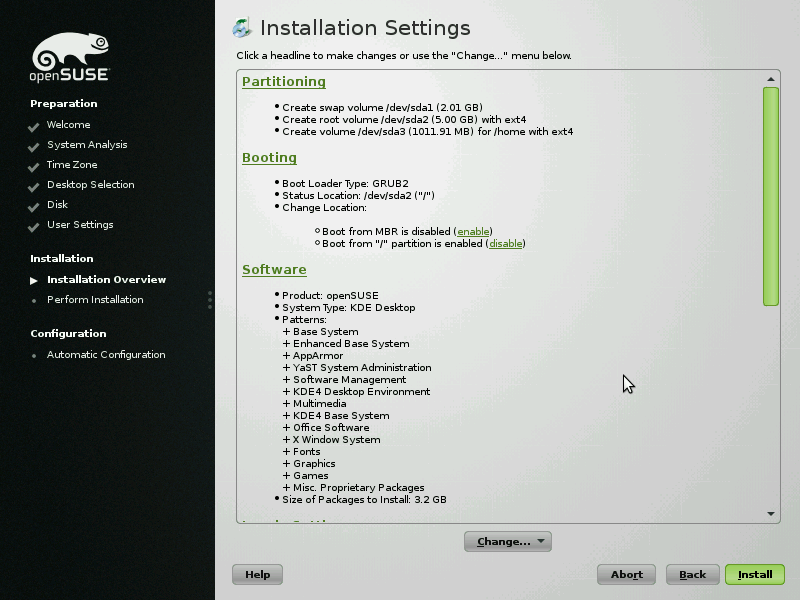
Installation SettingsAn installation summary will appear before installation begins. Confirm the options selected and click Install to begin the process. Clicking on each of the underlined titles will bring up the respective settings page.
|
|
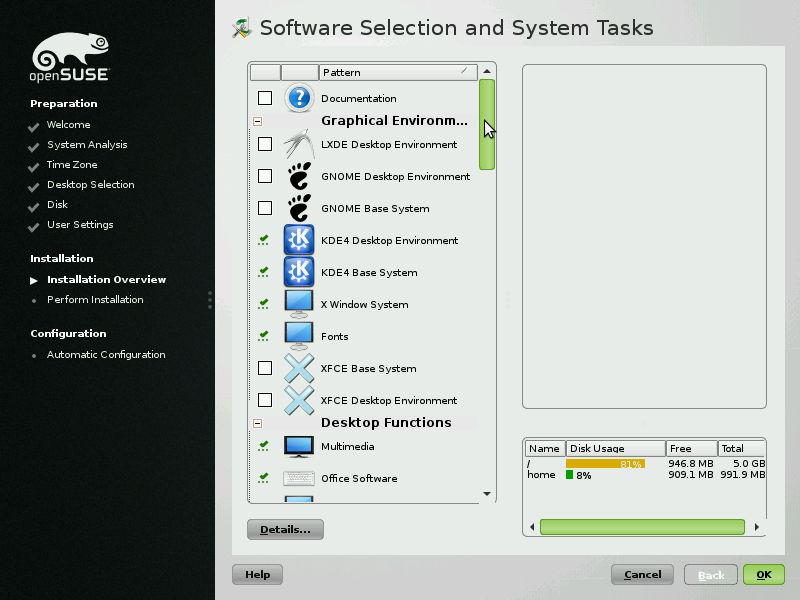
Software SelectionSelecting the Software title will bring up the Software Selection screen, where groups of packages (known as patterns) can be selected. For a desktop installation, the default options are usually acceptable. Software packages can always be added or removed after the installation. Select Details to manage all available packages individually, rather than as patterns.
|
|
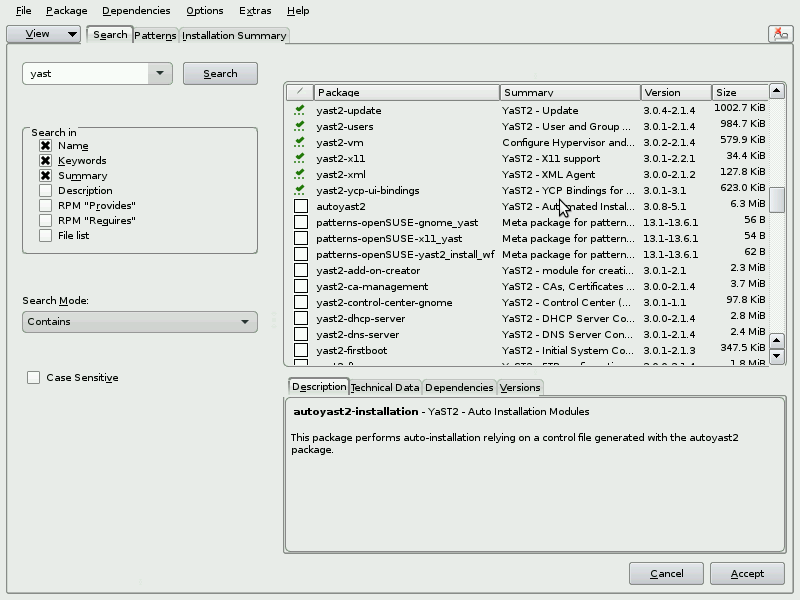
The Search tab will allow a search of all available software packages. More packages are available after installation and an internet connection is available. Check the box next to a package name to install that package, or uncheck it to remove that package from the installation. Be warned that modifying the packages to be installed may result in a system that does not successfully boot. Read all documentation before adding, removing, or modifying the install summary.
|
|
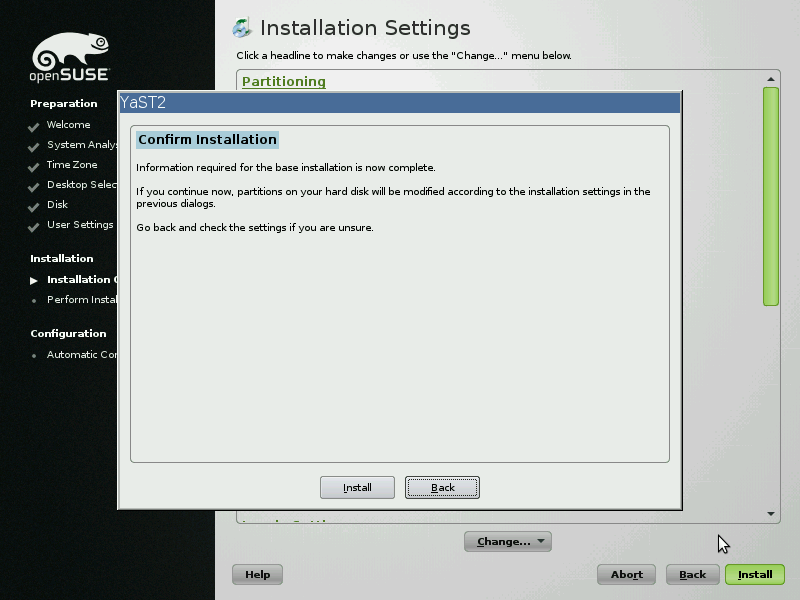
Confirm InstallationBefore installation begins, one final warning will appear on screen, informing users that the installation will begin as summarized in the previous screen, including disk drive partitioning. Only click Install when you are confident with the settings and installation summary. Clicking Back will allow all settings to be modified or installation to be cancelled.
|
|
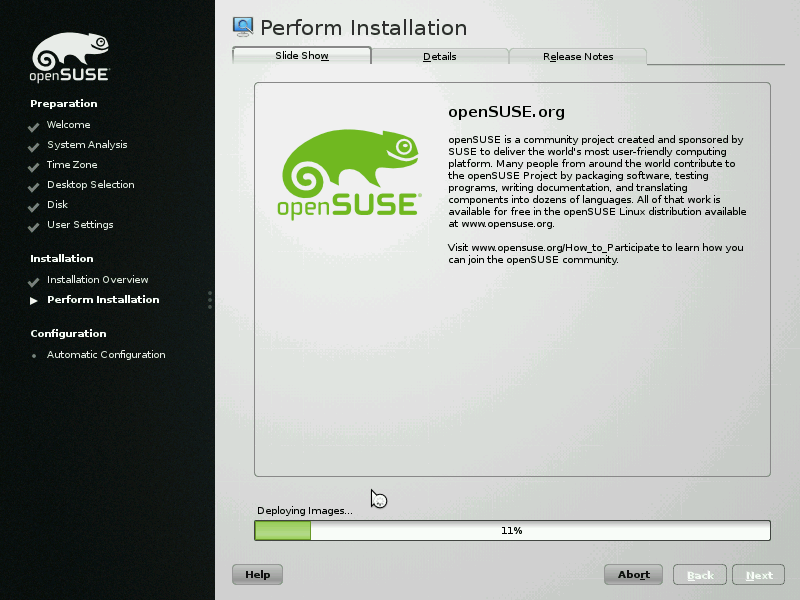
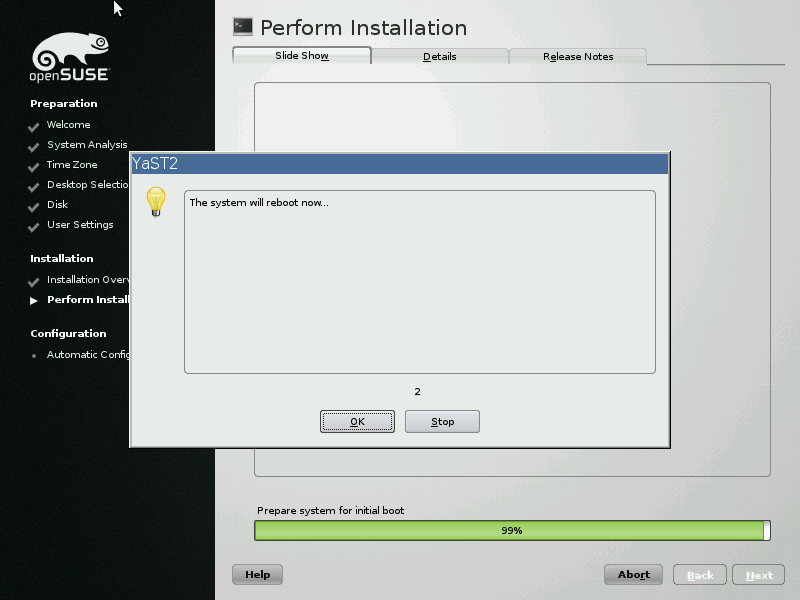
Perform InstallationThe installer will now partition hard drives and install openSUSE onto the selected drive. This process will take several minutes, so feel free to make some coffee or eat a sandwich. The Progress bar will state the installation percentage. If an error message displays on screen, take a note of the message for debugging purposes later.
|
|
When installation is completed, the computer will restart after a few seconds.
|
|
RestartingThe Boot screen seen at the beginning of the installation will appear after restarting. Instead of Installation, select Boot from Hard Disk. This should cause the computer to load the new openSUSE installation.
|
|
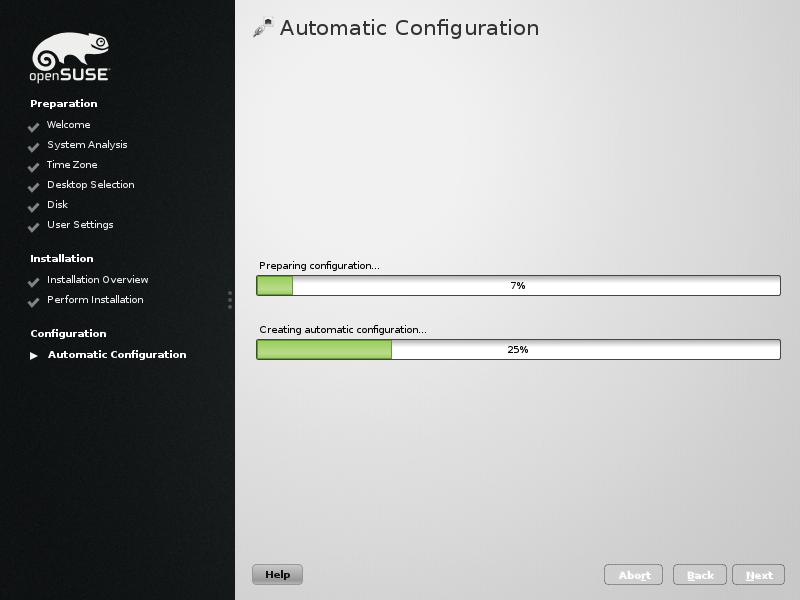
Automatic ConfigurationOn the first boot YaST will automatically configure the system's hardware and network settings. This should require no user input, and will bring up the login screen once completed.
|
|
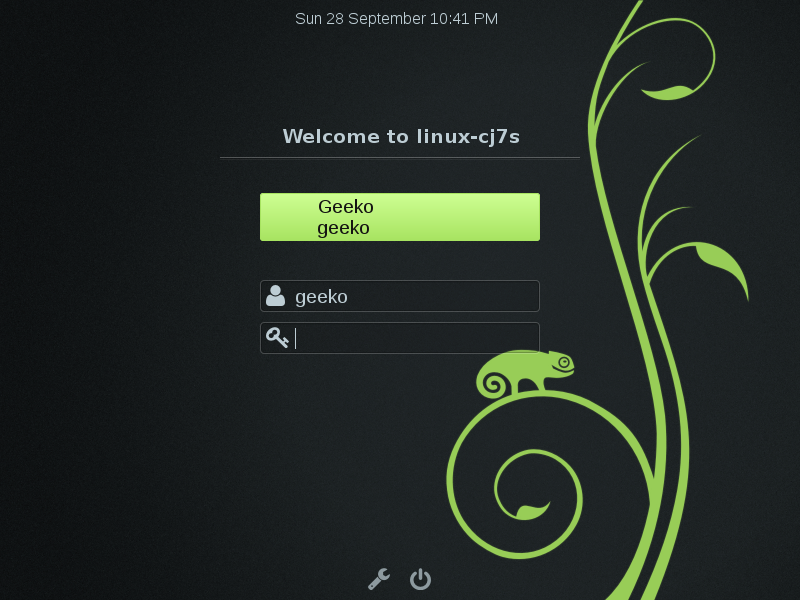
LoginAfter Automatic Configuration, the login screen will appear (unless Automatic login was enabled). Click or type in the username, enter the associated password, and press Enter or Login (depending on the desktop experience selected).
|
|
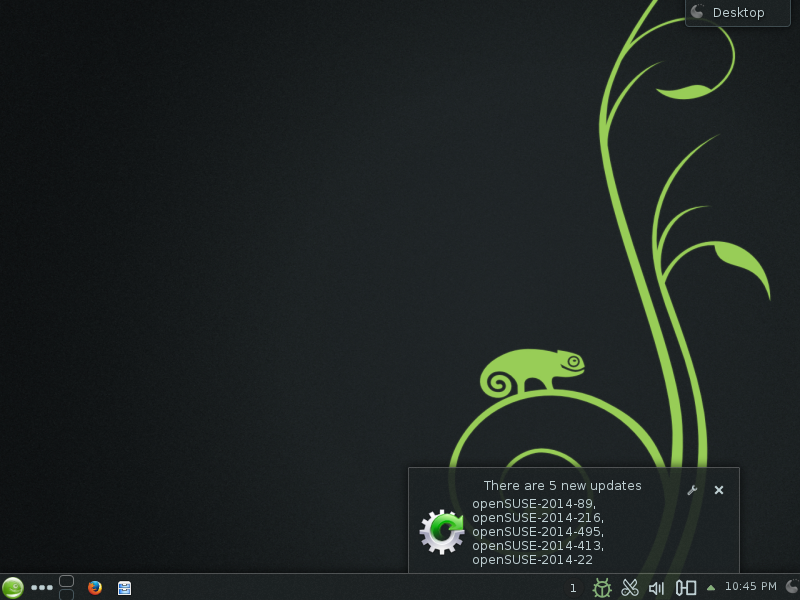
Desktop and UpdatesAfter a few moments, the desktop will appear. Check the openSUSE documentation for more information on each desktop environment. Many desktops will provide a welcome or tutorial screen to follow. An update notification may appear if connected to the internet - be sure to install these updates as soon as possible to reduce the amount of time that the system has security vulnerabilities. The installation of openSUSE 13.1 is complete! Enjoy the new, stable, free operating system and please check the wiki for more documentation.
See also |