SDB:Using fingerprint authentication
Background information
With the ThinkFinger driver, openSUSE supports the fingerprint reader by UPEK/SGS Thomson Microelectronics included with some IBM and Lenovo Thinkpads. The same fingerprint reader can also be found in other laptops and either as a stand-alone device or built into some USB keyboards. For more details, refer to Thinkfinger README and fprint Documentation. If your system includes the fingerprint reader, you can use biometric authentication in addition to standard authentication via login and password. After registering their fingerprint, users can log in to the system either by swiping a finger on the fingerprint reader or by typing in a password.
libthinkfinger and pam_thinkfinger, or fprintd and fprintd_pam are automatically installed.Supported applications and actions
The PAM module pam_thinkfinger supports user authentication by fingerprint for the following applications and actions (although you may not be prompted to swipe your finger in all cases):
- Logging in to GDM or a login shell
- Unlocking your screen on the GNOME desktop
- Starting YaST and the YaST modules
- Starting an application with
rootpermission:sudoorgnomesu - Changing to a different user identity with
suorsu-username
Managing fingerprints with Gnome Settings
Procedure: Registering a fingerprint
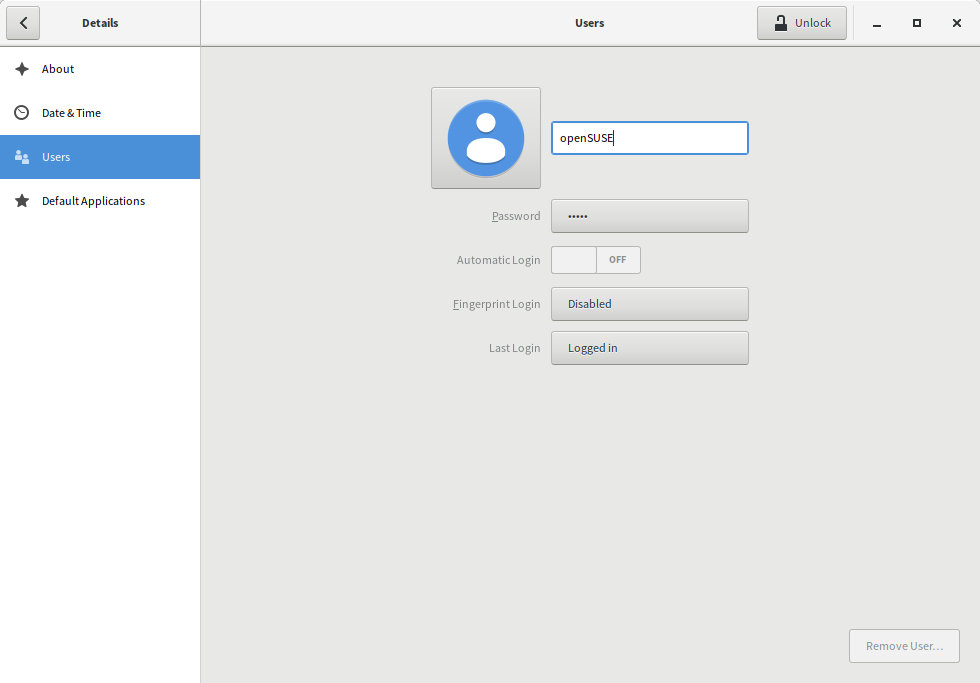
- In Gnome Settings, click Details+Users to open the
Usersdialog. A list of users or groups in the system is displayed.
- Select the user for whom you want to register a fingerprint and click button labeled
Fingerprint Login. - In new popup, select a finger you want to save, then click
Next.
- Popup prompts the user to swipe their finger until five readable fingerprints have been gathered.
- After the fingerprint has been acquired successfully, click Accept to close the
Fingerprint Configurationdialog and the dialog for the user. - If you also want to use fingerprint authentication for starting YaST or the YaST modules, you need to register a fingerprint for
root, too. To do so, go the the part describing command line instructions and do them as root user.
You can remove your fingerprint from Gnome by pressing the same button you used to add fingerprints previously.
Troubleshooting: Cannot write PAM settings
To fix this error login as superuser and perform following
 cd /etc/pam.d
 mv common-auth common-auth-old
 ln -s common-auth-pc common-auth
Managing fingerprints in KDE
Since Plasma 5.24 KDE offers a GUI for registering fingerprints
Procedure: Registering a fingerprint in KDE
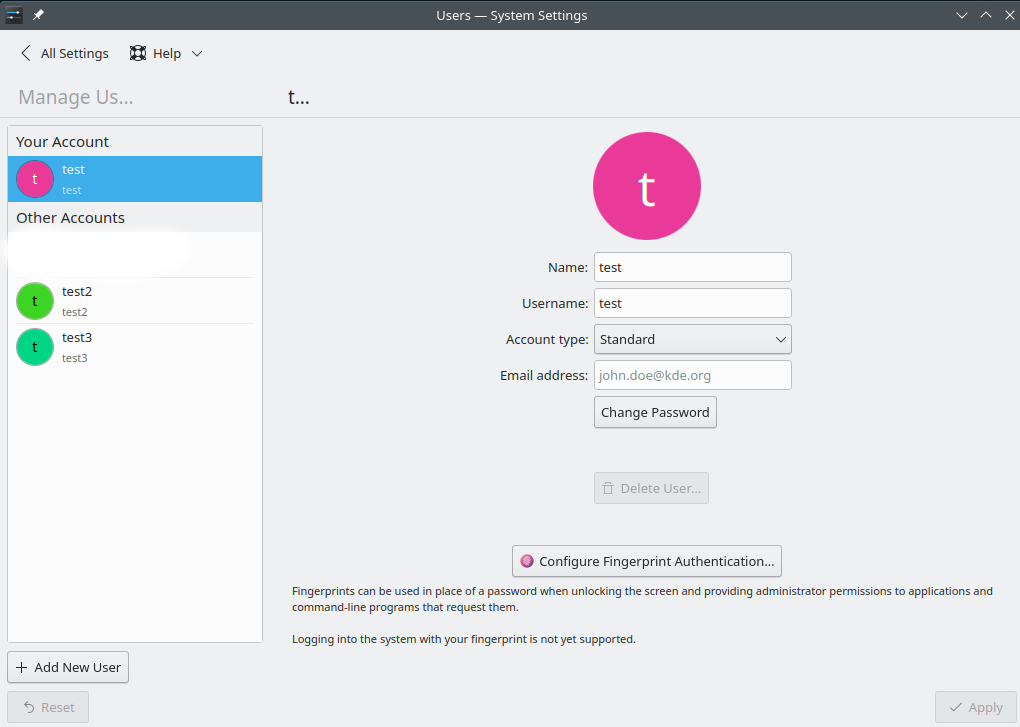
- In KDE System Settings, select User. A list of users on this system is displayed. Select the account for which you want to register fingerprints.
Select 'Configure Fingerprint Authentication'
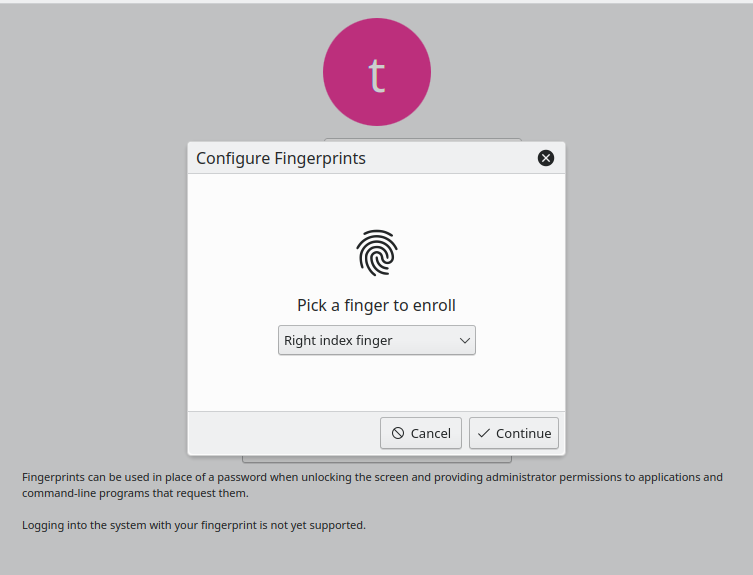
- Select the finger you want to register and follow the instructions. Note: It is recommended to register fingers from both hands
Preparing the window-manager for fingerprint-authentication
After you have registered the fingerprints you can prepare the system to authenticate with fingerprints.
In order to use fingerprint, if your system has pam-config, you probably only need to run:
sudo pam-config --update --fprintd
Otherwise, for the sddm, add the following to /etc/pam.d/sddm right underneath
 #%PAM-1.0
 auth    [success=1 new_authtok_reqd=1 default=ignore]   pam_unix.so try_first_pass likeauth nullok
 auth    sufficient      pam_fprintd.so
In order to user fingerprint authentication with KDE's lock screen, create a file /etc/pam.d/kde and include the lines:
 auth 			sufficient  	pam_unix.so try_first_pass likeauth nullok
 auth 			sufficient  	pam_fprintd.so
Once you hit 'Enter' on the lock screen, you are asked to use the fingerprint scanner to unlock the screen.
/etc/pam.d/{sddm,kde,*} is missing, don't panic! These files are moved to /usr/lib/pam.d/, you can, and should copy them to /etc/pam.d and make your changes.Managing fingerprints with fprintd
Procedure: Registering a fingerprint
- Open a shell and log in as
root. - To register a fingerprint for a certain user, enter
fprintd-enroll
fprintd prompts the user to swipe his finger until three readable fingerprints have been gathered.
- If you also want to use fingerprint authentication for starting YaST or the YaST modules in the GNOME control center, you need to register a fingerprint for
root, too. - Let the user swipe his finger.
fprintdcompares the fingerprint to the print stored for this user and provides a message if the fingerprints match.
As soon as the user's fingerprint has been successfully registered, the user can choose to authenticate with either fingerprint or password for the actions and applications listed above.
Procedure: Verifying or removing a fingerprint
- Open a shell and log in as
root. - To verify an existing fingerprint for a certain user, run the following command:
fprintd-verify
- Let the user swipe his finger.
fprintdcompares the fingerprint to the print stored for this user and provides a message if the fingerprints match. - To remove a user's fingerprint, run the following command:
fprintd-delete
Procedure: Doing a test run
- In a shell, run
fprintd-enroll
- You can see enrolled fingerprints with:
fprintd-list
- To verify the fingerprint, run
fprintd-verify
Further information
- Find the projects home pages at http://thinkfinger.sourceforge.net/ and https://www.freedesktop.org/wiki/Software/fprint/
- For more technical details, refer to
/usr/share/doc/packages/libthinkfinger/READMEin your installed system. - There are also man pages available for
pam_thinkfingerandfprint.


