SDB:Live CD installation for Gnome 3
Tested on openSUSE
- in installing of 11.4
- with small differences also all versions
Recommended articles
Related articles
There are pictures from earlier distribution installs at the pages linked from Installation and these may be helpful.

|
Getting mediaYou can either download the ISO from Gnome 3 or from openSUSE (for versions 12.1 and above) or from events.
|
|
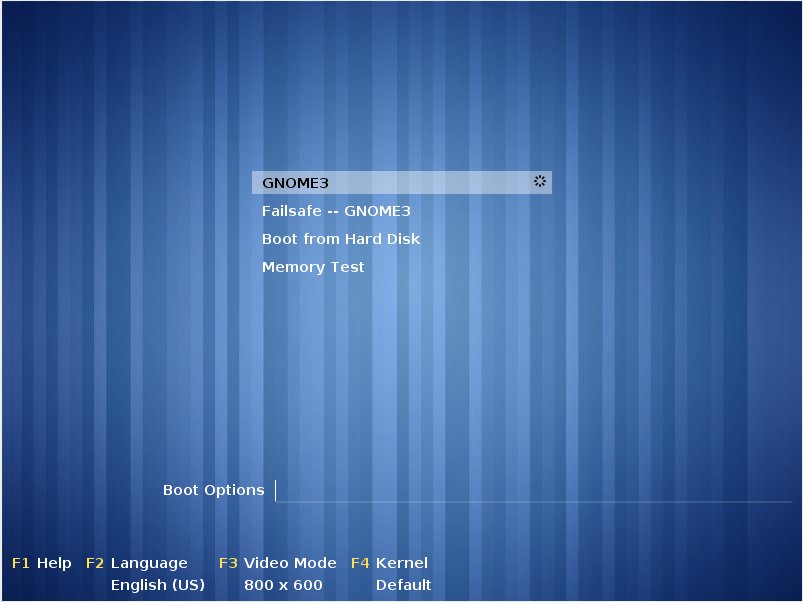
Installation in Live DesktopPlace your openSUSE disc in the drive, and reboot your computer. Upon rebooting, you should encounter the boot screen. Here you can choose your language.
|
|
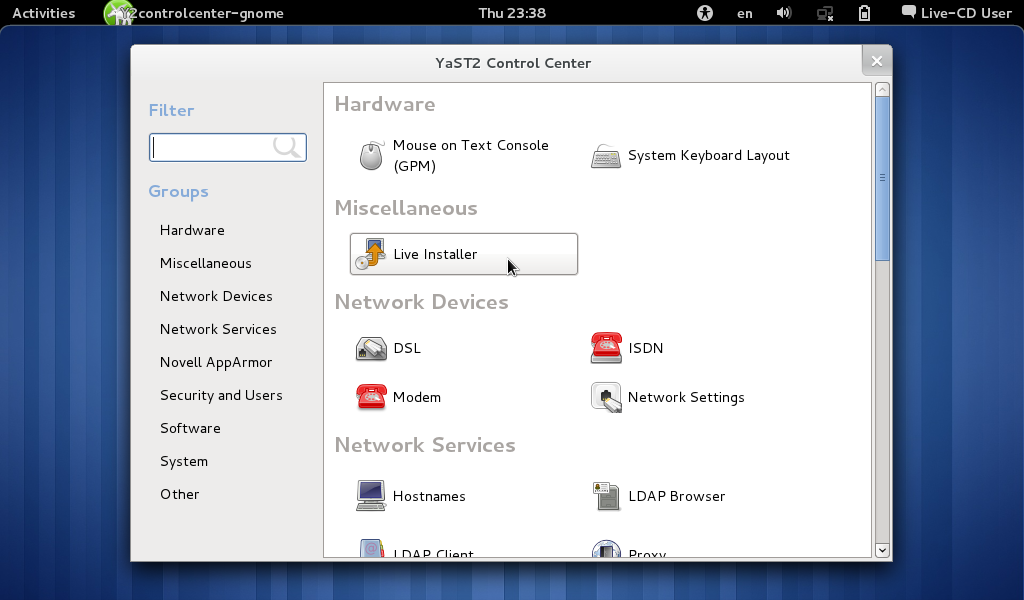
DesktopThe live CD boots into a fully-functional Gnome 3 desktop. There will be some limitations that protect your data. Feel free to explore the desktop, and when you're ready to install. Press the super key, write YaST and click enter. Double-click the Live Install icon. This will start the openSUSE installation and configuration program.
|
|
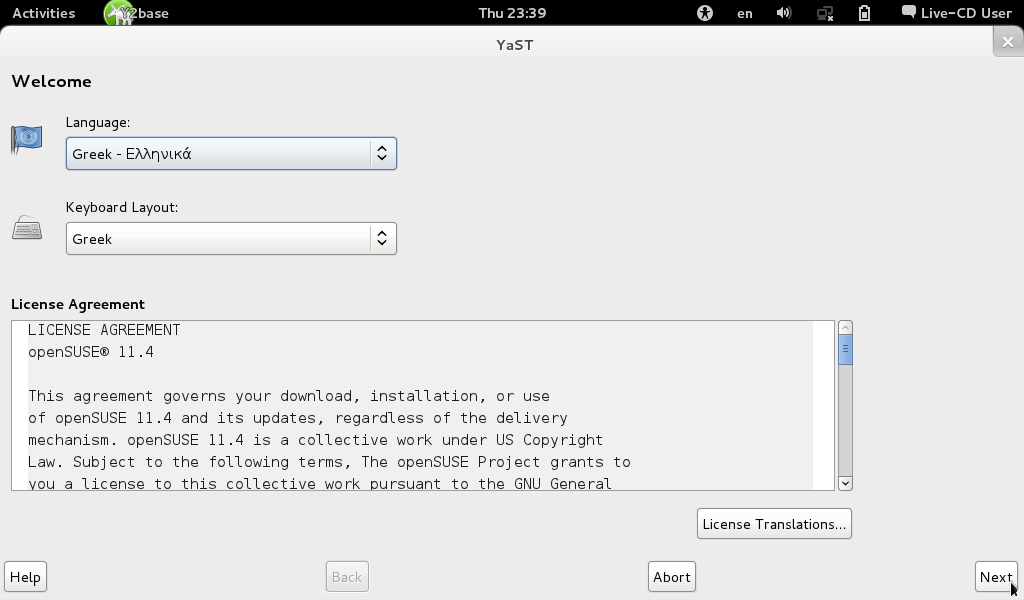
Step 1: Welcome screenOn top of the page you can set your language and keyboard layout. When the language is set, YaST will choose the applicable keyboard layout for you. However, if this is not correct, you can rectify this with the keyboard layout pull-down menu. Under the settings the end user license agreement (eula) is shown To see the license agreement in other languages, click License Translation. If you accept the license, click Next.
|
|
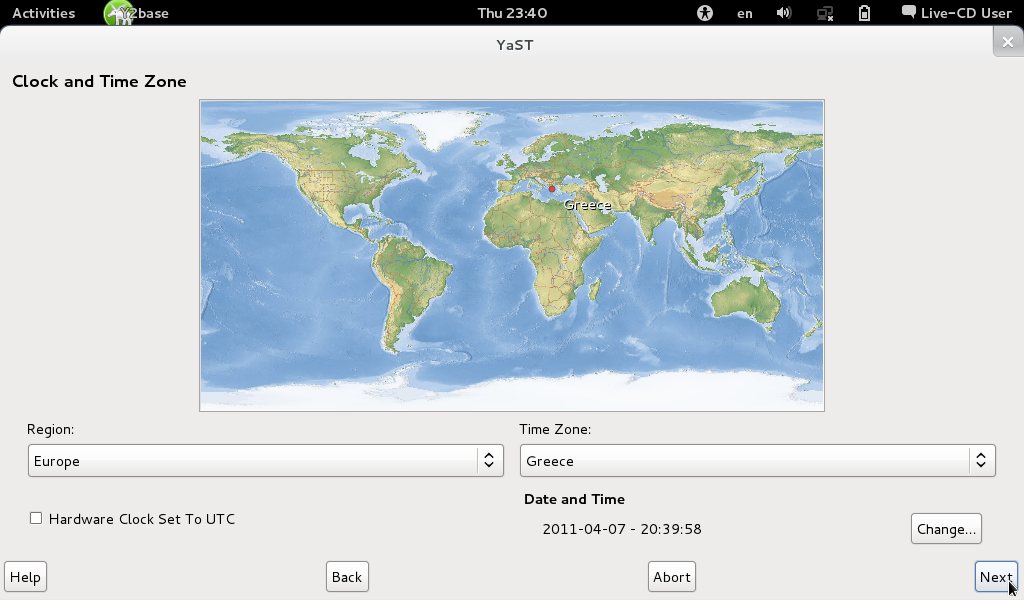
Step 2: Set the timeHere, you'll need to set your time zone which is displayed in the map of the world. You can select your timezone on the map or choose it trough the pull-down menus. If the time is not correct, you can click the Change button. Note that the option Hardware clock set to UTC can only be used when not dual-booting with windows.
|
| [[Image:{{{2}}}|200px|link=]] |
Optional: Set NTP serverIf you have a working internet connection, you can use a NTP server. A NTP server is used for time synchronization. You can choose the Run as daemon option if you want your time to be synchronized on every boot. The time will automatically be synchronized after clicking Accept.
|
|
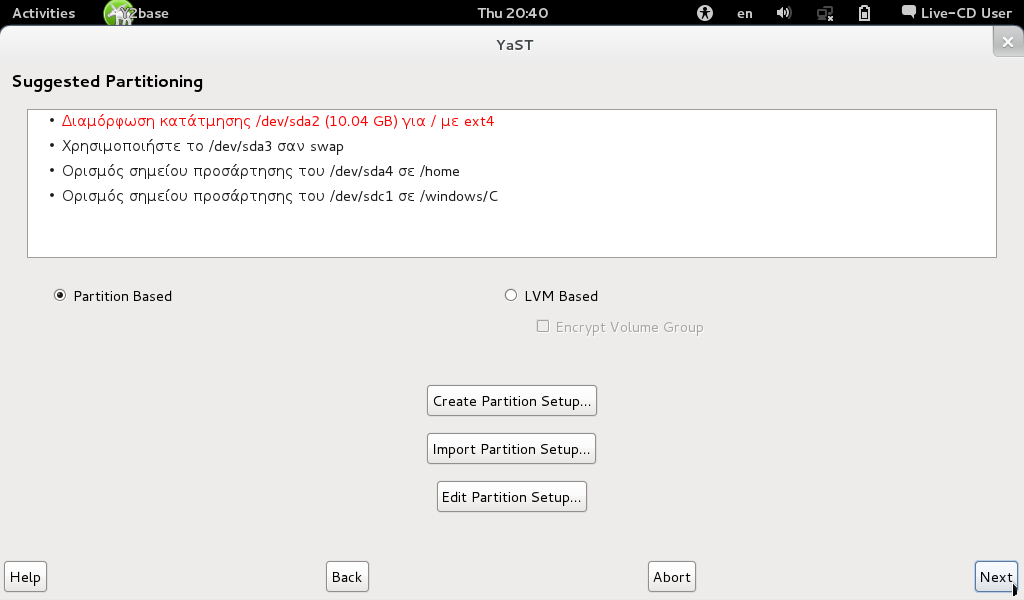
Step 3: Setting up your diskA suggested partition scheme for your hard disk is shown. If you have another operating system installed on the same hard disk (for example, Microsoft Windows or another Linux), YaST will resize that operating system so that it still on your computer, but has enough room to install openSUSE. Here you can see that the partitions are already created and the system proposes to format only the root (/) partition. If you are not happy about the proposed configuration, you can click Create partition setup. If you use Edit partiton setup the partitioning program is loaded, showing you the proposed configuration, which you can edit manually. If you want to learn more on custom partitioning, please read SDB:Partitioning.
|
|
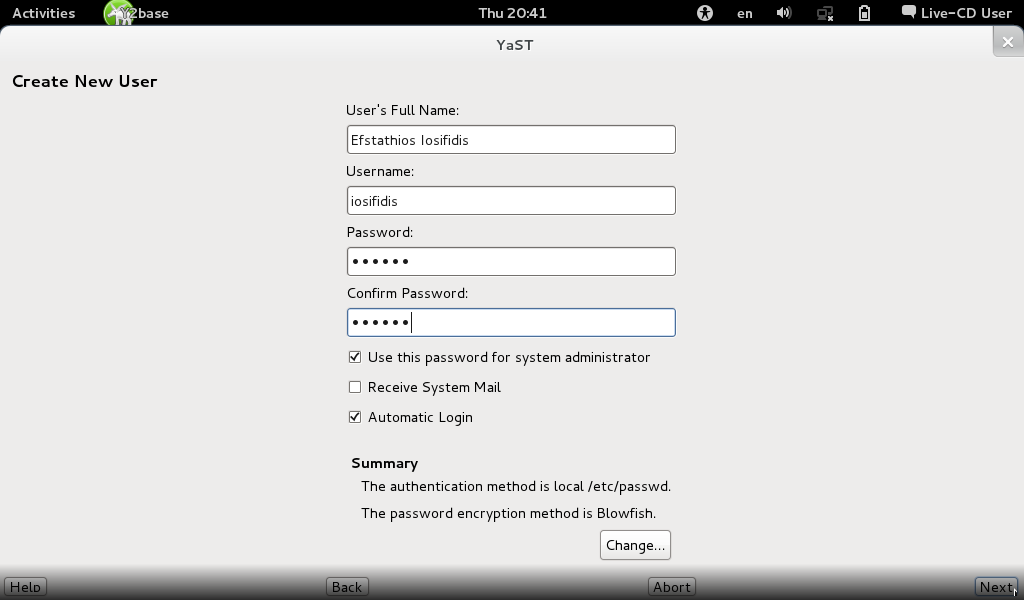
Step 4: Create the primary userEnter your full name, an username will be automatically chosen. If you wish you can change this username to your liking. Specify a new password twice, for verification. By default, the system is set to use this password for the system administrator (also known as root). Also, automatic login is turned on by default. However, if you wish to have a more secure system and/or multiple users, uncheck this options. YaST makes a check if your new set password is secure enough. You will get prompted if it is to insecure. You can then choose to change your password or to continue and ignore this warning.
|
|
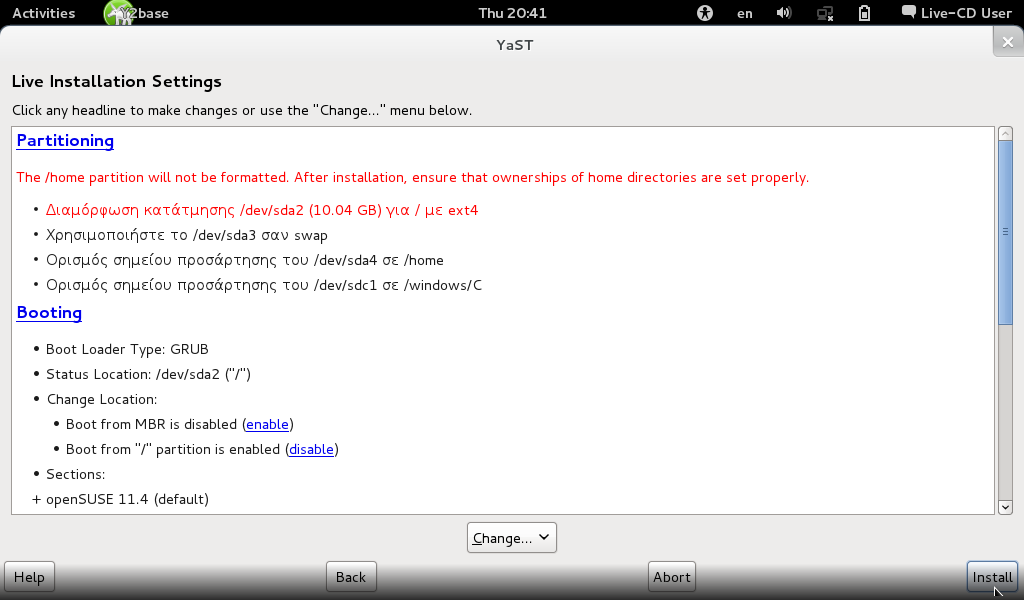
Step 5: Installation overviewThis is a summary of what YaST is planning on doing to your system. Read over the list and if you would like to change an option, click the title of the section. Consult the help text in YaST and in the documentation for what to do in these screens. If you agree with this proposel, Click install. You will be promted to confirm I you really want to proceed. Click Install again to confirm.
|
|
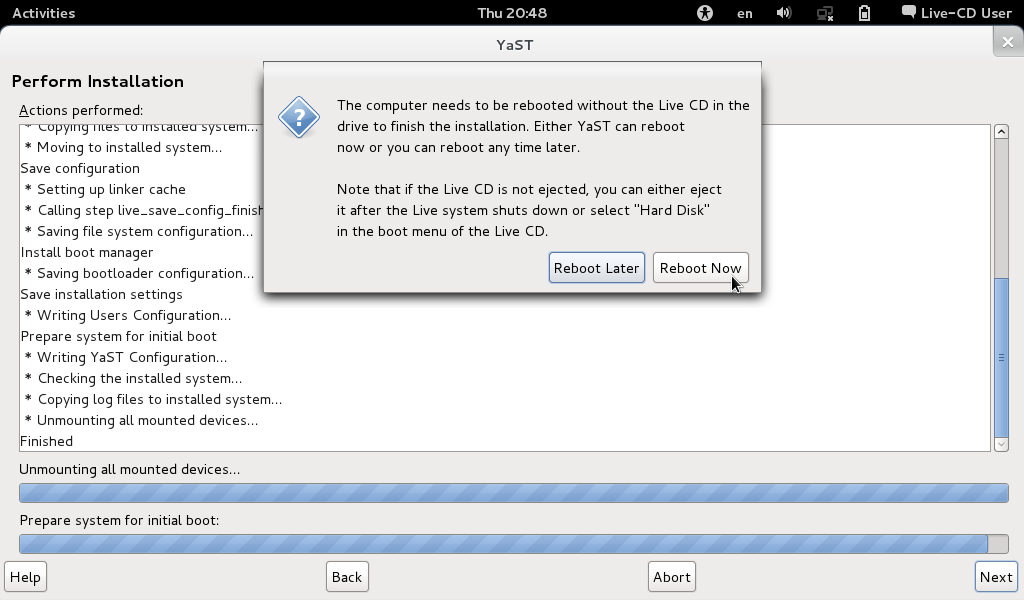
Step 6: InstallationYaST is now installing your new openSUSE system. Once finished, you'll be directed to restart the computer. Restart the computer, and remove the openSUSE Live CD.
|
| [[Image:{{{2}}}|200px|link=]] |
Step 7: Finishing the InstallationOn the first boot YaST will automatically configure your system's hardware and network settings.
|
|
Completion of InstallationopenSUSE Gnome 3 is now installed! Once you login, you must add repositories, update the system and add your favourite software.
|
Note on installation to large partitions
Many users will be upgrading from previous dual boot windows-linux distributions. YaST will detect empty ext3 partitions, say on a second hard disk and offer to convert them to ext4. For example if there are two empty ext3 partitions it will create an root ext4 partition and data ext4 partition, with the larger partition being assigned to data (/home) by default. On modern systems the scary warning in the Boot section just before commitment during installation, that GRUB will place the bootloader above 125 GBytes and the user is risking that the bootloader will not be found can be disregarded (of course with a certain risk). A check is possible before commitment if you cancel the install at this stage before you lose a useful MBR. Without a valid MBR a disk will not be accessible anymore and steps must be taken to recover all the data on that disk You can do this in an old linux distro that uses GRUB by copying your old linux root partition to the partition that you will use, and adding a new entry to GRUB menu.lst with as root partition this test root partition. If a boot test goes well you can then delete the contents of the temporary test root partition and the SUSE installer may well use it as its default root ext4 partition.
What next?
There is plenty of documentation available on this wiki.