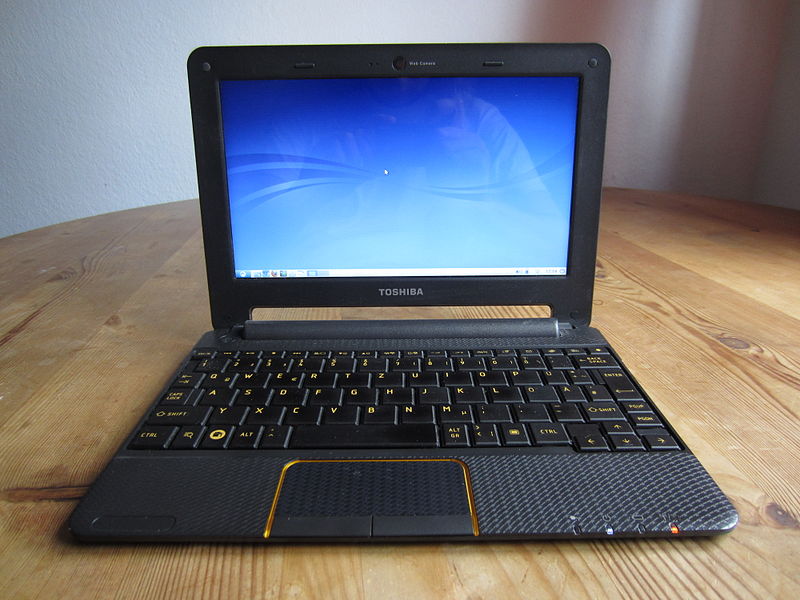
HCL:ToshibaAC100
The Toshiba AC100 is a notebook built for Android OS.
Technical data
- Model name AC100 in Europe, Dynabook AZ in Japan
- Codename "Paz00"
- Nvidia Tegra20 family 1Ghz dual core processor (Revision A02)
- 10.1" (1024x600) display
- 768 gramms weight
- ULP Geforce GPU
- 512 MB RAM
- from 8 to 32 GB eMMC
- Built-in USB 2.0 dual band Wi-Fi 802.11 b/g/n
- Front USB UVC VGA Camera
- Elan I2C Touchpad
- HDMI Port
- 1x USB 2.0, 1x Mini-USB
- 2100mAh battery
- some models contain Bluetooth USB HCI
- some models contain 3G Modem (Ericsson F3307)
More technical data (tests and configurations) on openSUSE:AC100.
U-Boot bootloader
By default paz00 (Toshiba AC100) comes with proprietary fastboot bootloader, to use current openSUSE on device you need to switch to U-Boot bootloader, which include mainline support for paz00.
Below is detailed guide how to switch to U-Boot bootloader on Toshiba AC100 itself.
You need to add U-Boot binary to Tegra BCT (Boot Configuration Table) BCT Overview
Device vendor don't permit to redistribute paz00 BCT, you need to extract it from your device online.
- Required software
- copy of your current BCT
- U-Boot binary
- openSUSE RPM
- or compile source code
- Cbootimage binary
- openSUSE RPM
- or compile source code
- Extract current BCT
- Run # dd if=/dev/mmcblkXboot0 of=current.bct bs=4080 count=1
- Run
- U-Boot
- Extract u-boot.bin armv7l binary from openSUSE RPM
- Cbootimage
- Extract cbootimage armv7l binary from openSUSE RPM
- Create new BCT with U-Boot bootloader
- Create config file u-boot.cfg for cbootimage with following contents:
Version       = 0x00020001;
Bctcopy       = 1;
Bctfile       = current.bct;
BootLoader    = u-boot.bin,0x00108000,0x00108000,Complete;
- Generate new BCT using cbootimage # cbootimage -d u-boot.cfg u-boot.bct
- Create config file u-boot.cfg for cbootimage with following contents:
- Write new BCT to device with root privileges
- Make /dev/mmcblkXboot0 device writable # echo "0" > /sys/block/mmcblkXboot0/force_ro
- Write new BCT # dd if=u-boot.bct of=/dev/mmcblkXboot0
- Reboot
- Make /dev/mmcblkXboot0 device writable
Writing a disk image to the SD card
- Download the image you want (Leap is stable, Tumbleweed is rolling) from here:
 Tumbleweed
JeOS image E20 image XFCE image LXQT image GNOME image KDE image X11 image If the direct links above do not work for you, please check the general download directory for the images.
 Leap-15.3
JeOS image E20 image XFCE image LXQT image GNOME image KDE image X11 image If the direct links above do not work for you, please check the general download directory for the images.
- As root extract the image onto your SD card (replace sdX with the device name of your SD card).
WARNING: all previous data on the SD card will be lost. Check first if the device you have selected is really your SD card!xzcat [image].raw.xz | dd bs=4M of=/dev/sdX iflag=fullblock oflag=direct; sync
- Insert the SD card with the openSUSE image into your board.
- Connect the board to your PC via serial port (optional, but helpful for debugging; USB-TTL serial cable needed).
- Connect the board to your monitor (via DVI/HDMI, optional).
- Power on the board.
- Walk through the first boot steps.
- Ethernet is configured to request an IP via DHCP, check your DHCP server for the board IP if used.
- Have a lot of fun...
Known Issues
- No screen output only white screen during repartion on first boot, it can take some time
- No 2D/3D Acceleration
- No Hardware Video decoding
