HCL:EspressoBin
The Globalscale Technologies ESPRESSObin is a single-board computer.
Technical details
- Marvell Armada 3720 SoC
- 2x Arm Cortex-A53 CPU
- Topaz Networking Switch
- micro SD card slot
- 2x Gbit Ethernet LAN
- 1x Ethernet WAN
- SATA interface for HDD storage
- USB 3.0 and USB 2.0
- MiniPCIe
Boot loader location
There are three different ways to boot the board:
- the board is equipped with SPI Flash chip containing U-Boot image preloaded by the vendor;
- SATA hard drive containing U-Boot image at MS-DOS partition with type 0x4d;
- serial console.
The latter is also used as a fallback procedure. There is no way to boot from SD-card (at least for v5 schematics of the board), so no special openSUSE image needed.
openSUSE also provides up-to-date version of upstream U-Boot boot loader for ESPRESSObin board. So basically there are two ways to use the board with openSUSE:
- use vendor U-Boot;
- reflash (update) U-Boot image at SPI Flash.
Every way has advantages and drawbacks. Using upstream U-Boot provides better integration with openSUSE and possibly has more issues fixed and features provided, however using vendor U-Boot doesn't require you to update the boot loader, this may be an advantages if you don't feel that you are skilled enough or you have borrowed the board for evaluation and don't want to make disruptive changes.
Booting from SPI Flash
| J10 | J3 | J11 |
|---|---|---|
| 1-2 | 2-3 | 2-3 |
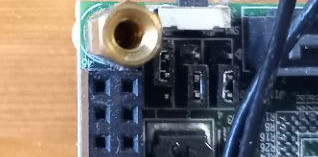
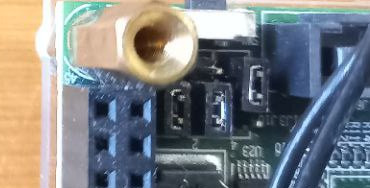
Boot loader source are controlled by the jumpers J10, J3, and J11 located at the corner of the board. Use tweezers to change jumper settings if required. Ensure that the board is off and the power supply is disconnected. See EspressoBin Wiki for detailed information.
If correct boot loader image is stored in SPI Flash chip then it will be read and executed on powering the board on.
Booting from SATA
| J10 | J3 | J11 |
|---|---|---|
| 2-3 | 2-3 | 1-2 |
The boot loader can be loaded from SATA device attached to the board. This case should not be confused with the case when the boot loader is stored in SPI Flash and the operating system (kernel and initrd) are loaded from SATA device by the correctly running boot loader previously loaded from SPI Flash by the CPU. Storing boot loader in SATA device can be used both as a recovery procedure (when SPI Flash content is broken) or in a normal operation.
To prepare bootable medium, you need to obtain the boot loader image. The simplest way is to take arm-trusted-firmware-a3700 package and unpack it to the current working directory:
rpm2cpio arm-trusted-firmware-a3700-2.6-9.1.noarch.rpm | cpio -id
Then you will find newly created ./usr/share/arm-trusted-firmware-a3700 relatively to the current working directory. Since the boot loader is also responsible for memory initialization you have to choose required flavor for your hardware variant. For instance, ./usr/share/arm-trusted-firmware-a3700/ebin_v3_1G_sata/flash-image.bin will work for the most common 1GB RAM version.
Prepare SATA device with MS-DOS (also known as MBR) partition table and partition with type 0x4d (fdisk will call this type QNX4.x but this doesn't matter). Given that required partition is /dev/sdc1, the image should be placed here as is. Remember to adjust this command to your device names.
dd_rescure ./usr/share/arm-trusted-firmware-a3700/ebin_v3_1G_sata/flash-image.bin /dev/sdc1
If correct image is found on SATA device then it will be read and executed, otherwise the board will fallback to UART boot procedure.
Booting from UART
| J10 | J3 | J11 |
|---|---|---|
| 2-3 | 1-2 | 1-2 |
First, in order to boot via serial console, you need to have arm-trusted-firmware-tools package installed on you system. Check that you can run WtpDownload command which is a tool to upload boot loader image through the serial console.
Second, you have to obtain UART boot loader files. The easiest way is to use openSUSE prebuilt ones. Take arm-trusted-firmware-a3700 package and unpack it to the current working directory:
rpm2cpio arm-trusted-firmware-a3700-2.6-9.1.noarch.rpm | cpio -id
Then you will find newly created ./usr/share/arm-trusted-firmware-a3700 relatively to the current working directory. Since the boot loader is also responsible for memory initialization you have to choose required flavor for your hardware variant. For instance, ./usr/share/arm-trusted-firmware-a3700//ebin_v3_1G_spinor/uart will work for the most common 1GB RAM version.
Third, check that the board is in UART boot mode. When you attach it with USB-cable and power it on, then you see that something tries to communicate with you on the serial console. Use serial terminal of your choice, for instance
screen /dev/ttyUSB0 115200
When you press Enter it says
>E
Then terminate your serial console terminal, and upload the images to the board with the following command. The boot loader will be executed immediately after it will be loaded into the board memory completely, so mind to run serial console terminal after the WtpDownload.
WtpDownload -P UART -C 0 -R 115200 \
   -B ./usr/share/arm-trusted-firmware-a3700/ebin_v3_1G_spinor/uart/TIM_ATF.bin \
   -I ./usr/share/arm-trusted-firmware-a3700/ebin_v3_1G_spinor/uart/wtmi_h.bin \
   -I ./usr/share/arm-trusted-firmware-a3700/ebin_v3_1G_spinor/uart/boot-image_h.bin -E; screen /dev/ttyUSB0 115200
Updating SPI Flash boot loader
If you decided to update U-Boot contained in SPI Flash memory chip, then you need new boot loader image. Assuming that you want to use openSUSE one, take arm-trusted-firmware-a3700 package and unpack it to the current working directory:
rpm2cpio arm-trusted-firmware-a3700-2.6-9.1.noarch.rpm | cpio -id
Then you will find newly created ./usr/share/arm-trusted-firmware-a3700 relatively to the current working directory. Since the boot loader is also responsible for memory initialization you have to choose required flavor for your hardware variant. For instance, ./usr/share/arm-trusted-firmware-a3700//ebin_v3_1G_spinor/flash-image.bin will work for the most common 1GB RAM version.
It is highly recommended to learn how to use SATA or UART booting before you proceed to updating the flash. Overall procedure is the following:
- boot the board using alternative (not SPI Flash) way and obtain U-boot command line;
- burn U-Boot image to the SPI Flash using bubt command;
- restore environment settings.
See EspressoBin wiki for details.
If you are successfully started the boot loader using SATA or UART and able to interact with U-Boot command line, then you have to somehow deliver flash-image.bin to the running boot loader instance and burn this image to the board. For instance, you can use USB flash pen drive (with FAT filesystem). Just copy flash-image.bin to the USB flash pen drive root, and then attach it to the board.
=> bubt flash-image.bin spi usb
Burning U-Boot image "flash-image.bin" from "usb" to "spi"
Bus usb@58000: Register 2000104 NbrPorts 2
Starting the controller
USB XHCI 1.00
Bus usb@5e000: USB EHCI 1.00
scanning bus usb@58000 for devices... cannot reset port 2!?
2 USB Device(s) found
scanning bus usb@5e000 for devices... 1 USB Device(s) found
Image checksum...OK!
Erasing 1163264 bytes (284 blocks) at offset 0 ...Done!
Writing 1160348 bytes from 0x6000000 to offset 0 ...Done!
It is highly recommended to recover environment settings which are also stored in SPI Flash:
=> env default -a
=> env save
However, remember to backup your board MAC address since it is stored along with U-Boot settings and may be lost. If required, it will be easy to set it later when you will boot from you main boot loader source.
Power off the board, set the jumpers to SPI Flash boot position, and power on the board again. If the flash update is successful and the image is chosen correctly, then you will see the output of your brand new boot loader. In U-Boot command line we can check its version:
=> version
U-Boot 2022.04 (May 16 2022 - 00:00:00 +0000)

gcc (SUSE Linux) 12.1.0
GNU ld (GNU Binutils; openSUSE Tumbleweed) 2.38.20220411-5
Manual installation
For basic installation prepare a micro SD card with a raw image as described here AArch64_EFI. Put the SD card into your board and do the following steps:
- connect a USB cable to have access to the serial console of the CPU. This is running at 115200 baud.
- power it
If your board contains the latest openSUSE U-Boot image then left the board unattached and let the system boot. If you decided to use vendor provided U-Boot then the following additional configuration steps will be required for the first time:
- stop u-boot to get a prompt
- run the following command:
env default -a; load mmc 0:1 $kernel_addr_r /efi/boot/bootaa64.efi; load mmc 0:2 $fdt_addr_r /dtb/armada-3720-espressobin.dtb; bootefi $kernel_addr_r $fdt_addr_r
- the board should boot to a grub prompt
- set the grub environment variables to run the default boot menu
set root=hd0,gpt1
set prefix=($root)/efi/boot
normal
- linux should boot now to the login prompt
- login as root (password: linux)
- find the UUID of the EFI partition (which is the first one of the disk, mmcblk0p1), e.g.:
localhost:~ # ls -l /dev/disk/by-uuid/
total 0
lrwxrwxrwx 1 root root 15 Jul 22 15:59 9691cdb9-ffad-4764-bf89-e958d79ef0fd -> ../../mmcblk0p4
lrwxrwxrwx 1 root root 15 Jul 22 15:59 992D-C26D -> ../../mmcblk0p1
lrwxrwxrwx 1 root root 15 Jul 22 15:59 af77f2f7-8017-4a25-8c50-38491762fbfc -> ../../mmcblk0p3
lrwxrwxrwx 1 root root 15 Jul 22 15:59 c42e9c58-b0d4-4e18-b8ac-df0a2e1a5eb4 -> ../../mmcblk0p2
- install the opensuse bootloader
grub2-install --skip-fs-probe --no-nvram
- prepare a temporary grub config /tmp/grub.cfg (e.g. by using vi), ensure that the UID of the EFI partition is used for the search command:
search --fs-uuid --set=root 992D-C26D
set prefix=($root)/efi/opensuse
- prepare a grub2 EFI loader that includes the teporary config:
MODULES=$(for i in $(ls /usr/share/grub2/arm64-efi/*.mod); do echo $i | cut -d/ -f6; done | cut -d. -f1 | tr '\n' ' ')
grub2-mkimage -v -c /tmp/grub.cfg -O arm64-efi -p "" -o /boot/efi/EFI/opensuse/grubaa64.efi $MODULES
- reboot the board and stop u-boot to get a prompt and make the default boot parameters permanent:
env default -a
setenv bootcmd 'load mmc 0:1 $kernel_addr_r /efi/opensuse/grubaa64.efi; load mmc 0:2 $fdt_addr_r /dtb/armada-3720-espressobin.dtb; bootefi $kernel_addr_r $fdt_addr_r'
saveenv
- reset the board, it should boot into linux per default now.
Boot from SATA disc
Instead from a SD card the board can also boot from a SATA disk. For that do the same steps as described in "Manual Installation", but modify the u-boot commands to:
env default -a; scsi reset; load scsi 0:1 $kernel_addr_r /efi/boot/bootaa64.efi; load scsi 0:2 $fdt_addr_r /dtb/armada-3720-espressobin.dtb; bootefi $kernel_addr_r $fdt_addr_r
env default -a
setenv bootcmd 'scsi reset; load scsi 0:1 $kernel_addr_r /efi/opensuse/grubaa64.efi; load scsi 0:2 $fdt_addr_r /dtb/armada-3720-espressobin.dtb; bootefi $kernel_addr_r $fdt_addr_r'
saveenv
Known Problems
- The default network configuration does not work due to the switch vlan configuration, use yast to configure it manually.
SATA and USB3 does not work with 5.1 and newer kernel
The SATA PHY cannot be intialized:
[   11.748728] phy phy-d0018300.phy.2: phy poweron failed --> -1
[   11.748775] ahci-mvebu: probe of d00e0000.sata failed with error -1
This can be fixed by using a newer Arm Trusted Firmware that needs to be flashed to the onboard flash. Pre-build images can be downloaded from here.

