openSUSE:OBS Light use cases
Overview
Now that you have understood the basic principles of an OBS server (build and share a program, from the same source code for a given platform and a given architecture), you want to test the system.
The following practical labs will give you some simple examples to getting start with OBSLight using a "free" OBS server.
Each lab point a goal, and explain the whole procedure to achieve it.
Lab 1: "Hello World" package using openSUSE
Goal: I want to create a package and build it for an openSUSE 12.2 distribution for a i586 architecture using OBS Light and a the openSUSE build Service.
In this lab you will learn:
- how to set up a project on the OBS Server
- how to edit the repository to build your package for a given Linux distribution which run on a given architecture
- how to configure OBS Light to import a project
- how to create from scratch a package in your project with OBS Light
- how to edit your files with autotools
- how to perform a local build of your package
- how to commit your sources and verify the build status on the OBS server
- how to patch your files with OBS Light to upgrade your program
Prerequisites
OBSLight and openSUSE Build Service
Before following this tutorial, you must:
- have installed the packages obslight and obslight-gui. If it's not already done, please refer to the obslight installation
- have an account on the "free" OBS server of openSUSE: https://build.opensuse.org/ and generate your home directory
- have read the part "Graphical Interface" of the OBS Light client manual
- be a little bit familiar with the web interface of the OBS server
Tools
You also need to install vim editor, and some tools of the GNU build system. For an openSUSE distribution, type the following commands in a terminal:
$ sudo zypper in vim autoconf automake
Note: this tutorial doesn't cover rpm packaging and autotools, but through this lab you will probably learn some basics about these notions.
Enjoy and have fun! :)
Step 1: set up your project on your OBS server
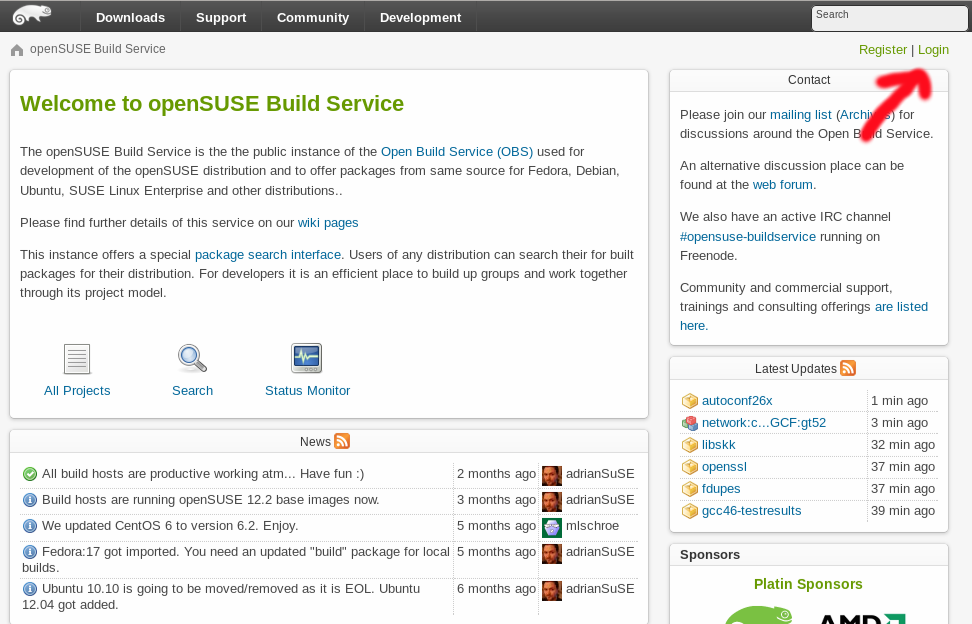
First, we are going to set up your project, using the web interface of the openSUSE OBS. Open your favourite browser and log on the openSUSE OBS: https://build.opensuse.org/
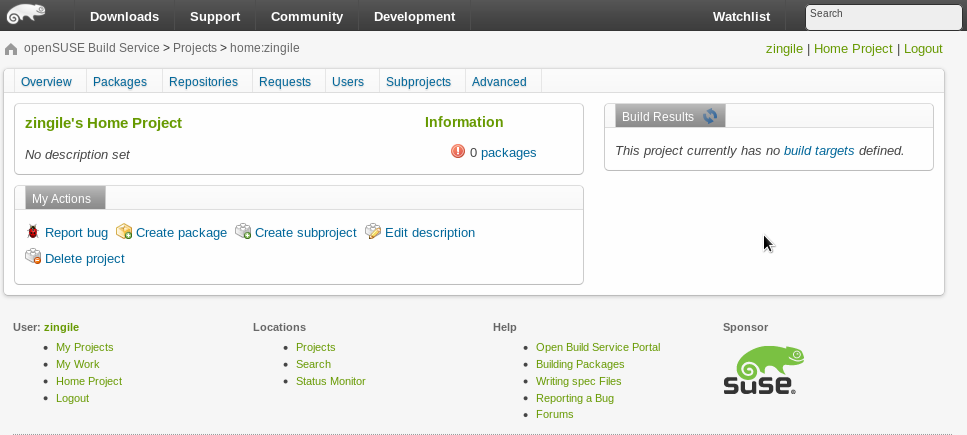
Then click on Home Project on the right, in the upper part of the the page. You will see all the available configurations for your home project.
You can see that you have no packages in your project and for instance, no build results are published. Click on Repositories and then Add repositories to edit the repository that you want to build against. Now you can see the list of the available repositories to build your package. In this tutorial, we want to build a package for an openSUSE distribution, so, check the box openSUSE 12.2.
Then confirm your choice clicking Add selected repositories at the bottom of the page. By default, two architectures are predefined for this repository (i586 and x86_64). You can modify the architectures that you want to build against by clicking on Edit repository in the repository tab of your Home project. For this tutorial, we will keep the default choices, since we want to build our package for openSUSE 12.2, i586, which is already enabled.
Now your home project is configured to build packages against openSUSE 12.2, i586 (and x86_64) repositories.
Step 2: Import locally your project from OBS server and create a package with OBS Light
Open a terminal and launch OBS Light GUI.
$ obslightgui
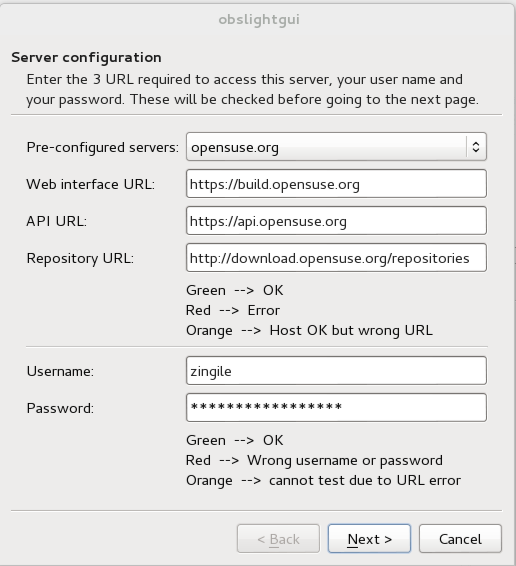
Set up your OBS server configuration in OBS Light GUI. To do it click on file > OBS servers > Add existing server. In the Pre-configured servers field chose opensuse.org and fill the fhe Username and the Password field with the login and the password that you have configured in your OBS server account on https://build.opensuse.org/
Once it's done, click on Next to validate the configuration. Then, you will be asked to chose a Server alias which is by default opensuse.org. You can modify it if you want, otherwise click on Finish.
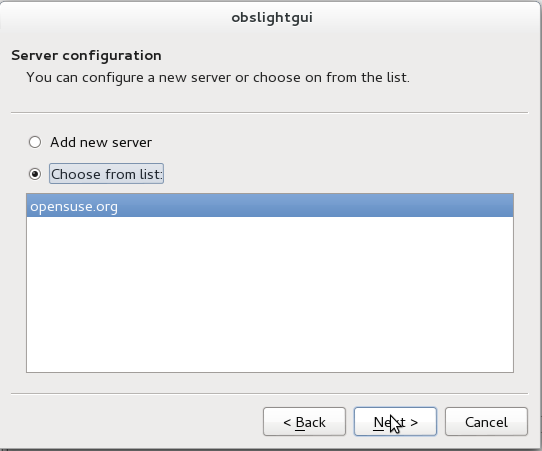
In the project tab of OBSLight GUI, click on Import > OBS Server Project > Choose from list and then select the server from which you want to import your package. Then click on Next to validate your choice.
Note: the server appears with its alias. You may have something different if you change the default alias when you configured your server in OBSLight. In any case, select the alias that you have previously defined.
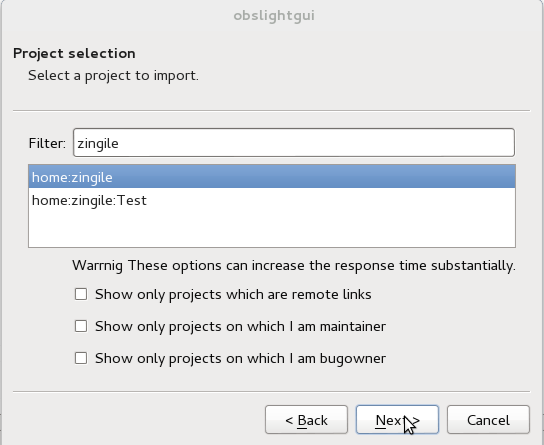
Now we are going to select the project to import. In this lab, we work in the Home project, which is the only one project required for all OBS users. In the Filter field, type the username that you defined for your OBS server to easily find your project. Select it and then click Next.
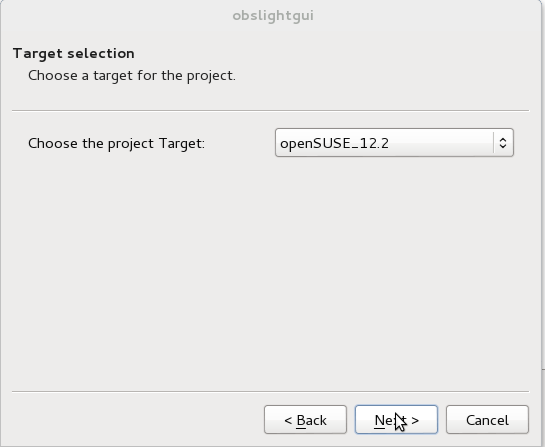
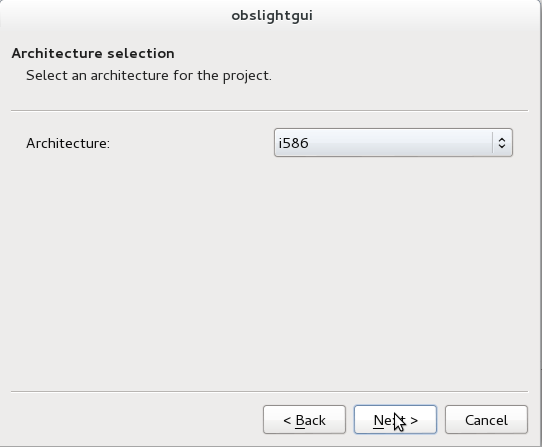
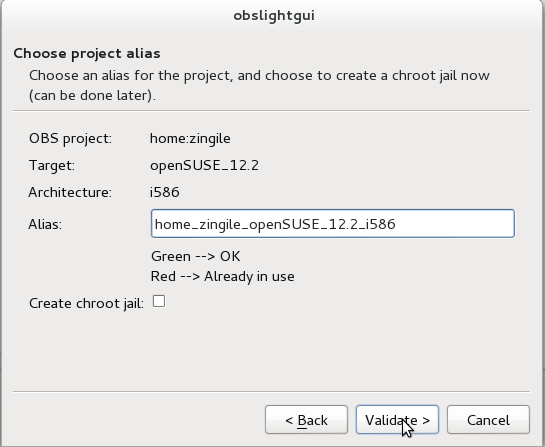
Choose the target and the architecture you want to build against. In our case, choose openSUSE_12.2, click on Next. Chose i586 for architecture and then click on Next. Choose your project alias and then click on Validate
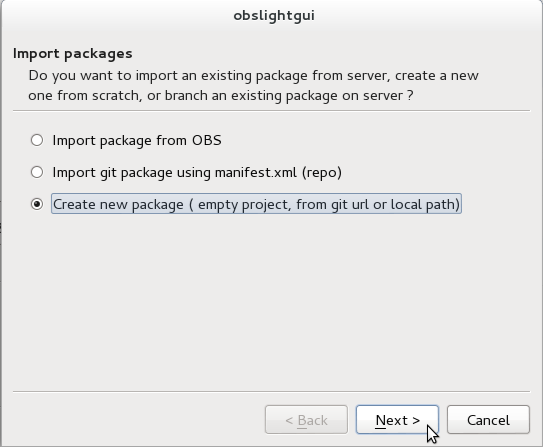
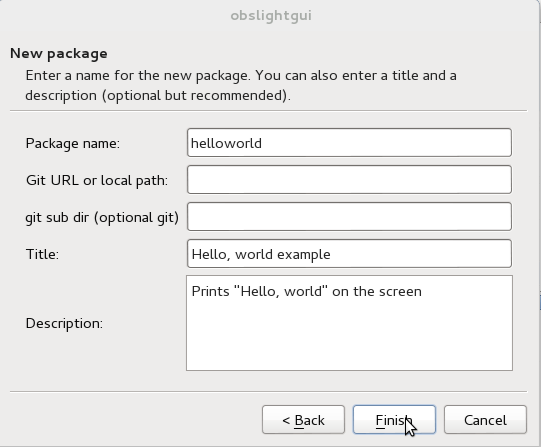
Once it's done, select Create a new package and click on Next. Fill the form as the picture below, and then click Finish
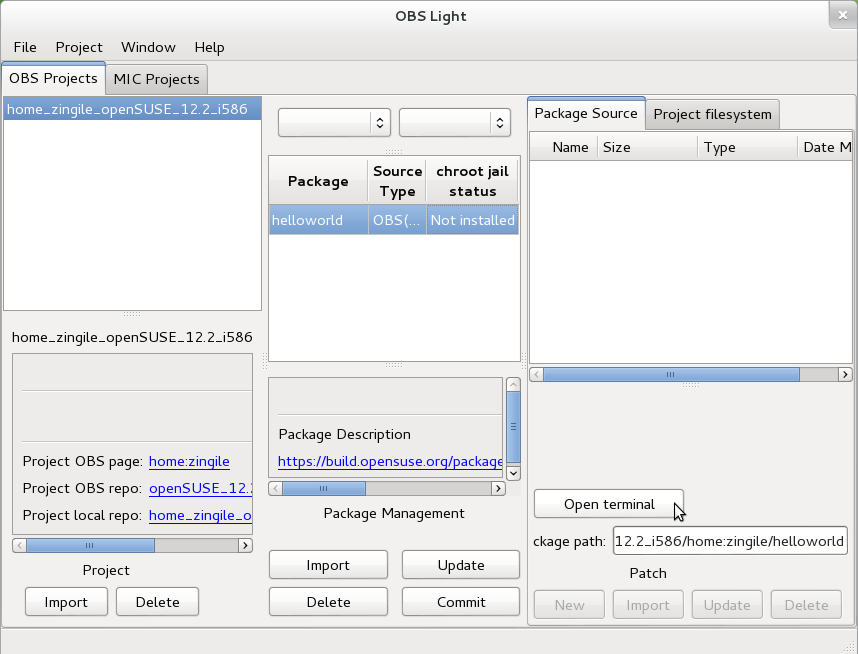
Now your project is imported and the package has been created.
Open a terminal in your package source. Click on Open terminal in the Package Source tab.
Step 3: Edit your spec file and your sources
Note: for this section the keyboard keys for vi are in green.
In the opened terminal type the following commands:
$ touch Makefile.am
$ mkdir src
$ cd src
$ touch helloworld.c Makefile.am
In your package terminal, edit the helloworld.c file:
$ vi helloworld.c
i
Copy past the following lines:
#include <stdio.h>
#include <stdlib.h>

int main(int argc, char **argv)
{
   printf("Hello, world\n");
   return EXIT_SUCCESS;
}
Save and exit:
<esc>
:wq!
$ cd ..
Run the autoscan script to generate a template of your future configure.ac file which is required to generate your configure script.
$ autoscan
$ vi configure.scan
i
Modify it as the below:
#                                               -*- Autoconf -*-
# Process this file with autoconf to produce a configure script.

AC_PREREQ([2.69])
AC_INIT([helloworld], [1.0], [n.zingile@gmail.com])
AC_CONFIG_SRCDIR([src/helloworld.c])
AC_CONFIG_HEADERS([config.h])

# Init automake
AM_INIT_AUTOMAKE([foreign -Wall -Werror])

# Checks for programs.
AC_PROG_CC

# Checks for libraries.

# Checks for header files.
AC_CHECK_HEADERS([stdlib.h])

# Checks for typedefs, structures, and compiler characteristics.

# Checks for library functions.

AC_CONFIG_FILES([Makefile src/Makefile])

AC_OUTPUT
Save your changes and rename the configure.scan file in a configure.ac file :
<esc>
:wq!
$ mv configure.scan configure.ac
Edit the file Makefike.am:
$ vi Makefile.am
i
Copy past the following lines:
SUBDIRS = src
Save your changes and quit vim editor:
<esc>
:wq!
Edit the file src/Makefile.am:
$ vi src/Makefile.am
i
Copy past the following lines:
bin_PROGRAMS = helloworld
helloworld_SOURCE = helloworld.c
Save your changes and quit vim editor:
<esc>
:wq!
To avoid to manually run the differents tools (autoconf, automake, libtool) we will use the autogen script which prepare the whole project for the build. Download in your package directory the autogen script on the official website:
$ wget http://sourceforge.net/projects/buildconf/files/autogen/2009.12.23/buildconf.2009.12.23.tar.gz
$ tar xvzf buildconf.2009.12.23.tar.gz
$ cd buildconf
$ mv autogen.sh ..
$ cd ..
$ rm -rf buildconf*
Run the autogen script to generate your configure script and the Makefile.in files :
$ ./autogen.sh --verbose
Run the ls command to see the files of your package directory.
$ ls
You should now have the following files in your package directory:
aclocal.m4 autogen.sh autoscan.log config.h.in configure.ac depcomp install-sh Makefile.in README AUTHORS autom4te.cache/ ChangeLog configure COPYING INSTALL Makefile.am missing src/
Verify the files in your src directory:
$ ls src
You should have the following files in your src directory:
helloworld.c Makefile.am Makefile.in
Now we are going to compress the files in a tar.gz archive. The tar.gz archive version must be compliant with the version that you will define in the spec file. We will use the version 1.0 for the helloworld package.
$ mkdir helloworld-1.0
$ mv !(helloworld-1.0) helloworld-1.0
$ tar -cvzf helloworld-1.0.tar.gz helloworld-1.0
$ rm -r helloworld-1.0
Your source are now ready to compile. Now you have to edit the spec file which contains all the information to build, install and create a RPM package. In your package directory type the following commands:
$ vi helloworld.spec
i
By default, a spec file template is generated (by vim, from a skeleton file). You just have to fill the form as below:
#
# spec file for package
#
# Copyright (c) 2012 SUSE LINUX Products GmbH, Nuernberg, Germany.
#
# All modifications and additions to the file contributed by third parties
# remain the property of their copyright owners, unless otherwise agreed
# upon. The license for this file, and modifications and additions to the
# file, is the same license as for the pristine package itself (unless the
# license for the pristine package is not an Open Source License, in which
# case the license is the MIT License). An "Open Source License" is a
# license that conforms to the Open Source Definition (Version 1.9)
# published by the Open Source Initiative.

# Please submit bugfixes or comments via http://bugs.opensuse.org/
#

Name:           helloworld
Version:        1.0
Release:        0
License:        GPL-2.0
Summary:        A simple helloworld program
#Url:
Group:          Education
Source:         %{name}-%{version}.tar.gz
#Patch:
#BuildRequires:
#PreReq:
#Provides:
BuildRoot:      %{_tmppath}/%{name}-%{version}-build

%description
The helloworld program prints "Hello world" on the screen

%prep
%setup -q

%build
%configure
make %{?_smp_mflags}

%install
%make_install

%post

%postun

%files
%defattr(-,root,root)
%{_bindir}/helloworld
%doc ChangeLog README COPYING

%changelog
Once it's done, save your changes:
<esc>
:wq!
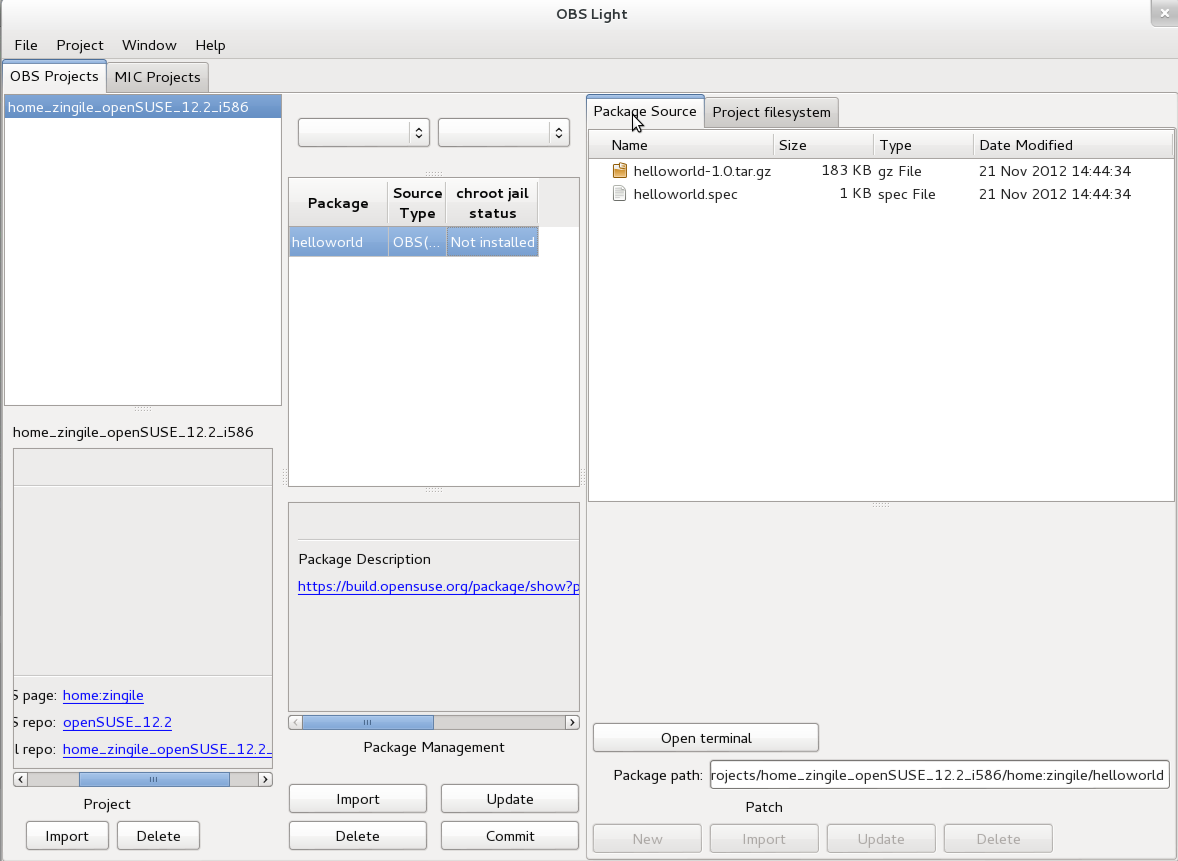
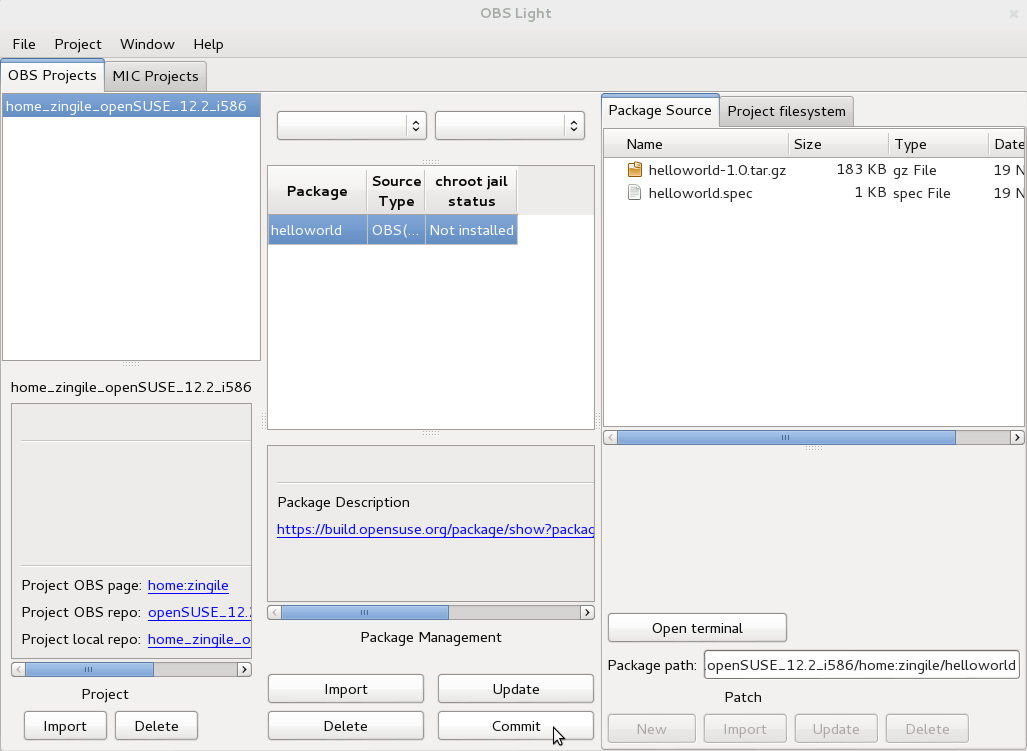
Back in you OBS Light GUI interface. You can see in the Package Source field the files that you have created using the command line.
Step 4: Check the proper functioning by performing a local build
Building your package with the remote OBS server can be long, depending on how busy the workers of the server are. To avoid waiting the build results of your package, it is a good practice to perform a local build before to send your sources on the OBS server.
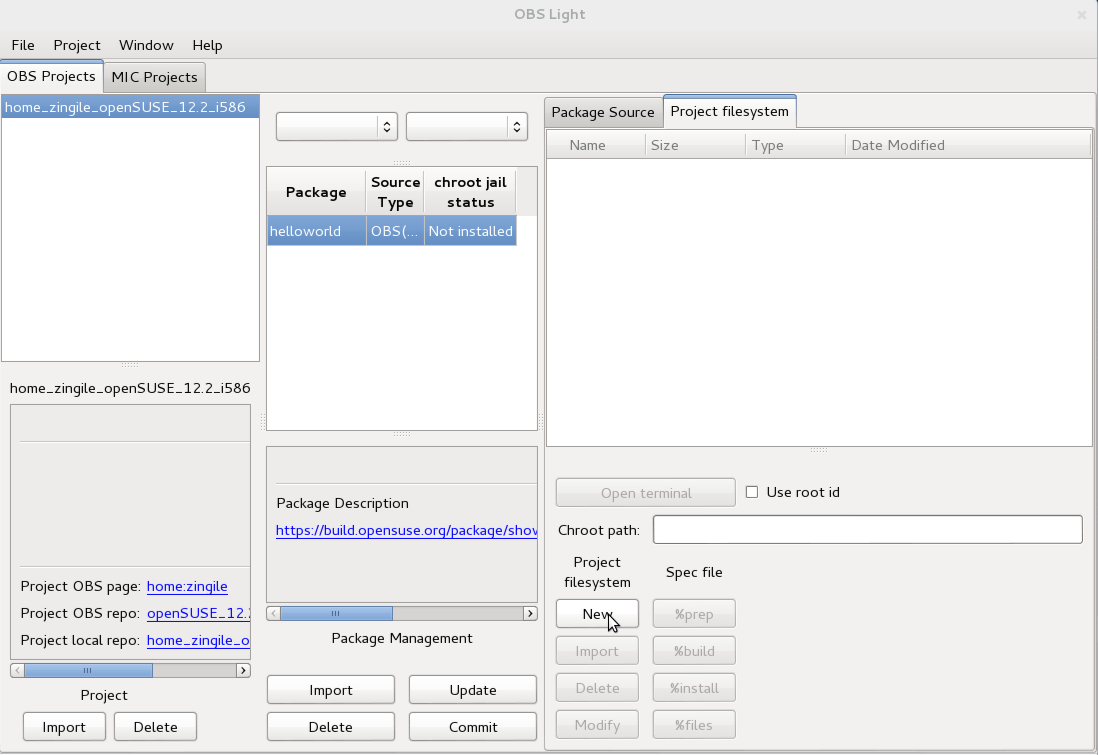
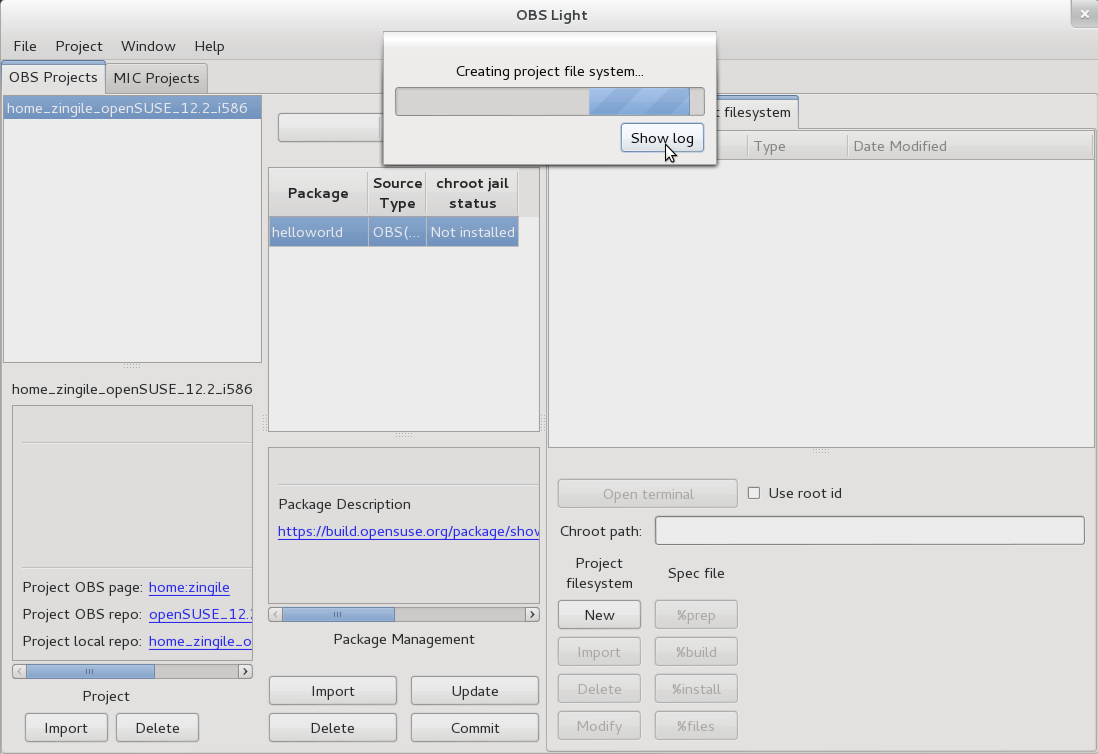
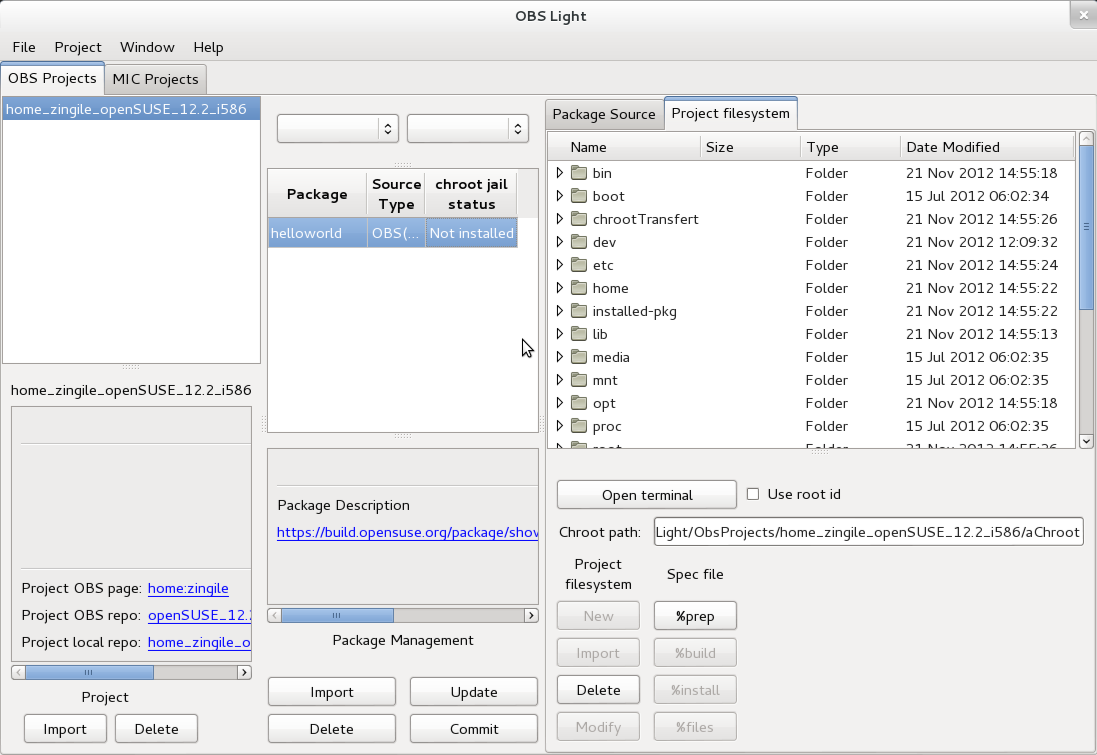
Go on the Project filesystem tab and click on New to generate the virtual filesystem of your project (openSuse 12.2 i586). You have to wait a while, OBS Light downloads all the required packages to generate your minimal virtual filesystem. You can see what's happening clicking on Show log on the small window which appears during the operation.
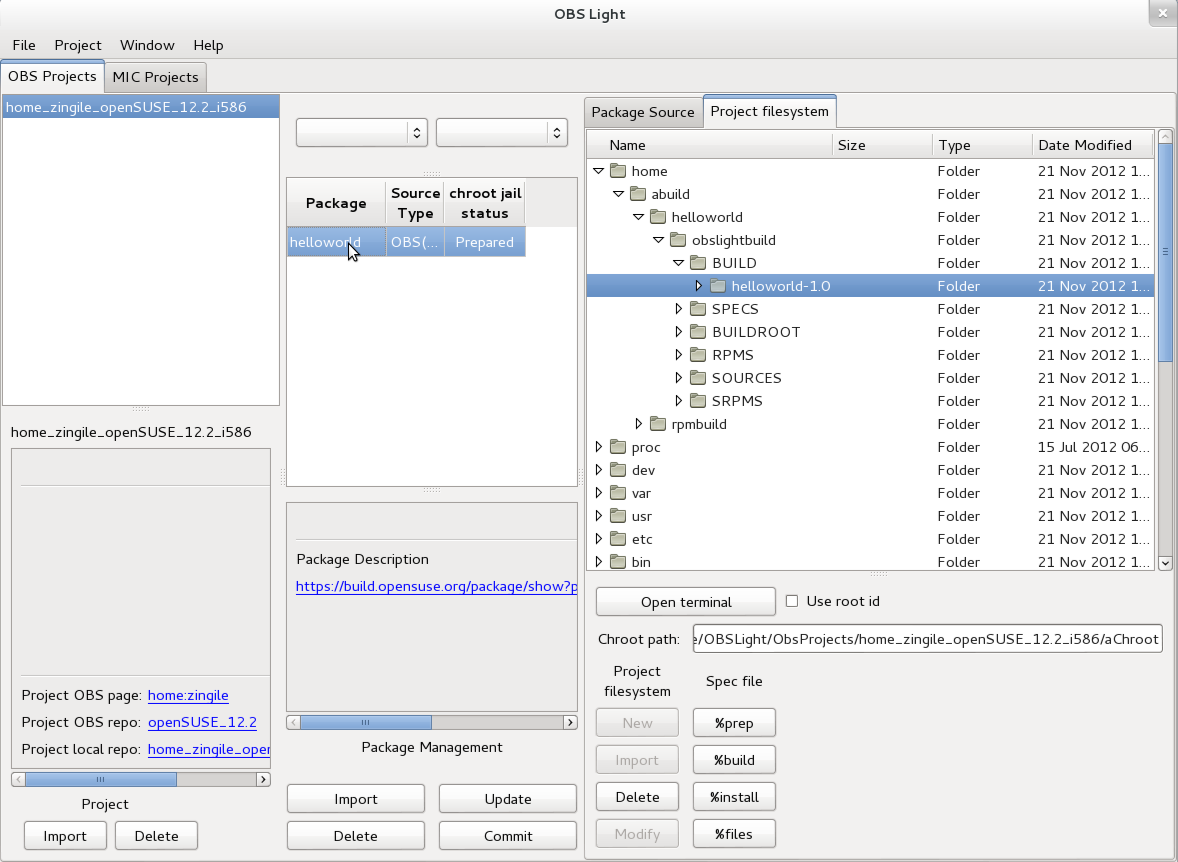
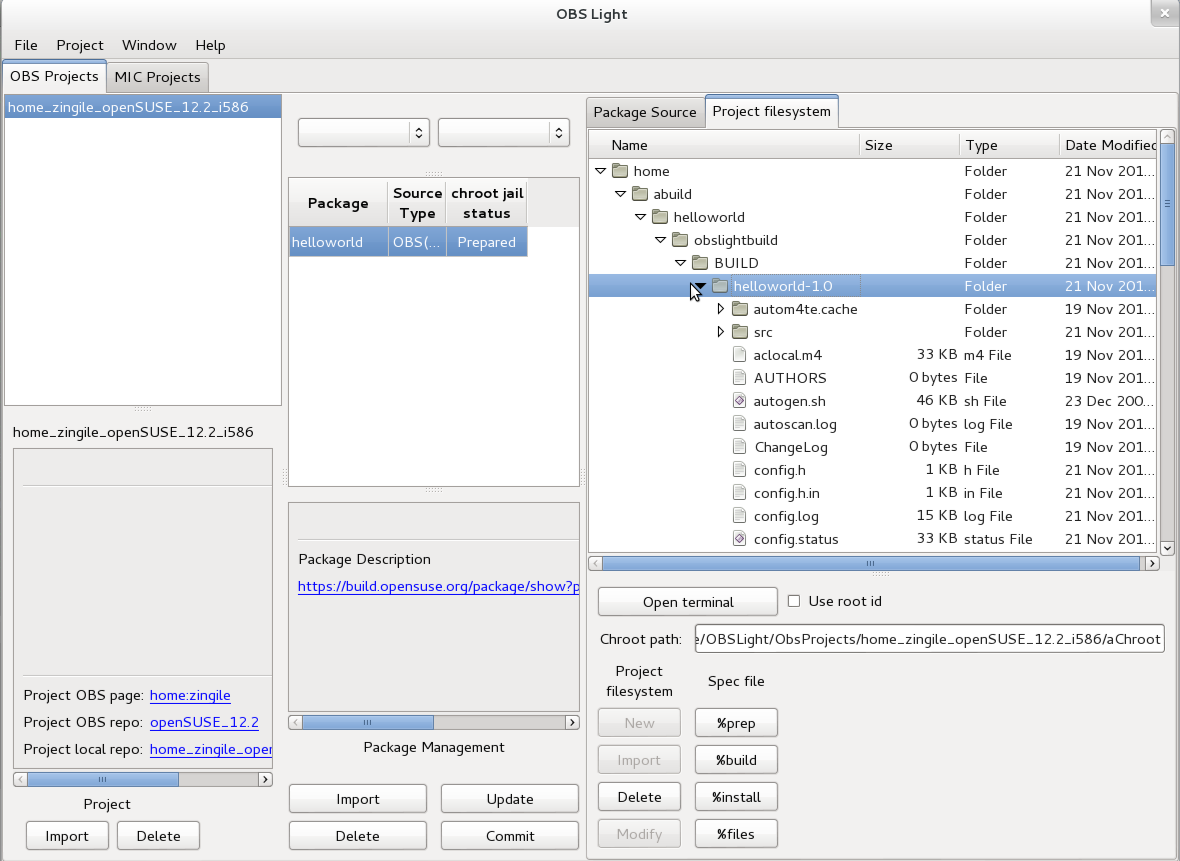
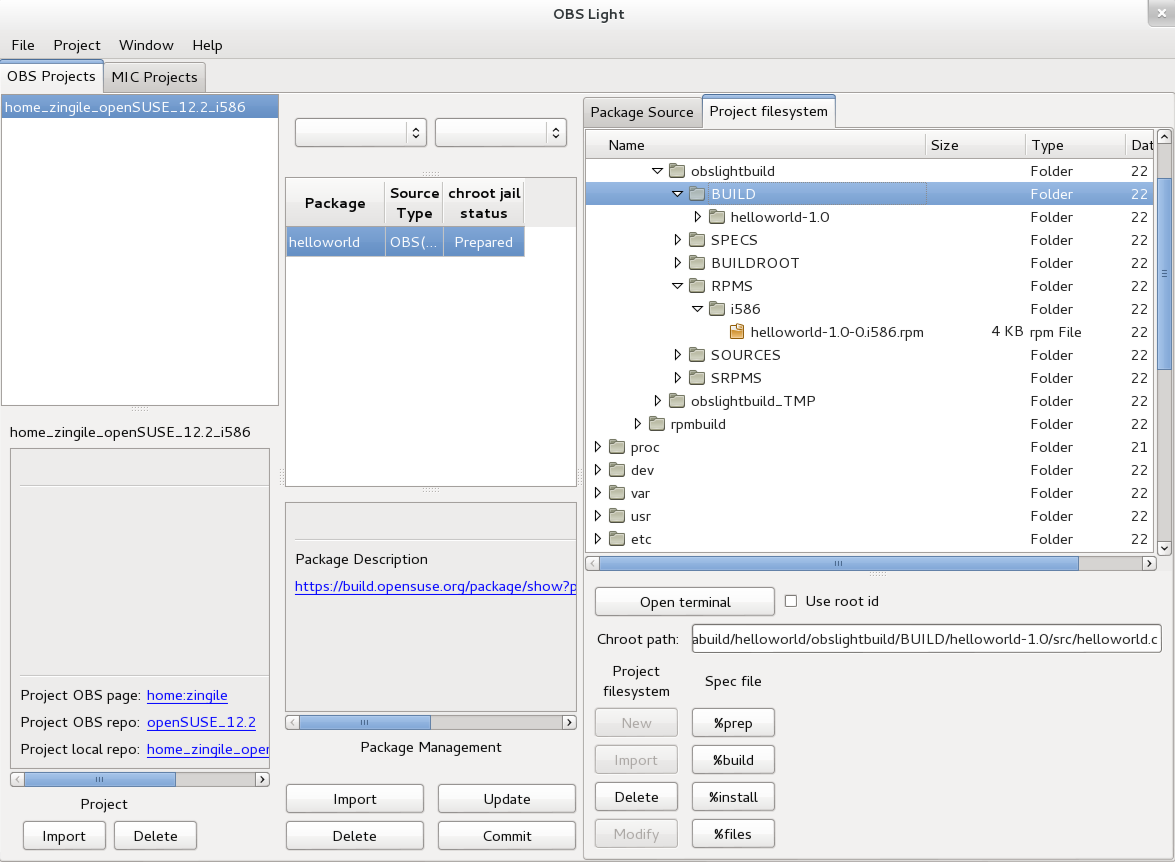
To perform a local build of your helloworld package, you must execute the different sections of the helloworld.spec file. This can be done by clicking successively on the associated buttons corresponding to the spec file in the Project filesystem tab of OBS Light GUI. Click on %prep to uncompress your sources in the virtual filesystem. Then re-select your helloworld package in the Package Management field of OBS Light GUI. You can see that the chroot jail status changed from "Not installed" to "Prepared". A dedicated folder with the same name of your package has also been created in your virtual filesystem to allow the local build. You can navigate in the helloworld-1.0 folder to see your sources.
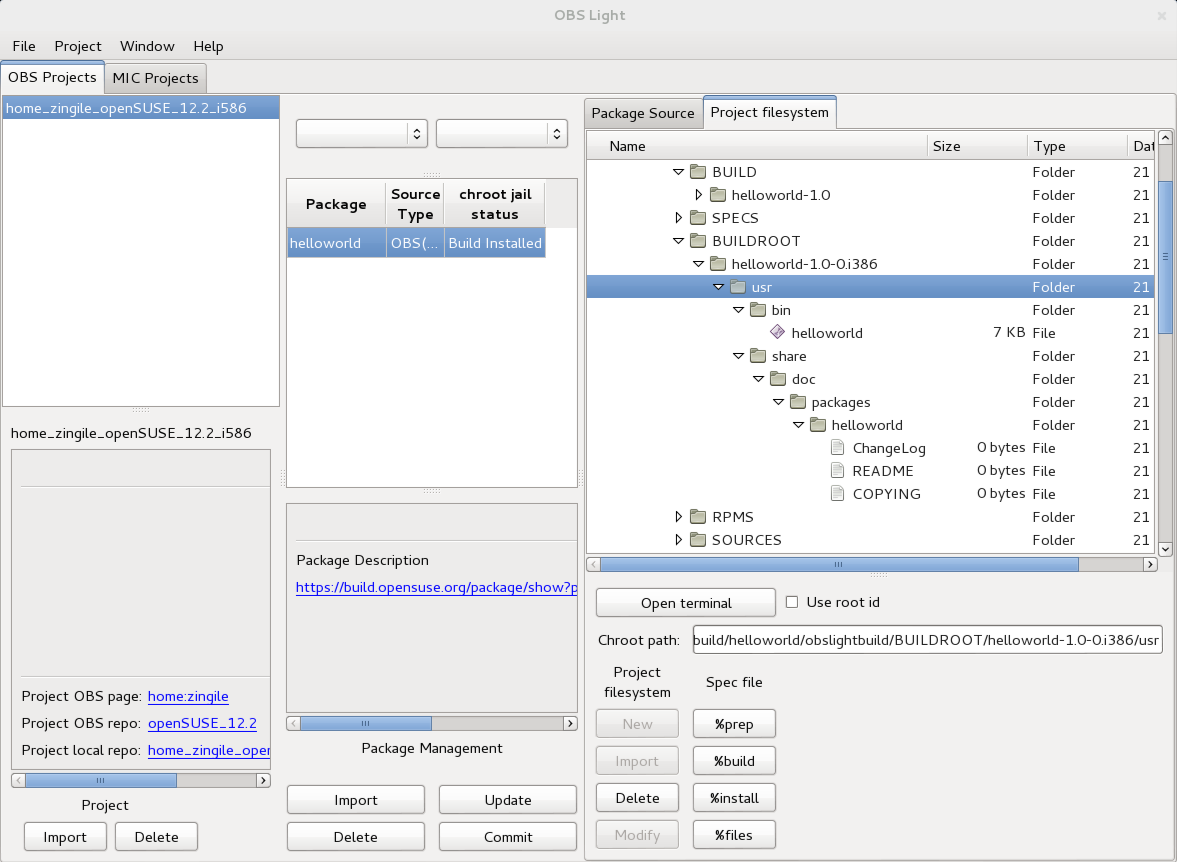
Click on %build to perform the local build of your package. Then click on %install to install the binary of your package and the associated files (README, COPYING, ChangeLog) in the BUILDROOT directory of your virtual filesystem. Re-select your helloworld package and unroll the BUILDROOT directory to verify that the path of your binary and your docs match to the paths that you desire. In the spec file we didn't add a prefix when we used the %configure macro.
%build
%configure
make %{?_smp_mflags}

%install
%make_install

%post

%postun

%files
%defattr(-,root,root)
%{_bindir}/helloworld
%doc ChangeLog README COPYING

%changelog
Since that we want to build the helloworld package for the openSUSE distribution, the default path for the binaries is /usr/bin and the default path for the documents related to the package are installed in /usr/share/doc/packages/helloworld. If you want to select an other prefix for the installation of the files of your built package, you just have to add the prefix option for the %configure macro in the spec file : %configure --prefix=/usr/local for example, to use the /usr/local path as your prefix.
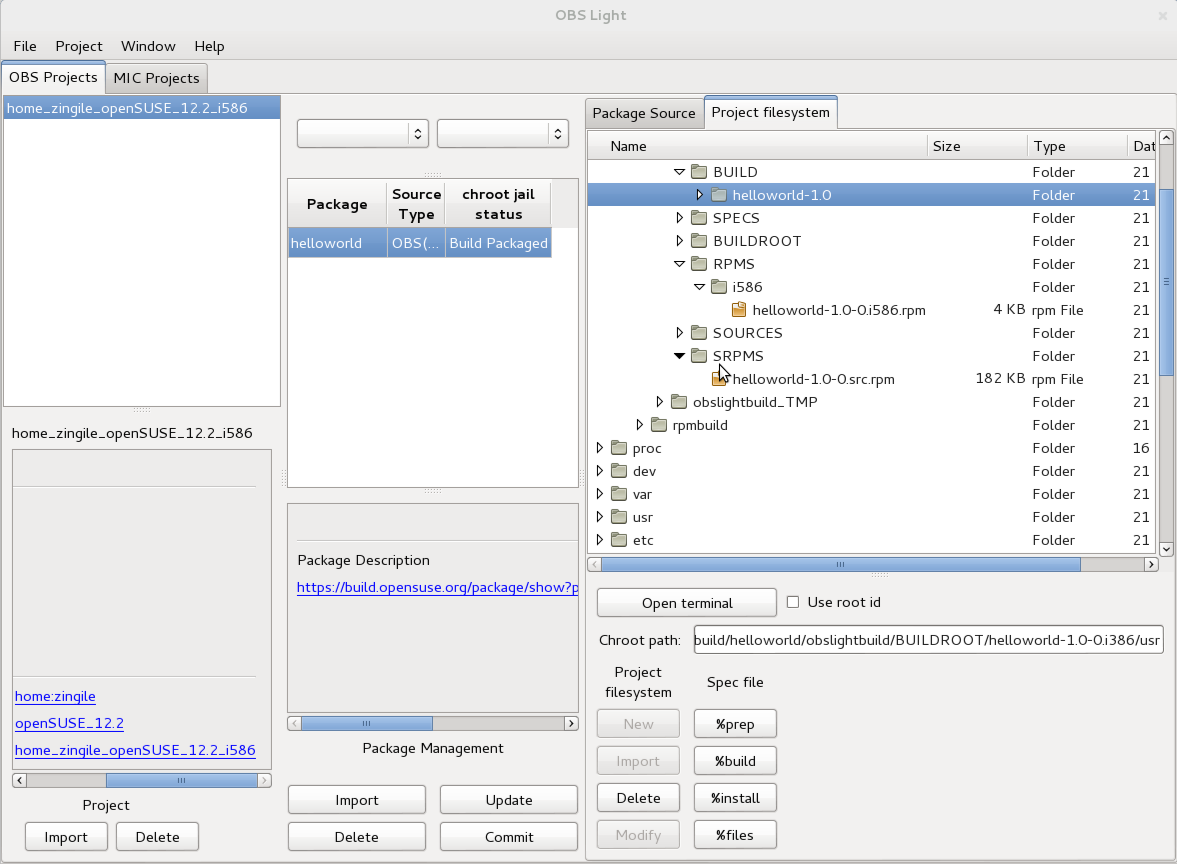
Click on %files to create your RPM package and the SRPM package of the helloworld package. This command will also clean all the installed files in your BUILDROOT directory. Then re-select your helloworld package and verify that the RPM package as been generated by unrolling the RPM directory.
Step 5: Commit your files on the OBS server with OBS Light and control the build status
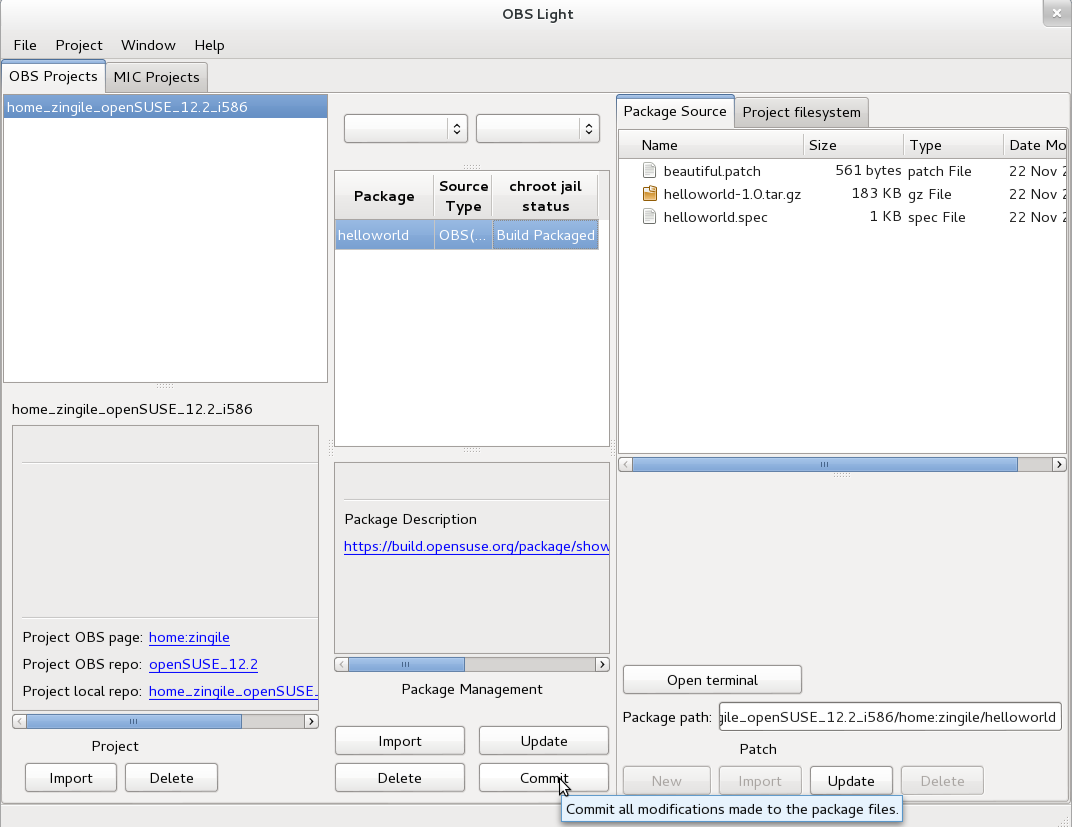
To commit your files in the remote OBS server click on Commit in the Package Management tab as bellow. A window will appear to invite you to put a comment on your commit. Fill it with what you want.
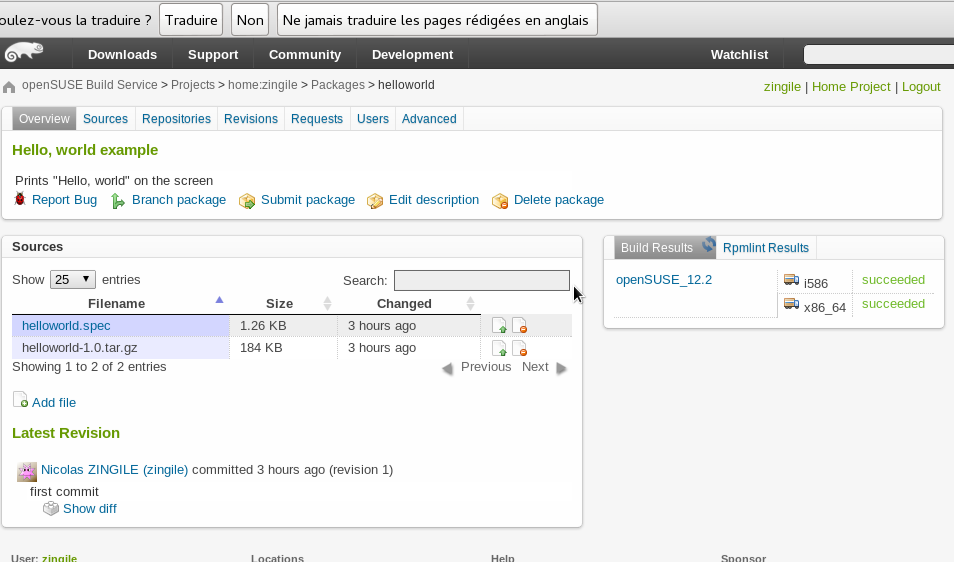
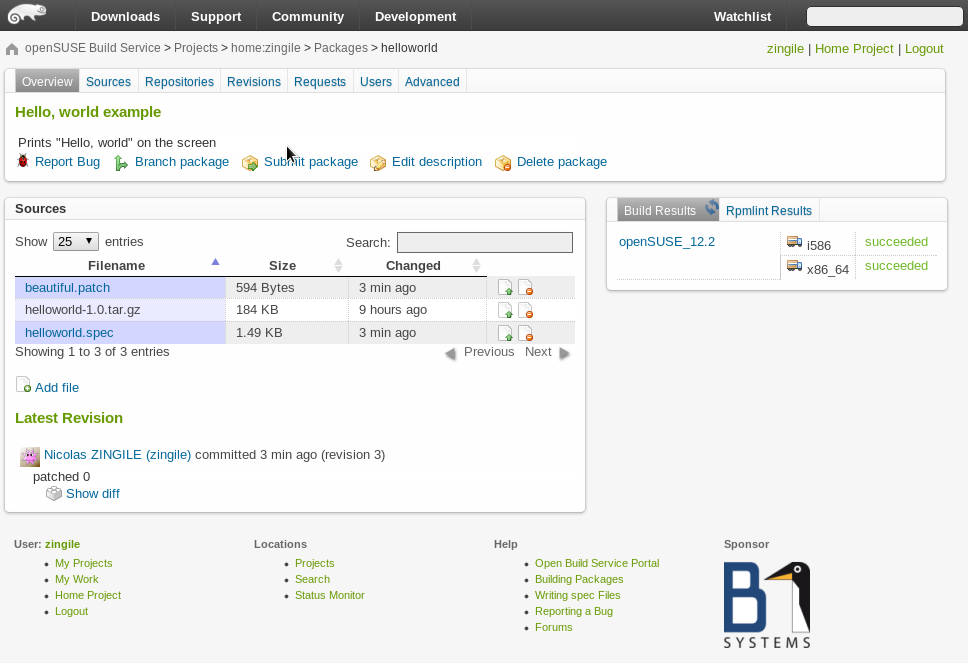
Then, log on the openSUSE OBS at https://build.opensuse.org/ and then click on Home Project. Click on your helloworld package. At the right side of the window, you can see the build status of the helloworld package. Verify that the status is succeeded. You should have a window like the image below:
Note: You may need to update the build status by clicking the Build Results button.
Step 6: Improve your package and create a patch with OBS Light
Now, your helloworld package build for an openSUSE 12.2 distribution, for the i586 (and x86_64) architectures. If you want to modify or improve your package, you need to create a patch. The following lines explain you the different steps to patch your source code.
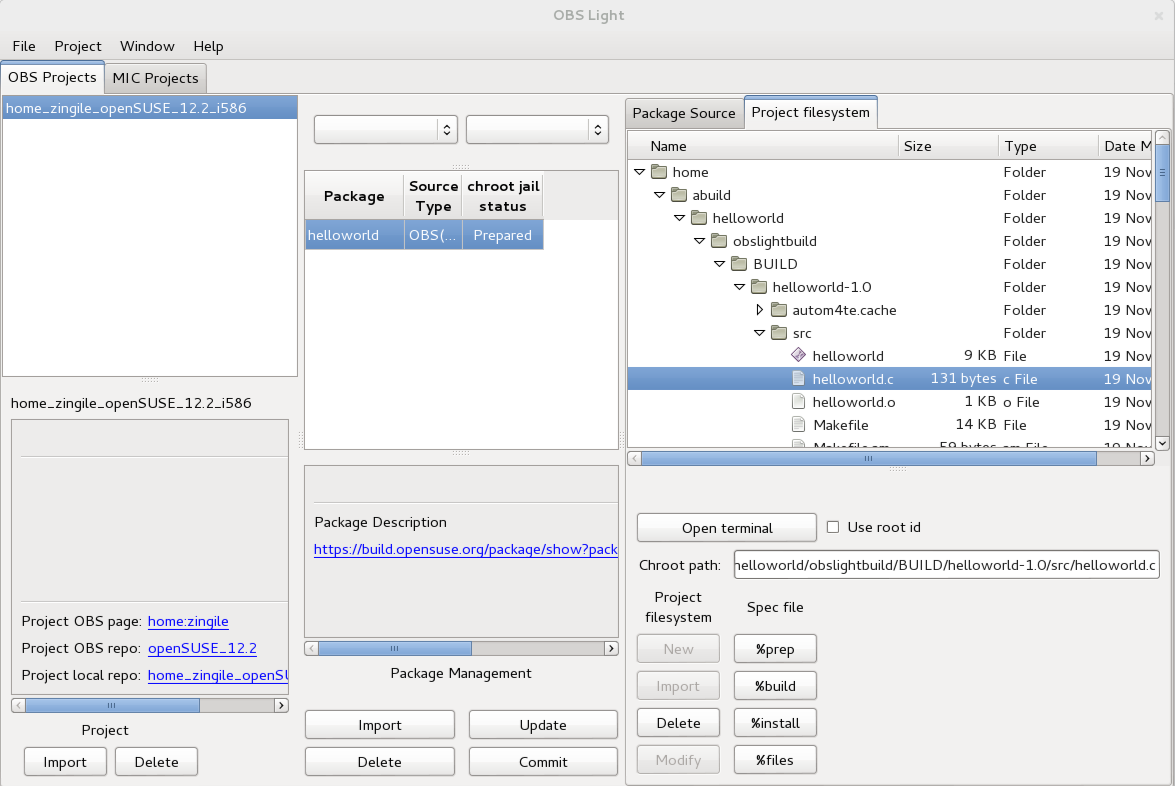
Navigate in the virtual file system as the below picture and open the helloworld.c file. The file will be opened with the default editor of your system.
Note: the file cannot be edited using the terminal of the virtual filesystem since vim is not installed in the virtual filesystem by default.
Make your changes
Modify the code as you want. For this lab, we will juste add a new line. The whole modified code looks as below:
#include <stdio.h>
#include <stdlib.h>

int main(int argc, char **argv)
{
   printf("Hello, world...");
   printf("Life is beautiful.\n");
   return EXIT_SUCCESS;
}
Then save your changes and close your editor.
Create your patch
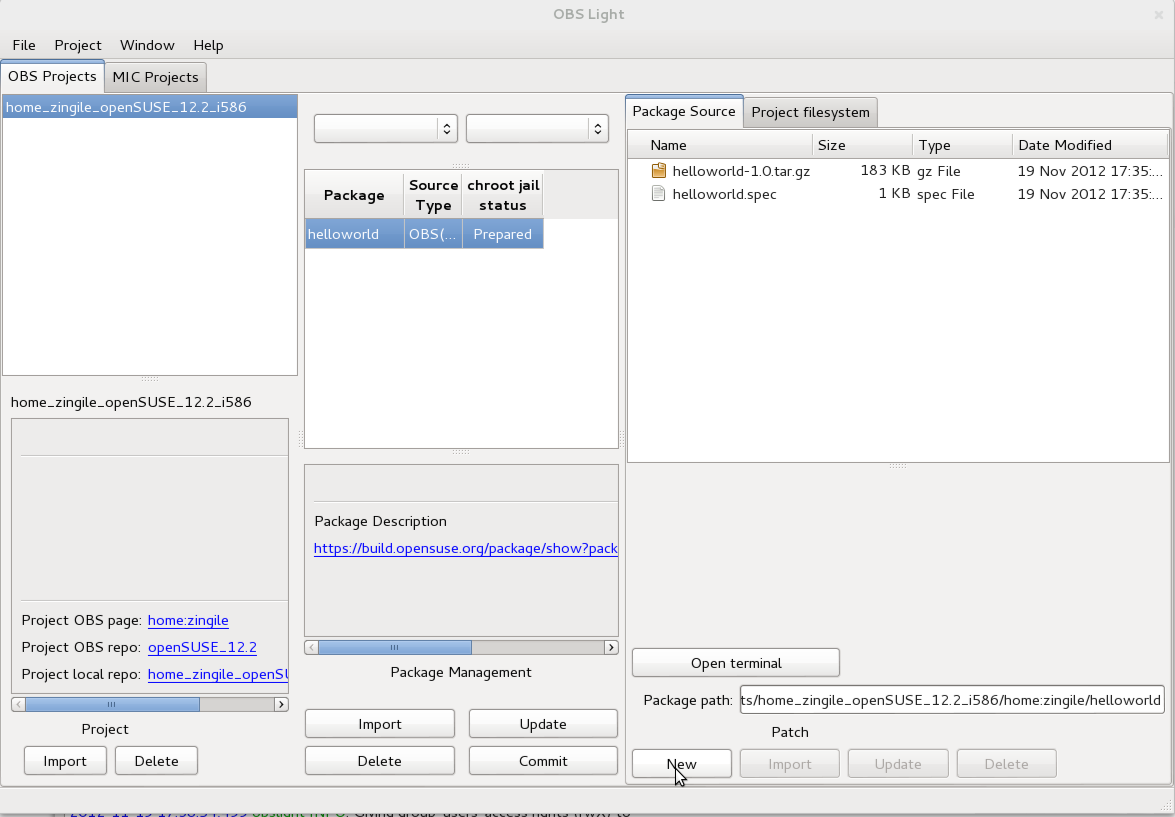
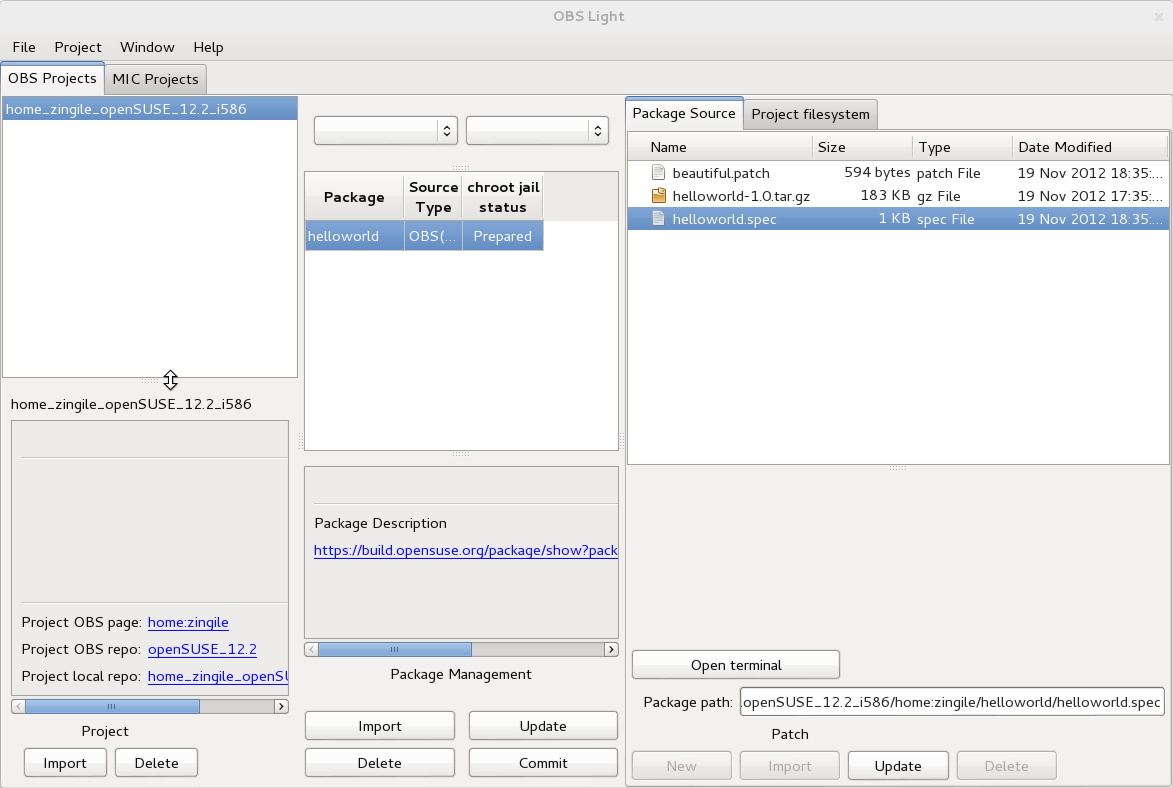
Back in the Package Source tab of OBS Light GUI and click on New to generate your patch. A box will appears to set up the name of the of the patch. Edit it with the name that your want. You juste have to be careful that the extension is .patch. Then validate. It will create a patch in your package source directory. The helloworld.spec file will be automatically updated taking into account the patch. For this lab, the patch is named beautiful.patch.
Perform a local build
Perform a local build to verify that your patched package can build locally. To do it, go on the Project filesystem tab of OBS Light GUI. Click successively on %prep, %build, %install, and files. Check that your RPM packages has been created.
Commit your changes
Commit your changes to the OBS server by clicking the Commit button in the Package Management field of OBS Light GUI. Do not forget tu put a message for your commit. Then, control that everything is Ok consulting the build status on the OBS server.
Autotools documentation
If you want to have a better understanding of autotools you can visit this page about the GNU build system.
Lab 2: Building a Tizen.org package from git repo in an OBS Light server appliance
Goal: I want to create a package on a OBS with git-buildpackage service.
We use a patched version of obs-service-tar_scm
The latest OBS Light server (devel release https://en.opensuse.org/index.php?title=openSUSE:OBS_Light_Appliances#Devel) includes that patched version.
- Configure your git connection on your OBS server:
Tizen Setup Development Environment
- Create your project on your local host:
osc -A https://obslightserver:444 co $PROJECT
- Create your package
cd $PROJECT
mkdir tzdata
- Create your service file
cat > tzdata/_service << EOF
<services>
  <service name="tar_scm">
  <param name="url">review.tizen.org:toolchains/tzdata.git</param>
   <param name="revision">master</param>
   <param name="scm">git</param>
    <param name="usegbp">yes</param>
    <param name="specFile">packaging/tzdata.spec</param>
  </service>
</services>
EOF
The line <param name="specFile">packaging/tzdata.spec</param> is optional. It's usefull if package has many spec files.
- Commit your package:
osc add tzdata
osc commit -m "- create tzdata package."
- Add Repositories to your project meta:
(sample)
 <repository name="standard">
   <path project="tizen.org:Tizen:Base" repository="standard"/>
   <arch>i586</arch>
 </repository>
- Run the service to upload and build with latest source code from Git
osc service remoterun $PROJECT
Note; to optimise network traffic you want to create local git clones on your network in order to only fetch the update. OBS server will do a clone each time, so you want that traffic to remain local to your network.
