SDB:Tutorial XBMC
Introduction
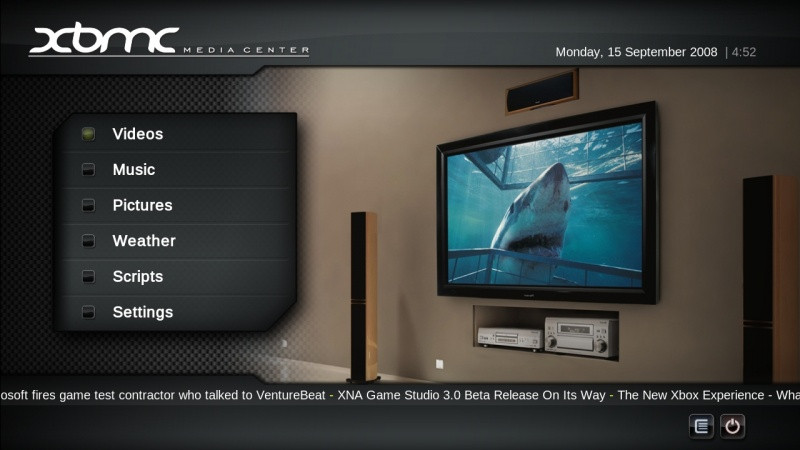
This document aims to present the methodology concerning the installation and creation of a Media Center using openSUSE 12.3 and XBMC software (available in the Packman repository Multimedia).
The steps in these concepts are based on the use of a laptop dedicated solely for use as a Media Server for streaming to DLNA / uPnP to a remote device.
It is not the scope of this document to cover the basic aspects of maintenance and administration of the operating system, we assume that the user is familiar with these tasks, as well as management of firewalls and security. This document has been prepared assuming the use of the concepts will be operated within a DMZ or a protected home network.
Installation
This topic will show general guidelines for creating a USB stick with a bootable image of the operating system installation, installing the operating system and software repositories needed for the installation of XBMC.
Requirements
- Existing Linux operating system to create the installation image
- USB stick with less than 1GB (for network installation image)
- Internet access to download the installation image and network installation
- Dedicated laptop to run XBMC
- Knowledge of maintenance and administration of operating systems Linux (openSUSE)
Creating An Installation Image
For this tutorial, we will use the image provided by the openSUSE Project called NET INSTALL, usually available at the following URL (32 and 64 bit):
http://download.opensuse.org/distribution/12.3/iso/
Bootable CD/DVD
Use your favorite CD/DVD burning software to add the downloaded .iso file to your optical media
USB Stick - Manual
In a terminal, run following command:
$ sudo dd if=/user_ID/path/to/openSUSE-12.3-NET-x86_64.iso of=/dev/DEVICE bs=8M
In the above you should make sure that DEVICE corresponds to the USB stick block device (eg, sdb, sdc, sdd).
USB Stick - Graphical
Alternatively, to create a bootable USB stick using a graphical interface, install SUSE Studio's ImageWriter:
$ sudo zypper in imagewriter
Once installed, you will need to run imagewriter as root (gnomesu imagewriter or kdesu imagewriter). When you see ImageWriter, you'll be able to follow the steps visually.
Once completed, the USB stick will contain a bootable image for network installation of openSUSE 12.3. You may need to configure your computer's BIOS to recognize your USB stick as a bootable device. (Check the manufacturer's documentation / motherboard).
Installing the Operating System
Install the operating system as you would normally, choosing various user tasks for a dedicated use. We recommend the following partition strategy (e.g. for a disk / dev / sda):
- 500mb partition for / boot (e.g. / dev/sda1)
- 40GB partition for the system (e.g. / dev/sda2)
- 4GB for SWAP partition (e.g. / dev/sda3)
- XX Gb partition for / home (e.g. / dev/sda4)
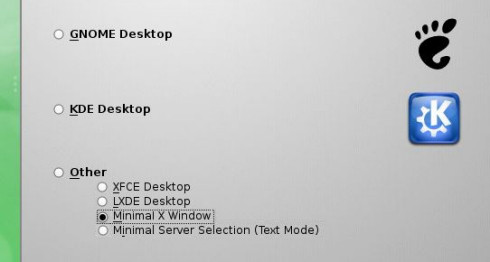
You should choose Minimal X; default. This will install the base operating system with an X Server and the window manager twm.
Adding Additional Repositories
After installing the operating system, the user must configure the repositories needed to install the necessary software. We RECOMMEND that before the next step is performed, you should configure the package manager to ignore Recommended packages. This is done in the file / etc / zypp / zypper.conf:
## Do not install soft dependencies (recommended packages)
##
## Valid values: boolean
## Default value: yes
##
installRecommends = no
Now, install the following repositories:
- Packman Essentials
- Packman Multimedia
 $ sudo zypper ar http://pmbs.links2linux.org/download/Essentials/openSUSE_12.3/ packman-essentials
 $ sudo zypper ar http://pmbs.links2linux.org/download/Multimedia/openSUSE_12.3/ packman-multimedia
The installation of these repositories is made through the following commands:
Once completed, do the following commands to run a local cache refresh and do an update to the operating system:
 $ sudo zypper ref
 $ sudo zypper update
Installing the Software
After the initial setup of the repositories and updating of your freshly installed operating system, it is recommended you run the following command so that it runs a 'distribution upgrade'; This operation allows you to replace components installed with the same components in different repositories (in this case, Packman.)
$ sudo zypper dup
After this operation we have the system ready for installation of XBMC and other necessary components. As openSUSE 12.3 offers a complete experience level of systemd, we recommend using a Display Manager that supports all the features you want, for example GDM (GNOME Display Manager).
$ sudo zypper install xbmc gdm
Configuration
In this section we present some settings that can be made so that it can run XBMC in Kiosk mode. Thus, the operating system will auto-login to user xbmc to run XBMC directly into kiosk mode session without X Window Manager.
Configuring the Operating System
Creating a system user of the service to run XBMC in kiosk mode:
$ sudo useradd -c "XBMC system user" -G users -m xbmc
Configuring the Display Manager
Display Configuration Manager (/ etc / sysconfig / displaymanager):
## Type:        string(kdm,kdm3,kdm4,xdm,gdm,wdm,entrance,console)
## Default:     ""
#
# Here you can set the default Display manager (kdm/xdm/gdm/wdm/entrance/console).
# all changes in this file require a restart of the displaymanager
#
DISPLAYMANAGER="gdm"
## Type:    string
## Default:
#
# Define the user whom should get logged in without request. If string
# is empty, display standard login dialog.
#
DISPLAYMANAGER_AUTOLOGIN="xbmc"
## Type:        yesno
## Default:     no
#
# Allow all users to login without password, but ask for the user, if
# DISPLAYMANAGER_AUTOLOGIN is empty.
#
DISPLAYMANAGER_PASSWORD_LESS_LOGIN="yes"
Configuring the Window Manager
Although we are not using a Window Manager (Window Manager), we set the XBMC itself as a 'Window Manager). This is done in the file /etc/sysconfig/windowmanager:
## Path:        Desktop/Window manager
## Description:
## Type:        string(gnome,kde4,kde,lxde,xfce,twm,icewm)
## Default:     kde4
## Config:      profiles,kde,susewm
#
# Here you can set the default window manager (kde, fvwm, ...)
# changes here require at least a re-login
DEFAULT_WM="XBMC"
NOTE: The value in the key DEFAULT_WM XBMC should be used in the same file that defines the X Session of XBMC (/ usr / share / xsessions / XBMC.desktop).
At this point, the user must restart the machine. Once rebooted, the machine will boot directly into XBMC (xbmc user with home in / home / xbmc).
Extras
This section includes some extras that may be attractive to some users. Although not mandatory, some extra functionality that can be interesting for many users.
systemd - Disable Laptop Lid Power Control
This operation allows the laptop to be closed without hibernating or suspending. This way the user can have the laptop closed without corrupting any running applications. Edit the file /etc/systemd/logind.conf:
#  This file is part of systemd.
#
#  systemd is free software; you can redistribute it and/or modify it
#  under the terms of the GNU Lesser General Public License as published by
#  the Free Software Foundation; either version 2.1 of the License, or
#  (at your option) any later version.
#
# See logind.conf(5) for details

[Login]
#NAutoVTs=6
#ReserveVT=6
#KillUserProcesses=no
#KillOnlyUsers=
#KillExcludeUsers=root
#Controllers=
#ResetControllers=cpu
#InhibitDelayMaxSec=5
#HandlePowerKey=poweroff
#HandleSuspendKey=suspend
#HandleHibernateKey=hibernate
#HandleLidSwitch=suspend
HandleLidSwitch=ignore
#PowerKeyIgnoreInhibited=no
#SuspendKeyIgnoreInhibited=no
#HibernateKeyIgnoreInhibited=no
LidSwitchIgnoreInhibited=yes
Enable XDMCP Protocol
To allow remote access via XDMC clients, and not use the physical display of the laptop, the following settings must be made in the file /etc/sysconfig/displaymanager:
## Type:        yesno
## Default:     no
#
# Allow remote access (XDMCP) to your display manager (xdm/kdm/gdm). Please note
# that a modified kdm or xdm configuration, e.g. by KDE control center
# will not be changed. For gdm, values will be updated after change.
# XDMCP service should run only on trusted networks and you have to disable
# firewall for interfaces, where you want to provide this service.
#
DISPLAYMANAGER_REMOTE_ACCESS="yes"

## Type:        yesno
## Default:     no
#
# Allow remote access of the user root to your display manager. Note
# that root can never login if DISPLAYMANAGER_SHUTDOWN is "auto" and
# System/Security/Permissions/PERMISSION_SECURITY is "paranoid"
#
DISPLAYMANAGER_ROOT_LOGIN_REMOTE="no"

## Type:        yesno
## Default:     yes
#
# Let the displaymanager start a local Xserver.
# Set to "no" for remote-access only.
# Set to "no" on architectures without any Xserver (e.g. s390/s390x).
#
DISPLAYMANAGER_STARTS_XSERVER="yes"

## Type:        yesno
## Default:     no
#
# TCP port 6000 of Xserver. When set to "no" (default) Xserver is
# started with "-nolisten tcp". Only set this to "yes" if you really
# need to. Remote X service should run only on trusted networks and
# you have to disable firewall for interfaces, where you want to
# provide this service. Use ssh X11 port forwarding whenever possible.
#
DISPLAYMANAGER_XSERVER_TCP_PORT_6000_OPEN="yes"
NOTE: The firewall must be set to allow traffic on port 6000.

