SDB:SSH tunnels from Microsoft Windows
This article is about using SSH tunnels from Microsoft® Windows®.
Required Software
- Putty
- A free Windows telnet/ssh client. The examples presented here are based on version 0.53. Putty can be downloaded from the Putty Homepage. Once downloaded, install the software with all default options.
Note: You can also use SSH from the Windows command line by installing Cygwin.
Putty General Parameters
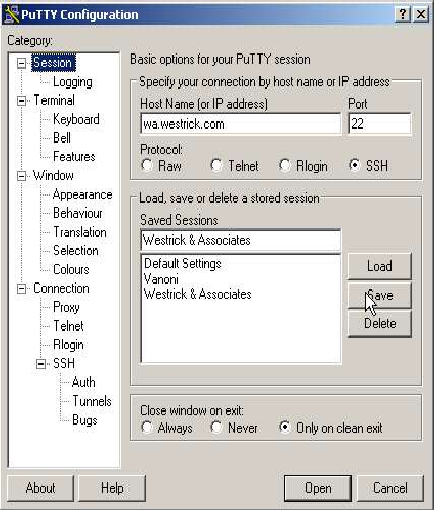
Once installed, putty can be configured as follows:
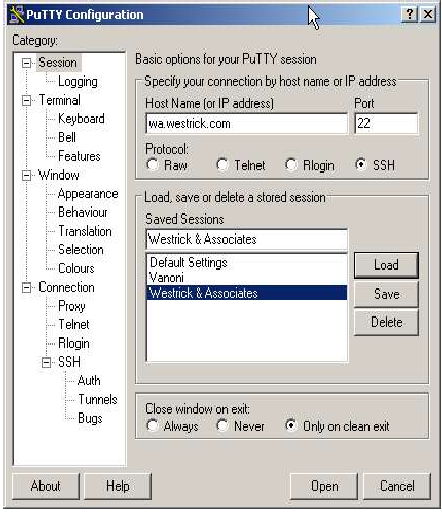
Double Click the Putty Icon
![]()
|
Session
|
|
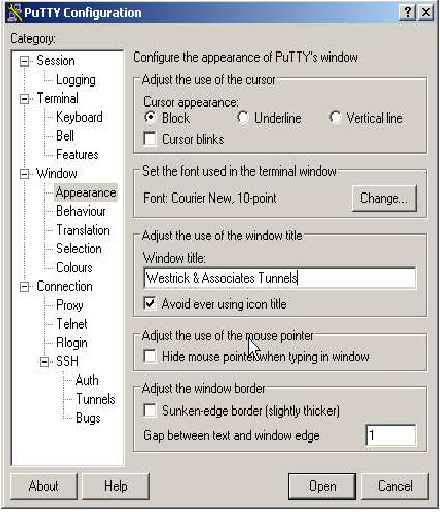
Window Appearance
|
|
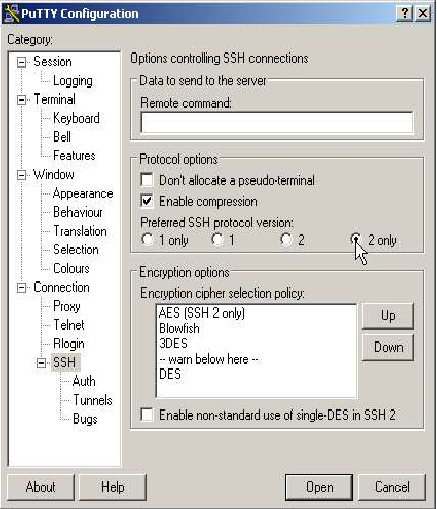
SSH
|
|
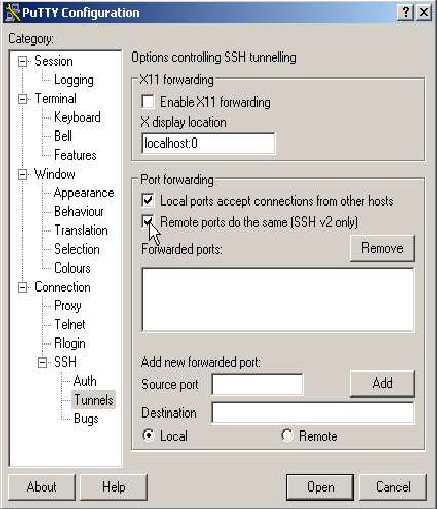
SSH Tunnels
|
|
Session (Save Again!)
|
The Example Tunnels
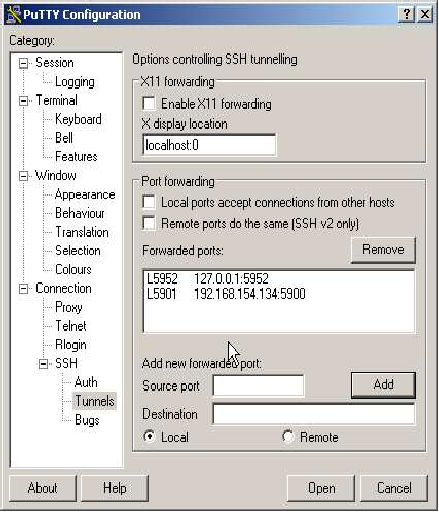
Here we will define the actual tunnels. To do this we'll define 2 example tunnels.
First Tunnel
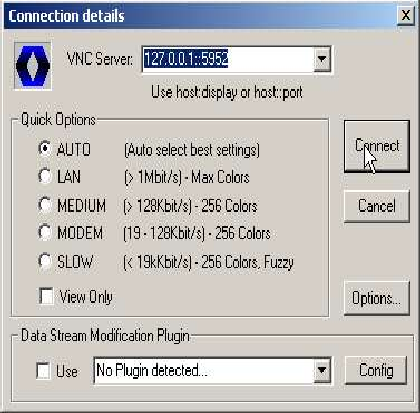
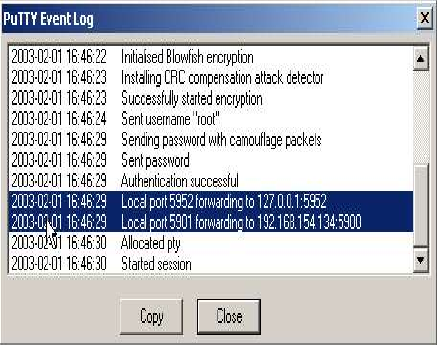
The first connection will connect a (local) port on your PC with a port on the remote server. The port on the server is used to allow VNC connections to the server so this will allow you to get a login on the remote server, via an encrypted, compressed tunnel! The local port we will use is 5952, and we will connect it to the same port on the server machine. To do this we enter local port 5952. The remote value is the address of the “machine:port” to connect to the remote end of the tunnel. Note: That the address specified is used on the remote side of the tunnel, so that here 'localhost' means the server, not your machine! The address for localhost is 127.0.0.1 so the “remote” value for our first connection is 127.0.0.1:5952.
Second Tunnel
For our second example we will connect our local port 5901 to another windows machine behind the server. The machine is 192.168.154.134, and is running VNC on port 5900. Here the remote value is 192.168.154.134:5900
Summary
| Description | local port | Remote IP | remote port |
|---|---|---|---|
| Connection to VNC on server | 5952 | 127.0.0.1 | 5952 |
| Windows PC behind server | 5901 | 192.168.154.134 | 5900 |
Configuring the tunnels
|
SSH Tunnels
First Tunnel
Second Tunnel
|
|
|
|
Starting up the Tunnels
Here we will start the tunnels so that they can be used / tested… First the manual method...
br> |
Double Click the Putty Icon
|

|
Load Saved Session
|
|
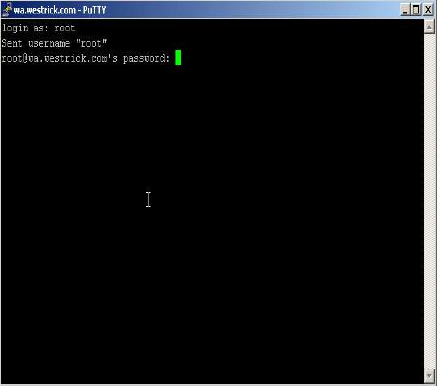
Sign On
|
Closing The Tunnels
To close the tunnels simply enter “exit” in the “PUTTY” window, or alternatively close the window!
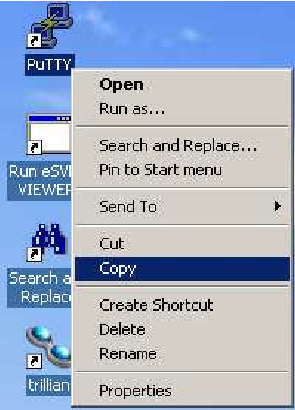
Creating a Desktop Shortcut
|
Copy Putty Icon
|

|
Paste To Desktop
|
|
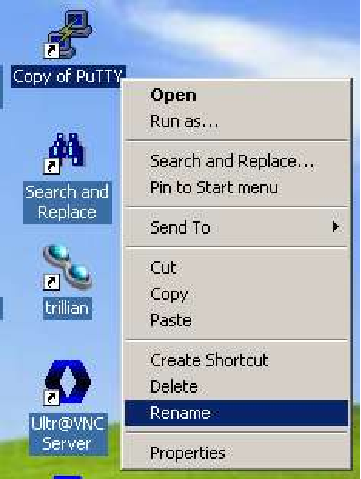
Rename Copy Of Putty
|

|
Enter new name
|
|
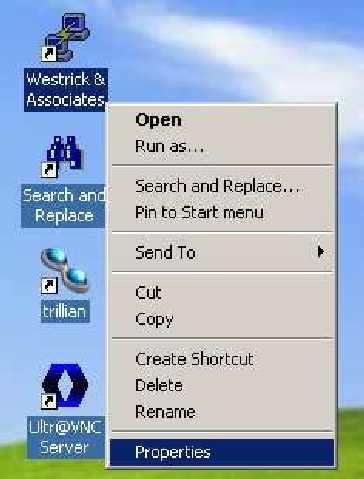
Open properties Dialog
|
|
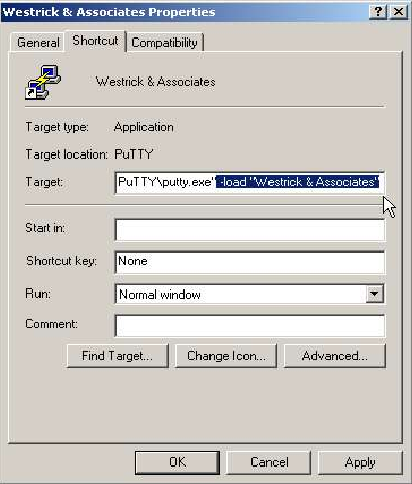
Modify the Shortcut
|
Using the Tunnels
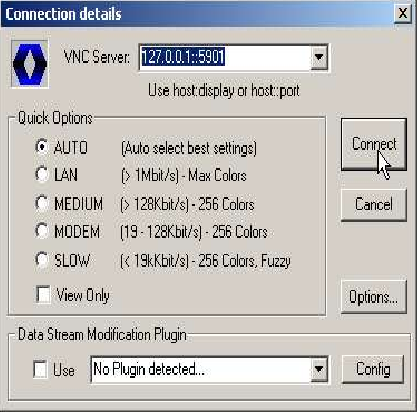
Of course here I can only explain how to use the example tunnels we setup above. Both tunnels are for VNC connections.
Starting the Tunnels
First you need to “start” the tunnels by double clicking the prepared “Westrick &
Associates” icon, and then logging into the server.
| [[Image:{{{2}}}|200px|link=]] |
The First Tunnel |
 br> |
Double click the VncViewer Icon (In this case UltraVnc)
|
|
|
| [[Image:{{{2}}}|200px|link=]] |
The Second Tunnel |
br> |
Double click the VncViewer Icon (In this case UltraVnc)
|
|
|
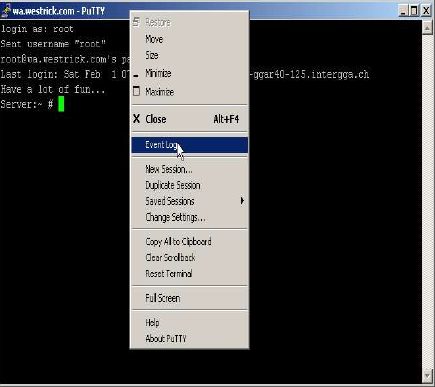
Testing and Debugging Tunnels
Putty offers an "Event Log" which is useful in checking tunnels and/or debugging problems with tunnels. This function is accessed as follows:
|
|
|
|
|
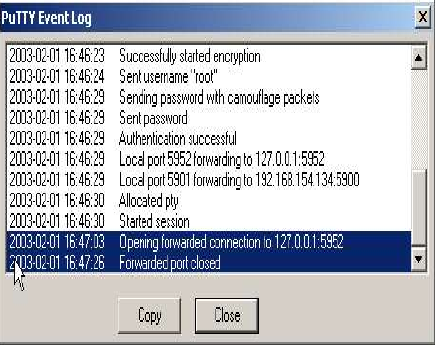
When a tunnel is accessed a line is added to this window like the second to last line on the right: When a connection is closed a line like the last line is added to the event log.
|
Conclusion
After following this document you should be able to setup SSH tunnels from a M$ Window machine, using putty.
We've seen that before you start defining the tunnels you have to know exactly what it is you want to tunnel, and you need that address of the server running SSH with a valid account on that machine.
This is usually the more difficult part of the job, so a little documentation before starting would help. I started with something like this:
- Server
- wa.westrick.com
- User name
- secret
- Password
- even more secret
| Description | local port | Remote IP | remote port |
|---|---|---|---|
| Connection to VNC on server | 5952 | 127.0.0.1 | 5952 |
| Windows PC behind server | 5901 | 192.168.154.134 | 5900 |
I hope my efforts here help someone, and that I've not been wasting my time.