SDB:Gfxboot
Overview
The graphical boot screen in openSUSE is an extension to the usual text-based bootloaders grub, lilo and isolinux. From a user perspective there is no visible difference between them. This article describes how to configure and modify the boot screen.
You'll need package gfxboot (is normally installed on openSUSE) and for some of the examples below you will need gfxboot-devel, qemu and syslinux.
Working with graphical boot screens
Bootloaders, such as grub, have been adapted to support both graphics and animations. The graphics and animations are contained in the archive file /boot/message, assuming, of course, that the partition used by the bootloader is mounted on /boot. /boot/message will be found automatically by a compatible bootloader according to its configuration file.
gfxboot essentially works with the /boot/message file
- to update it according to themes found in /usr/share/gfxboot/themes
- to manage the content of the configuration file gfxboot.cfg contained in the archive file /boot/message
The gfxboot-devel package and a virtual machine provider package, such as qemu is required to develop and test new themes.
There are only 2 themes supplied with openSUSE [at 11.0], namely openSUSE and upstream.
openSUSE theme
This theme is full featured, with an animation for a countdown timer and a penguin animation which appears randomly, with a probability which can be set between 0 and 100%. [to see the penguin animation, set penguin=1 in gfxboot.cfg file within the /boot/message archive as described below and reboot]. The openSUSE theme also compiles with the gfxboot-devel package.
upstream package
This is a partial theme, with alternative graphics that can be substituted for the openSUSE theme using gfxboot. It does not compile with the gfxboot-devel package.
Deciding how to go about configuring your boot screen
Single User environment
In a single user environment, it will be enough to work with the default openSUSE theme as packaged in /boot/message. You can use either cpio or gfxboot to access the archive. Both these approaches are described below.
As already described, the openSUSE theme already comes with features, such as the penguin animation, which you may not require. The penguins can be disabled by editing gfxboot.cfg within the /boot/message archive and you can set your own backgrounds by adding or substituting files within the cpio archive and editing gfxboot.cfg accordingly.
This will probably provide enough scope for most users to achieve the desired boot screen.
Corporate Branding environment
Corporate Branding may require
- more sophistication in the bootscreen
- a sufficient number of installations to justify the effort
gfxboot-devel will allow animations with some complexity to be created. An example would be the penguins animation in the openSUSE theme.
A full description of gfxboot-devel requires a separate article. However, in the absence of this, the available info resources are
- the openSUSE theme in /usr/share/gfxboot/themes, which compiles under gfxboot-devel
- a programming manual in /usr/share/doc/packages/gfxboot-devel, which covers syntax, but has no overview information on the process of creating a theme
Creating a new theme with gfxboot-devel is not for the faint hearted. If you have programming skills, however, you may be able to get started from the command line by using the Makefile in the openSUSE theme:
cd /usr/share/gfxboot/themes/openSUSE
make
Activating the boot screen
The boot screen is a cpio archive, usually /boot/message in the installed system and /boot/i386/loader/bootlogo on DVD. This archive must contain all files gfxboot needs (except when using isolinux, see below).
grub
Add a line like
gfxmenu (hd0,1)/boot/message
to /boot/grub/menu.lst.
lilo
Add
message=/boot/message
to lilo.conf. lilo detects automatically if /boot/message is just a text file or a gfxboot archive.
isolinux
isolinux is the bootloader used on DVD. The main difference to grub and lilo is that gfxboot can read files directly from DVD. So not all files have to be in the gfxboot cpio archive. Only the gfxboot core (usually named init) needs to.
Add, e.g.
gfxboot bootlogo
to isolinux.cfg.
gfxboot archive
The gfxboot archive /boot/message is a usual cpio archive. You can in principle look at it with
cpio -tv </boot/message
unpack it to the current directory with
cpio -i </boot/message
and repack it with
find . | cpio -o >/boot/message
But to make things easier there is the gfxboot tool. Here are some basic commands:
- list gfxboot archive (default is /boot/message):
gfxboot --ls
- add or replace files (e.g. background image):
gfxboot --add-files back.jpg
- view a file (e.g. the config file):
gfxboot --show-file gfxboot.cfg
- a shorthand for the above:
gfxboot --show-config
There are a lot more commands. Try gfxboot --help for a complete list.
gfxboot on DVD
As mentioned before, using isolinux has the advantage that gfxboot can read files directly from the ISO9660 filesystem (note: no Rock Ridge extensions). In this case you can pass the directory with the gfxboot files as argument to gfxboot.
E.g., to try a new background picture you can do:
gfxboot -a cd/boot/i386/loader --add-files back.jpg -b isolinux --test --preview
Archive size restrictions
gfxboot currently reserves 8 MB for itself. The archive is loaded into this memory at startup. So it should be somewhat smaller than 8 MB to leave enough free working space for gfxboot.
Older version of gfxboot had significantly tighter memory restrictions. But I hope 8 MB is enough for typical use cases.
gfxboot config file
A lot of internal variables can be modified by editing the gfxboot config file gfxboot.cfg. The file uses a typical INI-file syntax. If you don't want to edit it directly, gfxboot has some options to help you:
- print the complete config file:
gfxboot --show-config
- change an entry (variable 'beep' in section 'boot'):
gfxboot --change-config boot::beep=0
- remove an entire section:
gfxboot --rm-section 800x600
Note that there is no option to create a section. Sections are automatically created when you add a variable to it. See the screen size example below.
Modifying the boot screen
gfxboot comes with different themes. To save space /boot/message does not contain all files (e.g. not all translations). The complete set of files for a theme is installed in /usr/share/gfxboot/themes/<theme>. But if you simply using gfxboot to update /boot/message, then most useful files can be found in /etc/bootsplash/themes, although the bootsplash files are intended for providing a graphical screen while the kernel boots and for the console login screen.
Testing your changes
You probably don't want to reboot to review your lates changes. Luckily gfxboot has a test feature build in. A virtual machine must be installed for it to work (qemu works best, but vmware, vbox or bochs are supported, too).
Simply add --preview to your gfxboot command. This will take your boot screen, put together a mini system and run it in a virtual machine.
If you add --test as well, no changes are made to your original boot screen config.
For example:
gfxboot --change-config penguin=100 --test --preview
shows you the penguin theme without modifying /boot/message.
Themes
If you have several themes installed, you can switch to theme foo by running
gfxboot --update-theme foo
Languages
There are quite a number of languages supported but not all are added to the gfxboot archive.
gfxboot --add-languages de_DE fr_FR ja_JP --default-language ja_JP
adds German, French and Japanese and sets the default language to Japanese.
Keymaps
To switch to a Czech keyboard mapping, do:
--change-config keymap=cs_CZ
Background picture
The background picture is named back.jpg. You can simply replace it (must be jpeg image):
gfxboot --add-file back.jpg
Menu position
Maybe you like the menu more to the left:
gfxboot --change-config 800x600::mainmenu.pos=70,10
Menu size
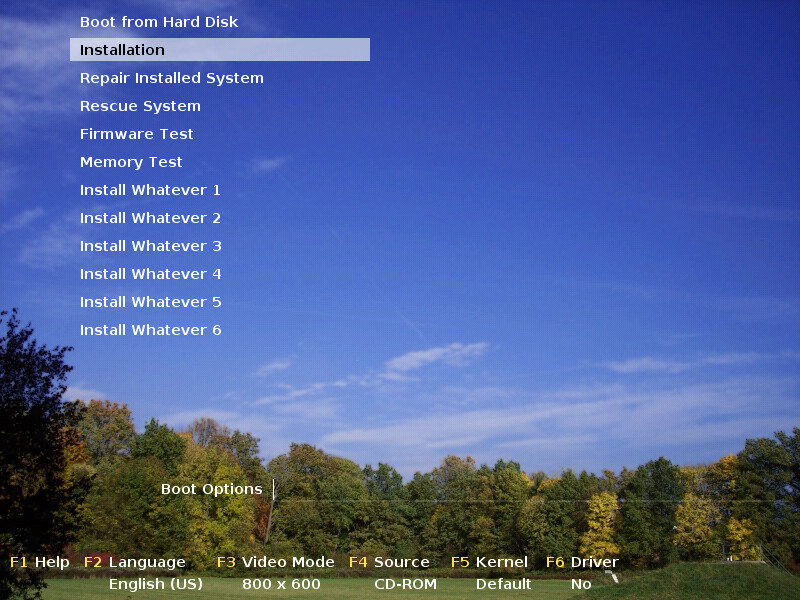
Normally, only 8 entries are shown at a time (you can scroll for more). If you want more, do, e.g.
gfxboot --change-config mainmenu.entries=12
Colors
Maybe yellow looks better (colors are 24 bit rgb values):
gfxboot --change-config mainmenu.normal.fg=0xffff00
Font
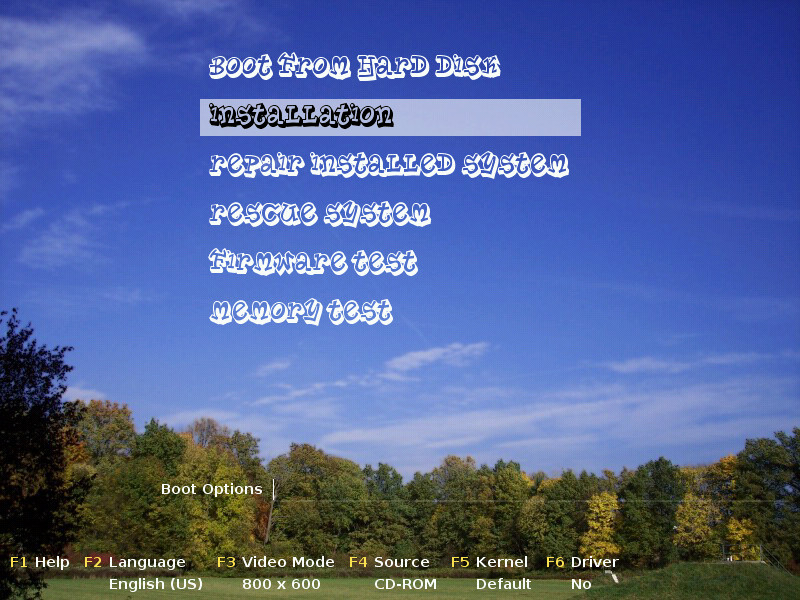
Replacing the font is a bit tricky if you want it to include the glyphs for all supported languages. If you need only typical european scripts, however, it is quite easy:
- first, install the gfxboot-devel package
- then run, e.g.:
gfxboot-font -v -c ISO-8859-15 -f planetbe:size=24 big.fnt >big.log
This gets the glyphs from font 'Planet Benson 2'. You can use every font FreeType 2 can render. Note that you have to give the real filename as argument, not the font name. In this case planetbe.ttf from the free-ttf-fonts package.
The log file is useful for debugging. It shows from which font the glyphs have been taken and how they look like.
Now that you have the new font, you can use it:
gfxboot --change-config font.large=big.fnt 800x600::mainmenu.pos=200,50
Screen size
gfxboot relies on the VESA Video BIOS for setting a video mode. So please be aware that not all screen sizes you have on your KDE or GNOME desktop are available. If in doubt, check
hwinfo --framebuffer
for a list of modes. gfxboot prefers 24 bit modes but will fall back to 16 bit modes if no suitable 24 bit mode is available.
Create a new section in gfxboot.cfg for your new screen size:
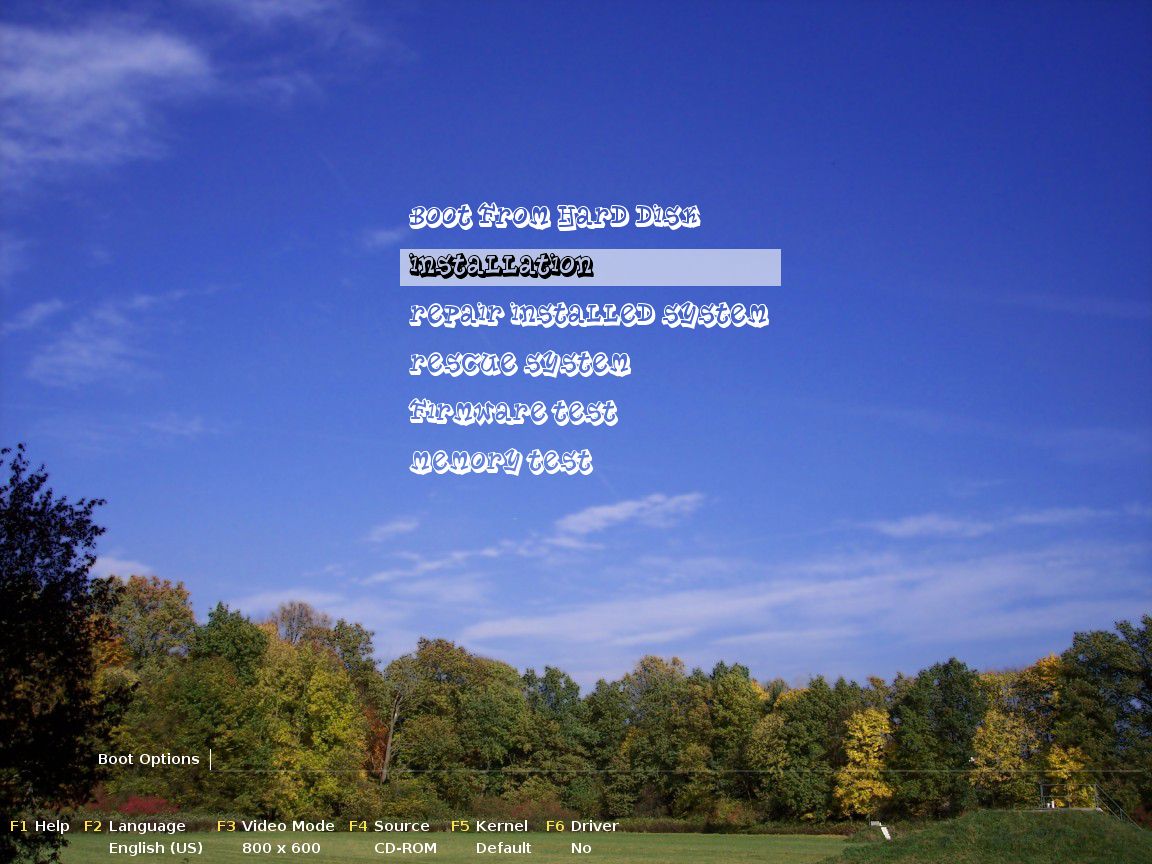
gfxboot --change-config 1152x864::screen.size=1152,864 1152x864::mainmenu.pos=400,200 1152x864::bootopt.pos=200,750
gfxboot --change-config layout=1152x864,boot
# or layout=1152x864,install if for DVD
Menu entries
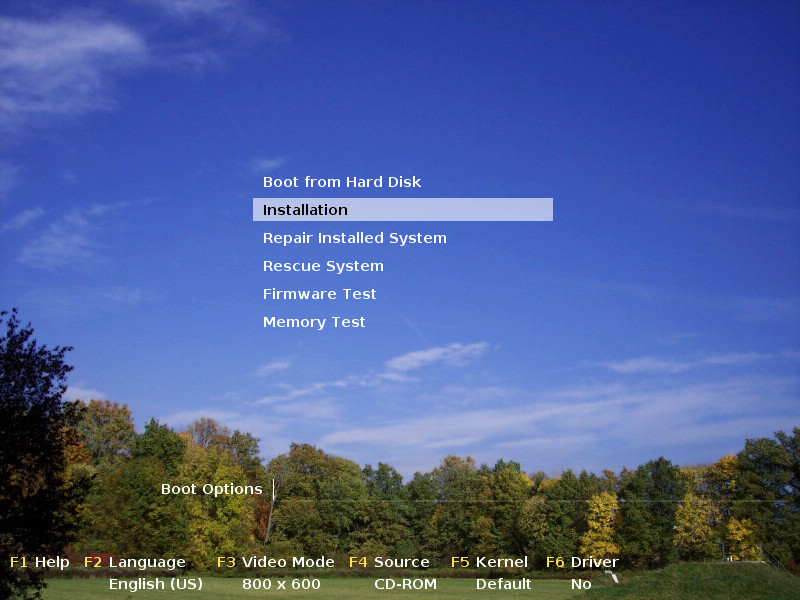
If you look at the pictures above you will see that although isolinux.cfg has just labels like rescue, the graphical screen shows Rescue System. That's because there is an internal list of menu entry strings it should replace.
If you don't want to recompile the theme there are two ways to influence how gfxboot prints menu labels:
- it replaces underscores ('_') with spaces (lilo & isolinux don't allow spaces in labels); if you dont' want this, turn it off (gfxboot --change-config _2space=0)
- if you need translations for your menu, you can create files translations.<locale> that consist of alternating lines with original text and translations. For example:
# cat translations.de_DE
install_xxx
Installiere XXX
install_foo
Installiere Foo
Note that you will almost certainly need a file translations.en with the second method.
See also
SDB:KIWI Cookbook Splash Screen describes the process of setting up customized splash screens for the boot process.
Code on Github See Source Code on Github.


