YaST Image Creator
This article needs to be tested for a newer version. If you are using this guide on the newer version and you find the guide up-to-date to this version, please add the version number to the Knowledge bar. Please refer to version related jobs: SDB pages for more information.
This tool is a YaST user interface for the KIWI imaging tool. It is aimed to provide easy way to configure your image configurations, suitable for kiwi. Once you create such configuration with YaST, you can save it and later build an image from it manually with kiwi, or you can run kiwi directly from the YaST module. It is possible to create new configuration from scratch, as well as importing existing one and modify its settings.
YaST Image Creator is part of yast2-product-creator package.
Starting YaST Image Creator
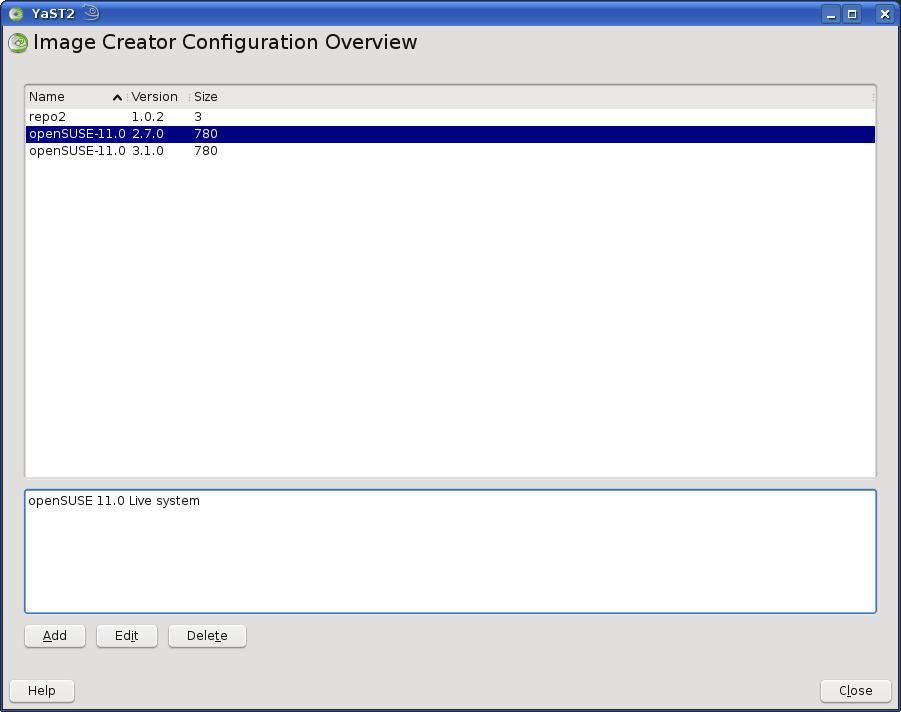
First dialog shows you the list of present image configurations. The "image configuration" is a directory used by kiwi (nothing is added by YaST): it must contain config.xml file and may contain bunch of optional files and directories (see Kiwi manual for a full description of possible settings).
The directory where YaST searches for the configuration subdirectories is defined in the file /etc/sysconfig/product-creator as the value of IMAGE_CONFIGURATIONS variable. By default, it points to /var/lib/YaST2/product-creator/images.
Creating new configuration
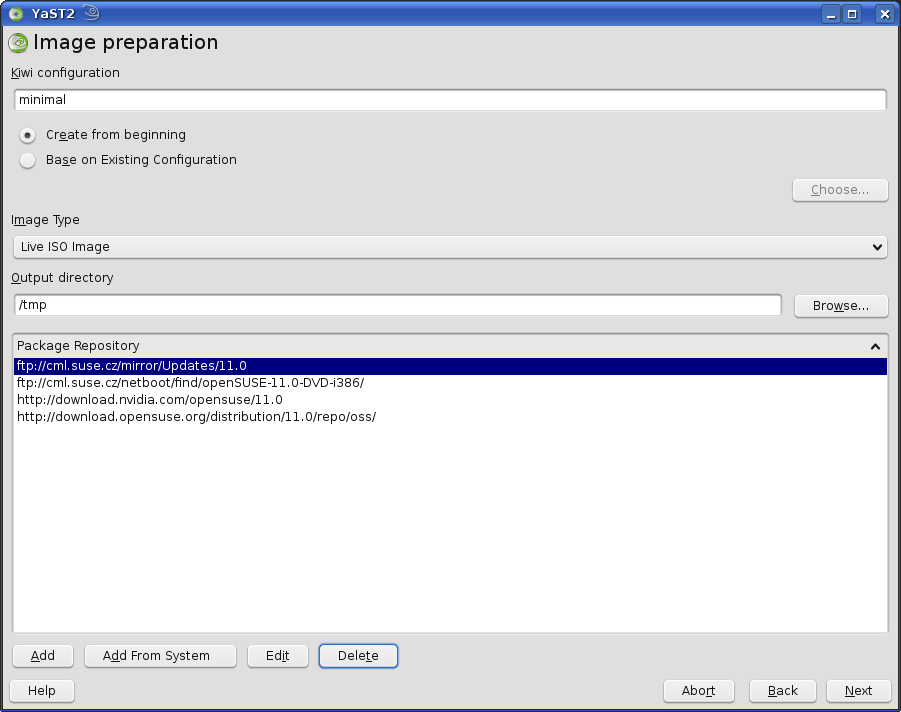
Clicking Add button on the Overview screen starts the adding sequence. First, you must choose some basic settings for the new configuration: it's name, the type of image that is set as primary, the output directory for the resulting image and the repositories containing the packages used for building the image.
By default, the configuration is started from scratch, but you may import any existing kiwi configuration here. "Starting from scratch" works this way: If one of kiwi-config-openSUSE-kde or kiwi-config-openSUSE-gnome packages is present, it is used as a template for a new configuration, otherwise YaST uses the template stored under /usr/share/YaST2/data/product-creator/kiwi_templates).
The list of repositories shown initially is the list your system is currently using. However, you can add any new repository just for this image configuration using the Add button.
Entering kiwi settings
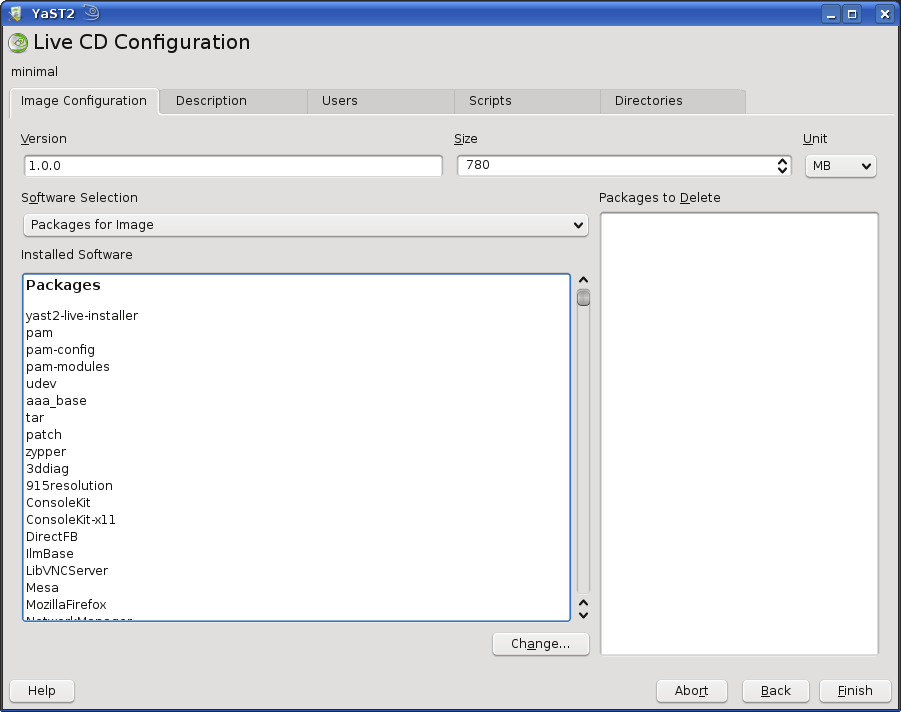
Now, you entered a dialog with some tabs, each for configuration of various settings for new image, that are supported by kiwi. Not every kiwi option can be edited here, however, but hopefully it covers the most important ones.
When the first tab is selected, you can edit the version number, image size, and size unit. But the main part of the dialog is dedicated to the software selection. You can provide the values for various parts of "packages" section of config.xml: by default at least for "image" and "bootstrap" ones, as well as packages intended to be deleted from the image.
To change the list of packages and/or patterns intended for installation (or for ignoring), push the Change button. The usual YaST Package Selector opens, where you can make your selection.
In other tabs of this dialog, more kiwi-related settings can be set. The usage is hopefully self-explanatory.
Building the image
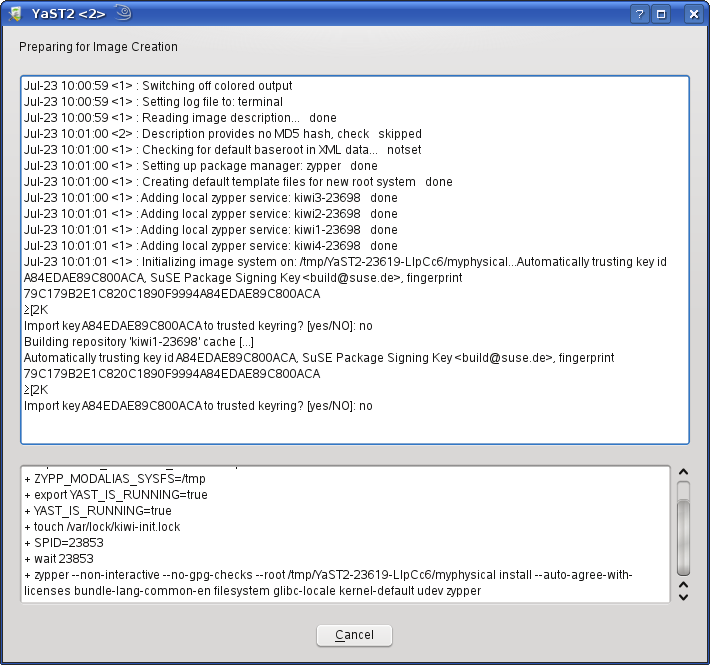
Once you are done, push Finish. YaST asks you if you want to build the image: if you decline, the configuration will be only saved (as a new directory under the one defined by IMAGE_CONFIGURATIONS) and you are returned to the overview screen. Otherwise, the kiwi is started from the YaST and you can see a progress window showing the kiwi log informations.
Once the image is successfully built, it is saved to the output directory selected earlier.


