SDB:FreeNX to existing display
Recommended articles
Related articles
Situation
NX is designed to use an internal VNC server and client to make it possible to connect to a already running X session, normally display :0 (X sessions start to count at 0). In the open-source version FreeNX this feature is still not working like it should. This article describes how to use an external VNC server and client for the same functionality.
Good side
This allows you to have the ease of VNC desktop sharing, the security from SSH (NX uses SSH encryption) and the reaction speed and compression from NX. Ideal for slow and high latency connections.
Bad side
Once you have a local X session running, you won't be able to create a new FreeNX session. But if you have a system running where you don't need the local display to be ran, you don't want to read this article. You just want to have a regular NX connection which you can suspend and re-connect to.
When do you want to connect (with FreeNX) to a local display?:
- Somebody is actualy working at the computer and you use this solution for cases you want to help him from outside a secured network.
- You use GUI software which is automatic loaded during boot and needs to keep running. You want to check up from time to time, form a remote location
Prerequisite
You are already able to log in to your computer using FreeNX. Read FreeNX server if not. This article describes the use of NoMachine's NX client, but should be the same for other client software.
Software
Since we are going to use our own VNC software and tunnel it over the NX connection, we need the proper VNC software installed. On top of the already installed software you need to open FreeNX connections you will need the following packages:
- tightvnc
- x11vnc
Install them with:
Configure x11vnc
We are going to use x11vnc to serve our VNC display. X11vnc can take a lot of options. Both on the command line or in a configuration file. Options are the same for both, only the command line way need the "-" suffix. Eg. -localhost on the command line is the same like localhost in the configuration file.
Configuration file
X11vnc automaticly looks for $HOME/.x11vncrc when invoked. For our configuration it is more easy to create this file and type the required options there. Open your favorite text editor and type the following lines:
display :0
shared
forever
localhost
rfbauth /home/user/.vnc/passwd
- display :0 Sets the display number. :0 being the first one.
- shared Enables the possibility for more than VNC session, not really necessary, but can come in handy.
- forever Means x11vnc keeps running when you disconnect. Default is to allow only 1 connection and after that stop x11vnc.
- localhost x11vnc doesn't listen to any external interfaces. Bind adress is set to 127.0.0.1 and the only allowed host is 127.0.0.1.
- rfbauth /home/user/.vnc/passwd Replace user with your username. This is the path where the VNC password is stored. rfbauth sets the type of password.
Password file
Now we need to create the above mentioned password file. The password just gives you some extra security. The client will use the same file (since it will be run on the same system and as the same user), so you will not have to type the password every time you connect. It just makes sure nobody else can hijack your session. (Eg. other users that have a SSH connection counts as a localhost connection for x11vnc). Run in a shell:
Use the default mentioned location, this is like we set above. Enter the same password twice, only the first 8 characters will be used. So entering longer passwords is useless.
Check the permissions of the file (should be OK by default).
Should give an output like this:
-rw------- 1 user users 8 2010-09-11 16:30 passwd
 ^^
 This should be the only permissions.
If you see more over there, run:
Configure vncviewer
Vncviewer is installed with the "thightvnc" package. We need vncviewer, because NX client somehow fails to connect to a x11vnc. Also executing vncviewer directly, instead of a window manager, does not work. For this we can use a workaround. We create a shell script, which executes vncviewer. We let NX client execute this script (and we tell NX client this script is a window manager) to get the VNC connection working.
Open you favorite text editor and type:
#!/bin/sh
exec vncviewer -passwd /home/user/.vnc/passwd localhost::5900
And save it as /home/user/bin/nxvnc. Make the file executable:
Vncviewer accepts the same file format for the password, so we point it to the same password file as x11vnc: /home/user/.vnc/passwd, with the -passwd option. localhost::5900 points to the x11vnc port number. 5900 resembles display :0.
Running
x11vnc
Issue command:
And x11vnc is loaded with the pre-setting given in the earlier config file. X11vnc is dropped once you close the shell. You are probably using ssh and it's certainly not what you want. You can use screen. Screen is a virtual tty/console inside bash, which can be detached but remains active in the background. Serving x11vnc until you re-attach and kill screen or x11vnc.
This loads x11vnc in screen. You can check the progress. If everything looks OK hit CTRL+A+D to detach. If you want to re-attach again issue: (as the same user!)
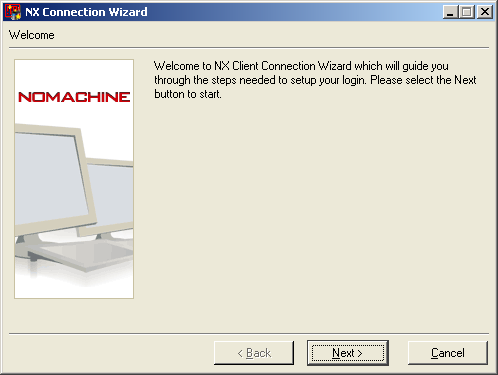
NX client
In this example NoMachine's NX client is used. It is obtainable from NoMachine download page. Although it's free, it is not free and opensource.
|
|
|
|
|
|

|
|
|
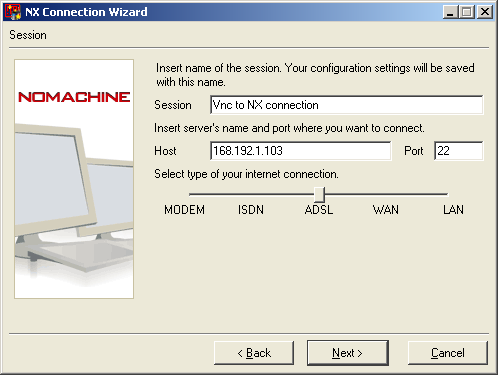
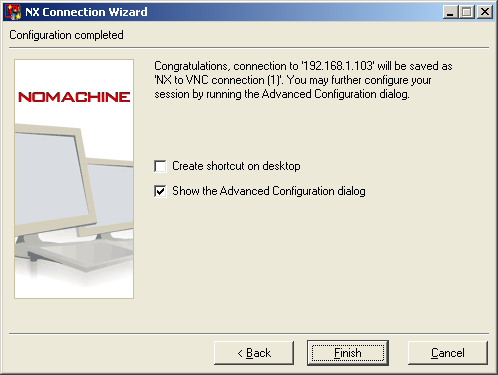
In the next screen you need to select Show Advanced Configuration dialog and click finish.
|
|
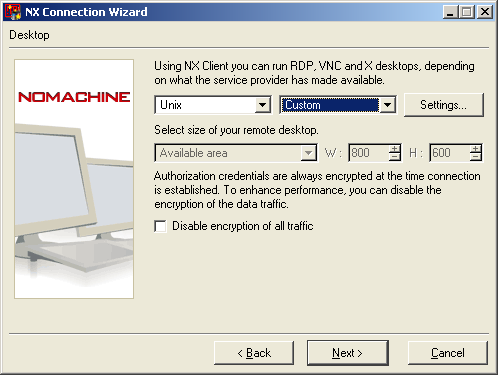
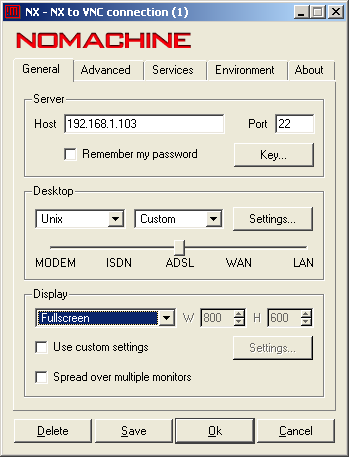
Under dispay select fullscreen. It makes live lots easier, since the remote desktop is not going to adjust it's size to your window. This gives you some more room over big desktops (equal or more resolution then the local one).
|
See also
Related articles
External links
- http://www.nomachine.com NoMachine official website.
- http://freenx.berlios.de FreeNX website.
- http://www.karlrunge.com/x11vnc/ x11vnc website.