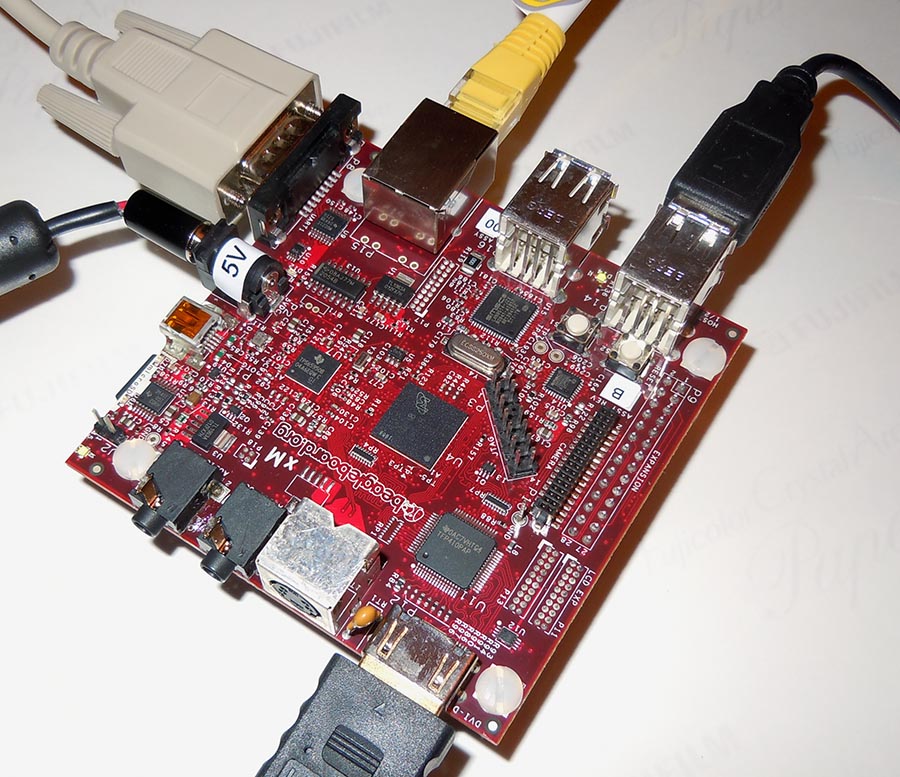
HCL:BeagleBoard-xM
(Redirected from BeagleBoard-xM)
The BeagleBoard-xM is a modified version of the HCL:BeagleBoard which has a faster CPU core (clocked at 1 GHz compared to the 720 MHz of the BeagleBoard), more RAM (512 MB compared to 256 MB), onboard Ethernet jack, and 4 port USB hub.
Technical Data
- TI DM3730 Processor - 1 GHz ARM Cortex-A8 core
- 512 MB LPDDR RAM
- Imagination Technologies PowerVR SGX 2D/3D graphics processor
- DVI-D (HDMI connector chosen for size - maximum resolution is 1400x1050)
- 10/100Mbit/s Ethernet
- Serial port RS-232
- 4x USB ports
- Audio in/out
- S-Video
- 5V Power socket
- mini-USB port
More technical data (tests and configurations) on openSUSE:Beagleboard_(xM).
Writing a disk image to the SD card
- Download the image you want (Leap is stable, Tumbleweed is rolling) from here:
This board is not supported by Tumbleweed anymore since it is not supported anymore in upstream u-boot (from version 2024.10)
Please use openSUSE Leap images instead. Leap-15.6
JeOS image E20 image XFCE image LXQT image GNOME image KDE image X11 image If the direct links above do not work for you, please check the general download directory for the images.
- As root extract the image onto your SD card (replace sdX with the device name of your SD card).
WARNING: all previous data on the SD card will be lost. Check first if the device you have selected is really your SD card!xzcat [image].raw.xz | dd bs=4M of=/dev/sdX iflag=fullblock oflag=direct; sync
- Insert the SD card with the openSUSE image into your board.
- Connect the board to your PC via serial port (optional, but helpful for debugging; USB-TTL serial cable needed).
- Connect the board to your monitor (via DVI/HDMI, optional).
- Power on the board.
- Walk through the first boot steps.
- Ethernet is configured to request an IP via DHCP, check your DHCP server for the board IP if used.
- Have a lot of fun...
Default login is root:linux, works on serial console, via ssh, GUI.
Known Issues
- DVI output does not work on some board revisions
Helpful hints
- In order to enable sound:
- Start "Audio Mixer" from the XFCE "Settings Manager" (alternatively, start "alsamixer" in a terminal), unmute sound and check/unmute the following switches:
- "Headset"
- "HeadsetL Mixer AudioL1"
- "HeadsetL Mixer AudioL2"
- "HeadsetL Mixer Voice"
- "HeadsetR Mixer AudioR1"
- "HeadsetR Mixer AudioR2"
- "HeadsetR Mixer Voice"
- Start "Audio Mixer" from the XFCE "Settings Manager" (alternatively, start "alsamixer" in a terminal), unmute sound and check/unmute the following switches:
