Archive:Change from 12.1 to Tumbleweed
Tumbleweed changes for 12.1
Tumbleweed will require its current users to make one manual change to the repositories upon the 12.1 release. This is also relevant for NEW tumbleweed users: you will need to replace the version-specific repositories with the generic 'current' repository.
What?!?
Besides the Tumbleweed repository, users are required to have the latest stable openSUSE repositories enabled, currently for most users set at openSUSE 11.4 or 12.1. See below for an example output of the command
zypper lr
Which shows the current repositories enabled on this system:
Nr| Alias                                   | Name                                           | Enabled | Refresh
1 | Tumbleweed                              | Tumbleweed                                     | Yes     | No
2 | packman                                 | packman                                        | Yes     | No
3 | repo-11.4-non-oss                       | openSUSE-11.4 Non-OSS                          | Yes     | No
4 | repo-11.4-oss                           | openSUSE-11.4 OSS                              | Yes     | No
5 | repo-11.4-update                        | openSUSE-11.4 Updates                          | Yes     | No
With the 12.1 release and every subsequent release, these will have to change. To not force Tumbleweed users to change this by hand on each release the openSUSE sysadmins have created a 'virtual' repository which is always the latest stable release.
Changing
The easiest way to get the repositories replaced is by removing the current repositories and adding the new ones. In the repository layout above, you would need to remove the repositories 3, 4 and 5. Then add the default stable repositories. We have created a one-click-install to add the Tumbleweed and Stable repositories which can help you, use the link below.
Command Line
From the command line this would be as simple as: (3,4,5 are the numbers of the repositories. Please check with your output of zypper lr)
sudo zypper rr 3 4 5
Then add the new repositories with the one-click install or by hand as follows:
sudo zypper ar \
http://download.opensuse.org/distribution/openSUSE-current/repo/oss/ \
'openSUSE Current OSS'

sudo zypper ar \
http://download.opensuse.org/distribution/openSUSE-current/repo/non-oss/ \
'openSUSE Current non-OSS'

sudo zypper ar \
http://download.opensuse.org/update/openSUSE-current/ \
'openSUSE Current OSS updates'

sudo zypper ar \
http://download.opensuse.org/update/openSUSE-non-oss-current/ \
'openSUSE Current non-OSS updates'
If you prefer repositories to automatically refresh on any zypper action you execute, add --refresh to each of the above commands like this:
sudo zypper ar --refresh \
http://download.opensuse.org/update/openSUSE-current/ \
'openSUSE Current updates'

sudo zypper ar --refresh \
http://download.opensuse.org/update/openSUSE-non-oss-current/ \
'openSUSE Current non-OSS updates'
Graphically
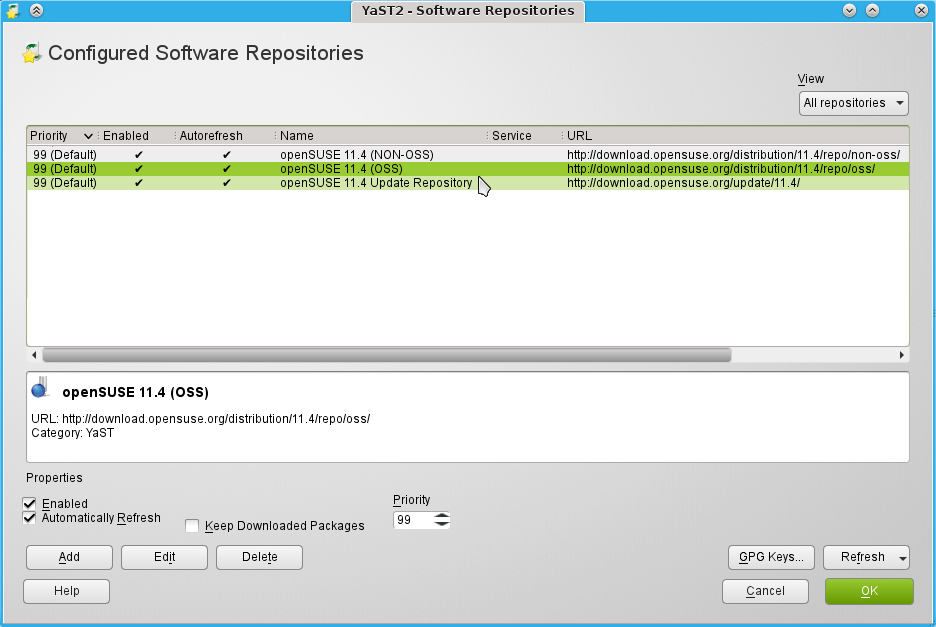
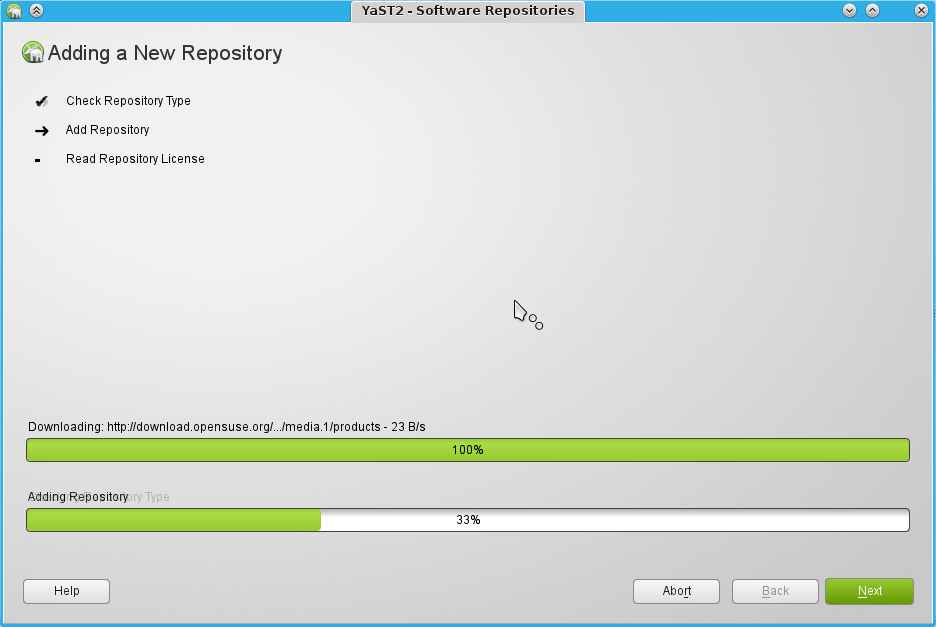
You can also do these steps from the GUI interface of YaST.
- Start YaST and click Software repositories in the Software category.
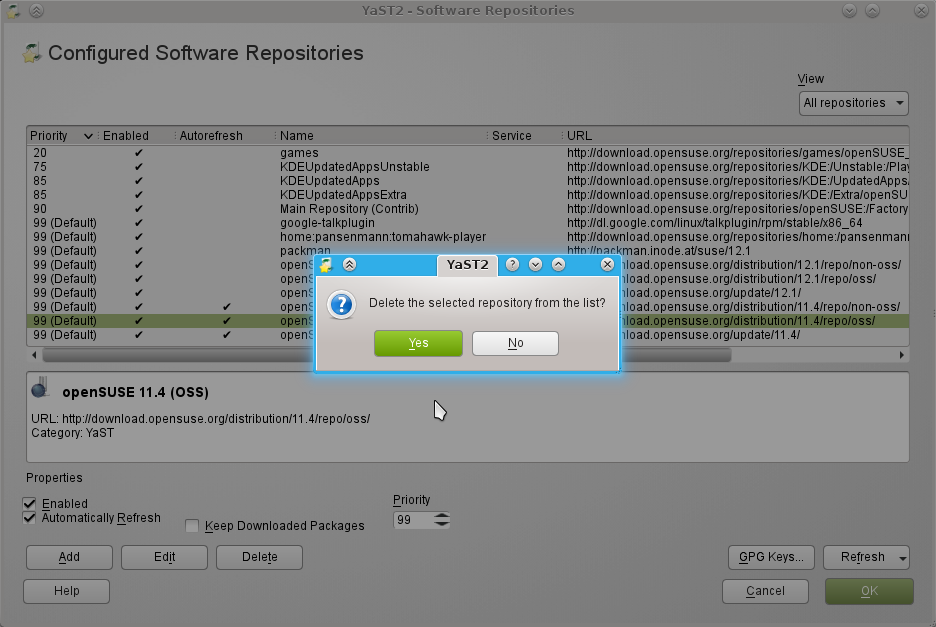
- You will see a list of the repositories. Click 11.4 OSS, non-OSS and Updates repos one by one and choose 'Delete'.
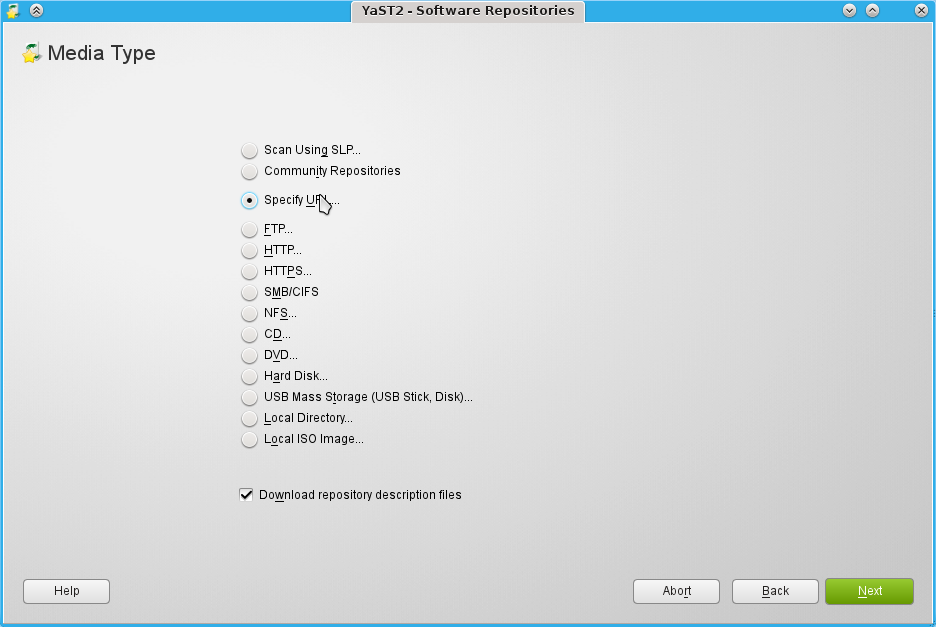
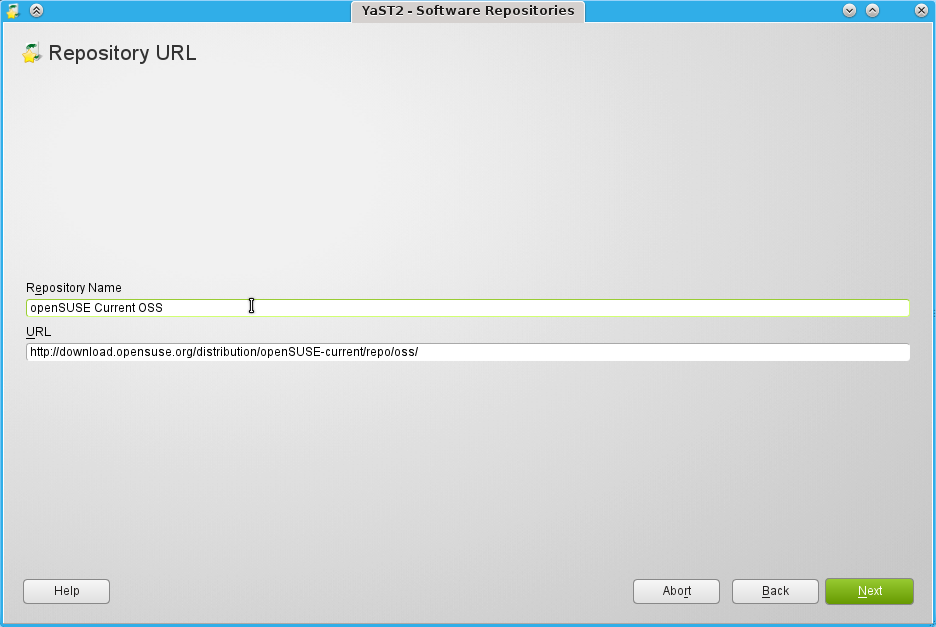
- Once done, click 'Add' and add the details for each of the following repositories:
Title 'openSUSE Current OSS'
Repo 'http://download.opensuse.org/distribution/openSUSE-current/repo/oss/'

Title 'openSUSE Current non-OSS'
Repo 'http://download.opensuse.org/distribution/openSUSE-current/repo/non-oss/'

Title 'openSUSE Current OSS updates'
Repo 'http://download.opensuse.org/update/openSUSE-current/'

Title 'openSUSE Current non-OSS updates'
Repo 'http://download.opensuse.org/update/openSUSE-non-oss-current/'
