SDB:KIWI-LTSP configuration
KIWI-LTSP tools
One of the unique part about LTSP5 implementation on openSUSE is the kiwi-ltsp-setup command. The command provides every feature required to configure all the required services and build various types of images. To know what can kiwi-ltsp-setup do, run:
kiwi-ltsp-setup -h
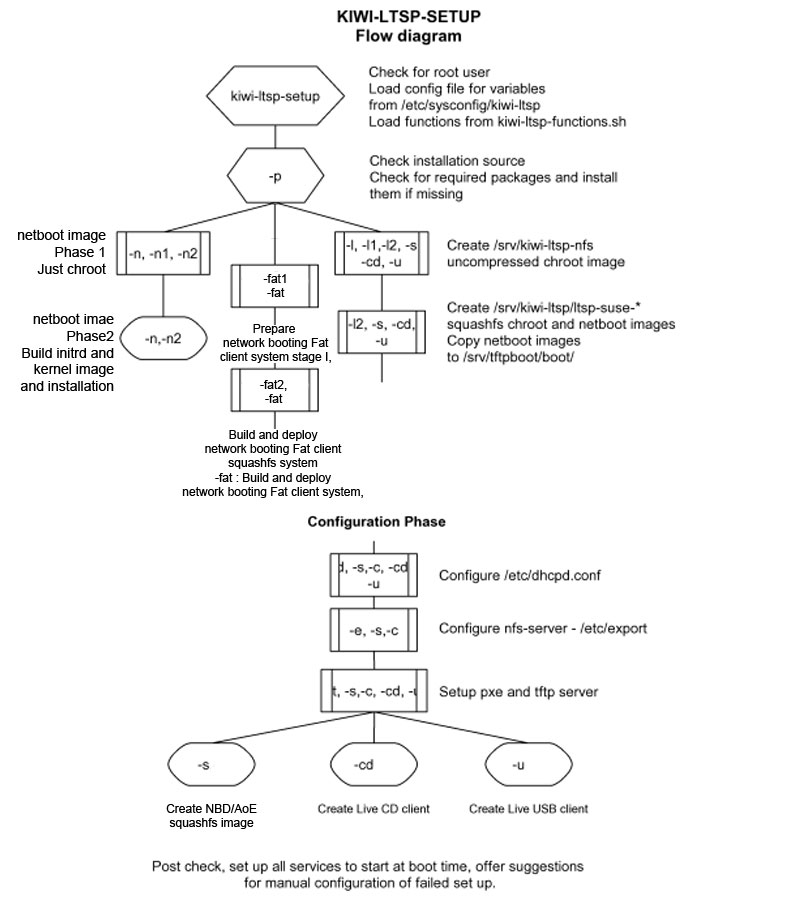
Here is a diagram that walks through the various stages of the entire process.
Configuration
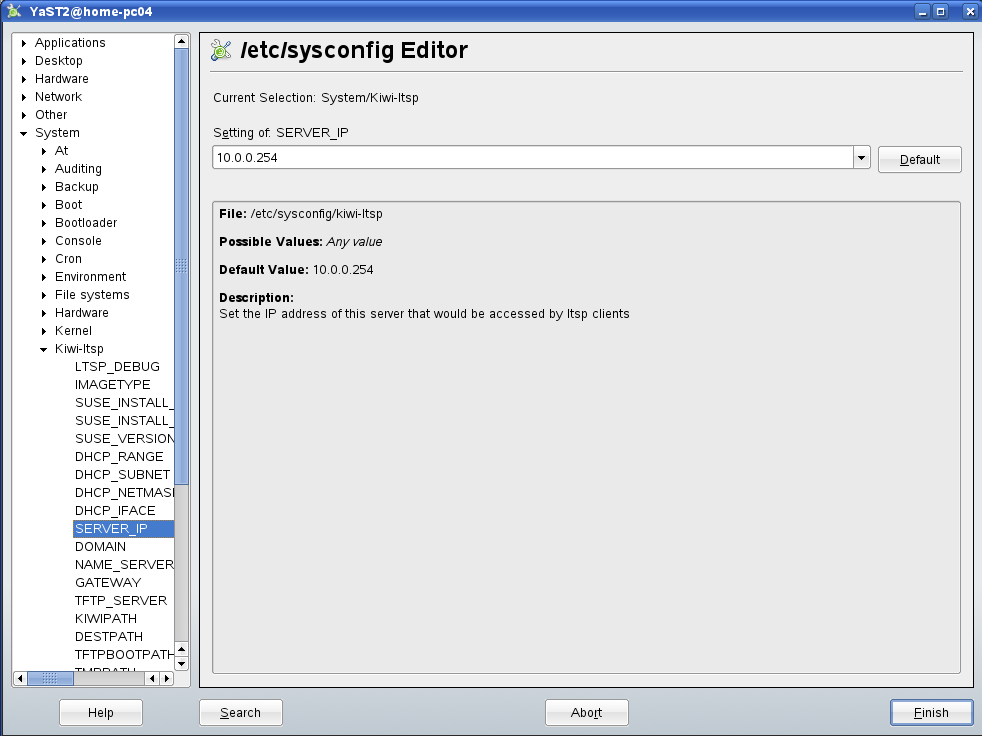
Launch YaST -> /etc/sysconfig Editor -> System -> Kiwi-ltsp
- Verify tag SUSE_VERSION is set to the installed openSUSE version. This also changes "/mnt/10.3" mentioned next.
- Fill in the correct installation path, ideally a path where the DVD media/iso is mounted for example "/mnt/10.3". Or a network installation path such as "http://download.opensuse.org/distribution/10.3/repo/oss/"
- Fill in network configuration information like server IP address, gateway and DNS. Make sure that the network interface used is specified as "Internal Zone" in firewall or disable firewall.
- Select the correct DHCP interface if you have more than one on the server.
- Leave the things you are not sure as default including all the paths mentioned. Once you are done you are ready to create the image.
Run the following command as root configure everything if using pre-built image:
kiwi-ltsp-setup -c
Run the following command as root if you wish to build your own images and configure everything:
kiwi-ltsp-setup -s (Only for developers)
The above command will take quite some time depending on your server so grab a cup of coffee. All the required services such as NFS, NBD, TFTP and DHCP will be configured and enabled. Make a backup of your configuration if you wish to preserve your configuration or use one of the other switches available with kiwi-ltsp-setup command.
It's time to boot the first client. which should leave you at the LDM (LTSP display manager) screen where you should be able to login with users created on the server.
To power down the client, just logoff from the session and select shutdown from LDM.
Local device support
All the local devices that LTSP provides support for are available:
Harddisk/USB/CDROM devices
Local devices are auto-mounted. The mount icons should show up on users' desktop.
Sound support
Sound can be played on the thin clients without any manual configuration.
Printers
Add the following lines to your LTSP client's entry in /srv/tftpboot/KIWI/lts.conf: (assuming your printer is USB)
  PRINTER_0_TYPE = U
  PRINTER_0_DEVICE = /dev/usb/lp0
Once you bring up your client, you can point your server's cups configuration file to the printer just like it was a HP JetDirect printer.
/etc/cups/printers.conf: (This is an example using a Brother HL-2040)
  <Printer HL2040>
     Info HL-2040
     Location on ws024
     DeviceURI socket://ws024.localdomain:9100 --> IP address works okay here too
     State Idle
     Accepting Yes
     JobSheets none none
     QuotaPeriod 0
     PageLimit 0
     KLimit 0
  </Printer>
Everything else works just like any other cups printer, make sure you have the right drivers, ppd, etc., and you should be working great.
When using parallel printer also add the following in lts.conf to load the required kernel module:
MODULE_01=lp

